Two-Point Measurement System
Two-Point Measurement System
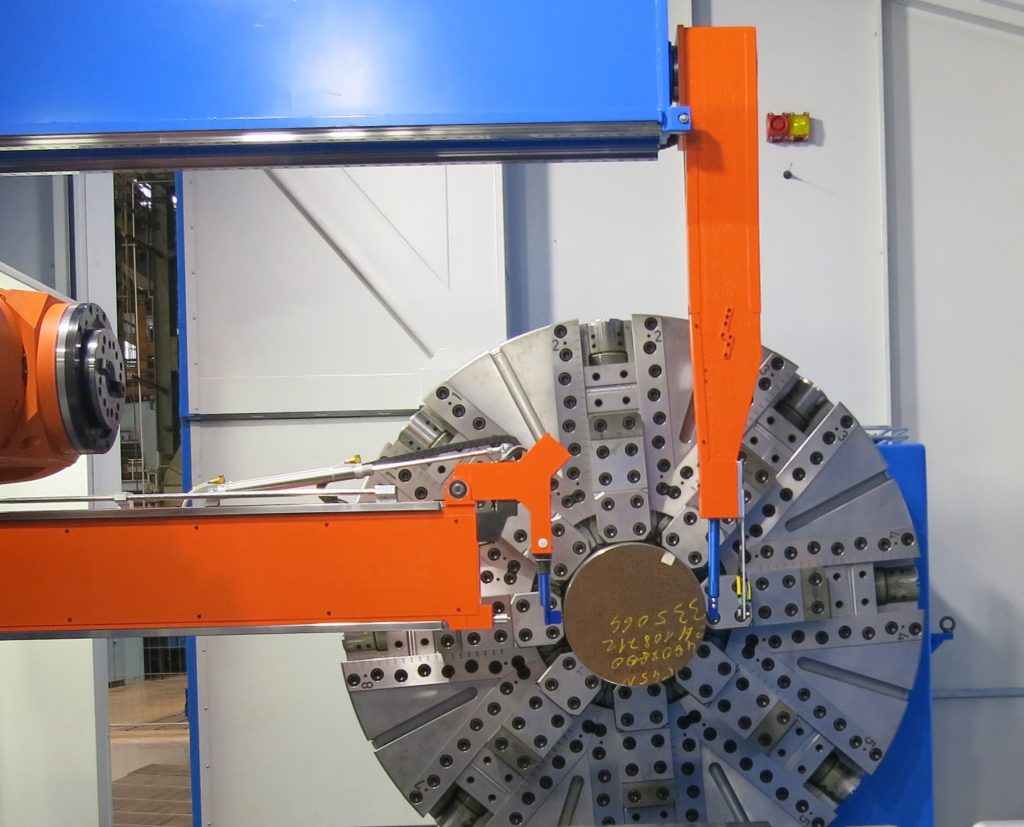
GEORG offers an integrated two-point measurement system for horizontal machining centers of its ultraturn MC series. These machines process workpieces weighing 10 tons and more and with diameters of 1,000 mm upwards.

GEORG offers an integrated two-point measurement system for horizontal machining centers of its ultraturn MC series. These machines process workpieces weighing 10 tons and more and with diameters of 1,000 mm upwards.
With the two-point measurement, GEORG has for the first time integrated quality control directly into the manufacturing process: ultraturn MC is a series of machining centers for large turned parts in which the diameters of the workpiece are not measured with just one probe, as has been common practice so far. Instead, GEORG uses a travelling two-point measuring system attached to the frame, which automatically measures the workpieces directly in the machine with two opposing probes. This technique ensures high precision and high reproducibility.
ultraturn MC machines are used among other things for the complete machining of turbine and generator rotors, as well as crankshafts.
While a measuring team would need several hours to manually measure the diameters or the axial runout of workpieces on the machine, the measurement with the integrated two-point system is completed after just a few minutes. By integrating this function into the machine, GEORG is a worldwide pioneer.
The two-point measuring system is also applicable to the company's classic lathe series for roll and turbine rotor machining. Furthermore, the system can be retrofitted to existing lathes made by GEORG or other manufacturers. Just recently, GEORG has successfully retrofitted a two-point measuring system to a lathe in operation for several years at Siemens in Mülheim/Germany.
Jan Ebener, sales manager for machine tools at GEORG, explains the economic benefits of the integrated measurement: "Experience gained from the operation of the first systems using our two-point measurement technique shows that not only the dimensional precision of the workpieces is increased but that also the overall machining times are markedly reduced. This is because the new measurement technique drastically reduces nonproductive times."


