


Effective finishing work: Medical Manufacturing
The Shop Operations column offers still more tips for effective finishing in the October 2014 issue of Cutting Tool Engineering magazine.
Continuing the theme of my previous two columns, presented here are additional tips and tricks for effectively performing finish work.
■ If you have a bunch of parts to be sanded at a particular angle, you can mark witness lines on the table of the belt sander to guide your roughing work. This visual cue keeps you from drifting too far from your intended angle. You can clamp a guide to the table, but that destroys one spot on the bench.
■ Use a thin masking plate when you are working with intersecting linear finish lines. This produces a crisp demarcation line between the two intersecting finishes. Be sure to use a plate of the same material to avoid contamination.
Courtesy of All images: T. Lipton
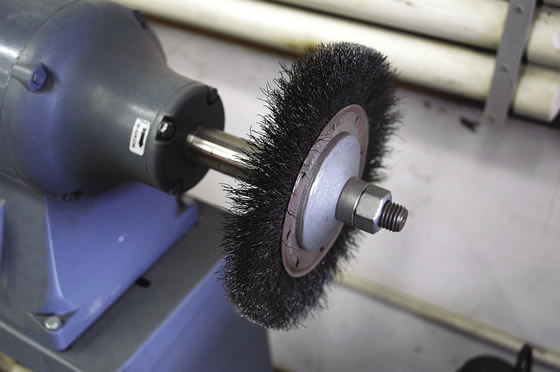
One of the guiltiest parties in the shop with regard to contamination is the dirty little wire brush on a bench grinder or buffer.
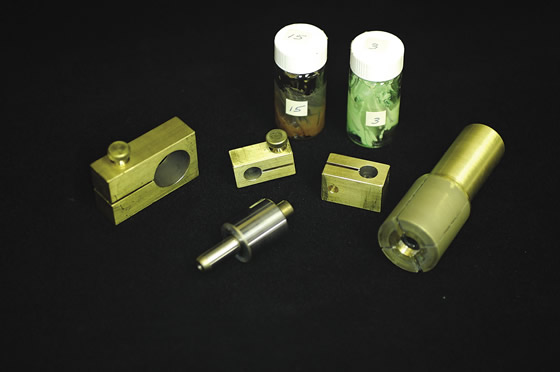
These brass laps were applied to a bearing bore (far right) and the OD of a gage (front, center). The lapping compound is diamond paste. The laps are applied at 100 to 300 rpm and stroked axially over the part length to produce a 30° to 45° crosshatch pattern.
■ Mark the materials you use abrasives on and segregate them from the other discs. I have seen some beautiful jobs ruined by a contaminated sanding disc or even a dirty wire brush. When in doubt, use a new disc. One of the guiltiest parties in the shop with regard to contamination is the dirty little wire brush on the bench grinder or buffer. It spreads its corrosive disease on everything it touches. You may have the best intentions, but this wheel is almost always contaminated with steel, rust and grease.
■ Cylindrical laps for OD and ID work are easy to make and produce fantastic results. The results are controllable down to microinches if necessary. The laps need to be made accurately, but, with a little effort, results that cannot be attained any other way are possible.
■ Dress a surface grinder wheel at a slight angle for peripheral roughing work. The edge will break down fast, exposing sharp grains for fast stock removal. Redress the wheel for fine finish work. For roughing, use an aggressive DOC and step-over as much as the wheel will tolerate without complaint. The abrasive grains must break down to continue the cutting action. If they are babied and allowed to glaze over, all your effort just turns into heat. Abrasives should be thought of as little cutting tools, much like those applied on a lathe or milling machine. Properly applied, the chips from abrasive tools look similar to those from cutting tools under high magnification.
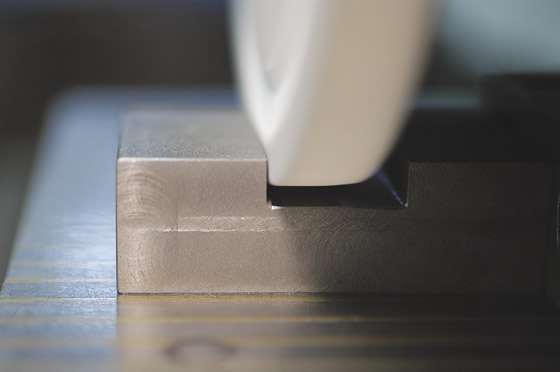
Although not an efficient material-removal method, side-wheel grinding is sometimes necessary.
■ A similar roughing trick works for side-wheel grinding, which even on a good day is a bit of a pain. Side-wheel grinding is not an efficient material-removal method, but it is necessary at times because of setup issues or part geometry. Dress the side of a wheel as you normally would, then stop the grinder and loosen the nut. Rotate the wheel slightly in relation to the spindle, tighten it all back up and perform your side-wheel roughing. The wheel will run out a little from where it was dressed and only cut on one part of the periphery. This small edge breaks down quickly and continues to cut while needing frequent redressing during roughing. Redress the wheel and don’t rotate it when finishing. This trick can extend the time between dressings, making a difficult grinding job go faster.
■ Glass-bead blasting can deburr and impart finishes that are difficult to produce any other way. Anything from a fine satin finish to a rough surface to add grip or traction to a part can be generated with a few different grit sizes and by varying the blasting pressures. Tool marks can be blended or removed with fine-mesh glass beads.
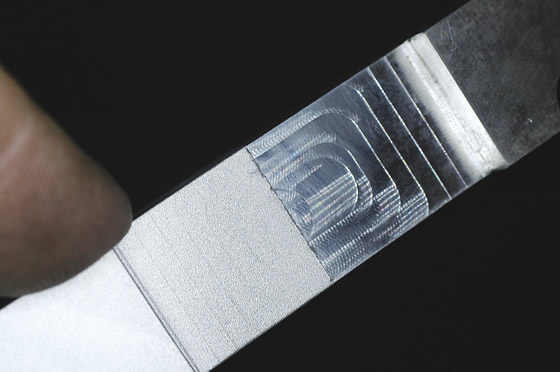
Fine-mesh glass beads are suitable for blending or removing tool marks.
■ Beware of blasting large sheets and surfaces. Using a bead blaster is similar to hammering with a vast supply of ball peen hammers and will remove material if you’re not careful. Also, the bead or sand blaster is an often-overlooked source of material cross contamination. If you have been cleaning engine parts, for example, you’ll need to replace the media when blasting medical parts.
■ Ever had a hard time holding onto small parts in a bead blaster? Ever drop one in the bottom of the blaster and have to fish it out? Use a tea strainer to keep the part under the blast stream, but be sure the mesh opening is larger than the beads or it will take a long time to do the job.
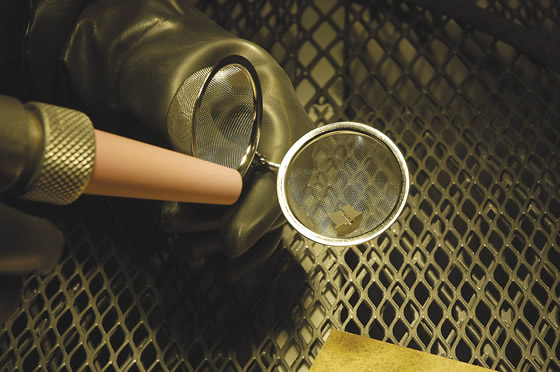
When bead blasting a difficult-to-hold part, a tea strainer keeps the part under the blast stream. A spring closes and holds the two halves of the strainer together during use.
■ There is a use for all those cheap, nicely hemmed carpet samples flooring stores offer! They make great throwaway portable part protectors and backup surfaces for dual-action detailing. When a sample gets loaded with dust, toss it and start over with a fresh one.
■ For fine deburring, try a surgical scalpel blade. The sterile stainless steel blades seem to be considerably sharper than carbon steel ones. If you don’t like it for deburring, you can always do a little amateur shop surgery with it. CTE
About the Author: Tom Lipton is a career metalworker who has worked at various job shops that produce parts for the consumer product development, laboratory equipment, medical services and custom machinery design industries. He has received six U.S. patents and lives in Alamo, Calif. For more information, visit his blog at oxtool.blogspot.com and video channel at www.youtube.com/user/oxtoolco. Lipton’s column is adapted from information in his book “Metalworking Sink or Swim: Tips and Tricks for Machinists, Welders, and Fabricators,” published by Industrial Press Inc., South Norwalk, Conn. The publisher can be reached by calling (888) 528-7852 or visiting www.industrialpress.com. By indicating the code CTE-2014 when ordering, CTE readers will receive a 20 percent discount off the book’s list price of $44.95.
Glossary terms in this article
QR codes and videos from this issue
Print QR codes, video callouts, and in-magazine links for this article now point to the CTE video hub in the HTML version.
Related


Subscribers can use MFGAxis notes, saves and discussion tools with their innoNET account.