


Layout work tips and tricks
All the lines, arcs and angles we mark on our forming and fabrication work to guide us fall under the heading of layout work. Sometimes work is produced directly from the layout and other times it's used as a reference so we don't make a mistake.
All the lines, arcs and angles we mark on our forming and fabrication work to guide us fall under the heading of layout work. Sometimes work is produced directly from the layout and other times it’s used as a reference so we don’t make a mistake.
All images courtesy T. Lipton
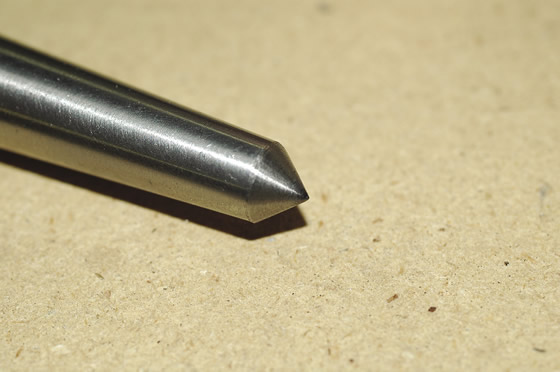
Grind the tip of a center punch to a 90° included angle.
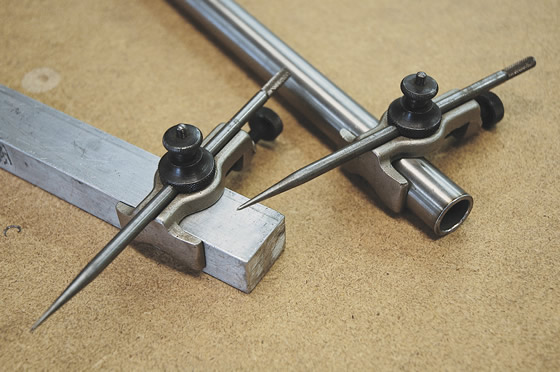
For larger fabrications and arc layout, trammel points that clamp to common bar stock sizes are excellent options.
It’s tricky deciding how much layout work needs to happen for any particular job. Some jobs don’t require any, whereas others are so complicated that a large amount is necessary to avoid errors. The following are some tips when a job requires layout.
■ When center punching, grind the tip of your center punch to a 90° included angle. This angle is extremely durable. Use a soft metal hammer like copper or soft steel to strike the center punch. This keeps the hammer from accidentally slipping off the head of the center and spoiling the work when you give the punch a solid blast. Hard steel on hard steel is like a banana peel on an icy sidewalk. Keep the tip nice and crisp so you can feel it click into the scribe lines.
■ You will need at least two sizes of dividers. A set with a 6″ radius ability will carry you a long way. I like having a set in which I can interchange a pencil with one of the legs. This is great for template work.
■ For larger fabrications and arc layout, trammel points that clamp to common bar stock sizes are excellent options. Trammel points that can fit a range of bar sizes are superior. The eccentric-point type also holds a wooden pencil for paper pattern layout. Fine adjustments are easily made by rotating the eccentric point.
■ Deep scribe lines can be a failure point when forming. Use a superfine point marker or pencil if the part will be subject to high stress. High-strength materials and tight-radius bends fail along these little stress risers.
■ Forming heavy plate sometimes requires the edges to be softened or sanded to eliminate potential crack-starting flaws. For example, it’s a good idea to sand plate edges to remove the ridges left from flame cutting. In addition, slightly round the corners on a plate surface. It’s just good practice on flame- or plasma-cut edges to always skim over them with a sander or grinder to eliminate potential crack-formation points and to remove the hard scale layer that can damage tooling for forming.
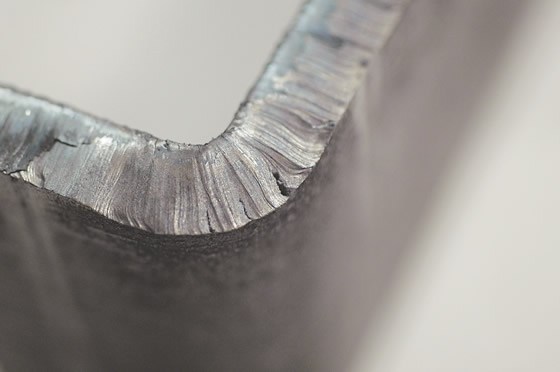
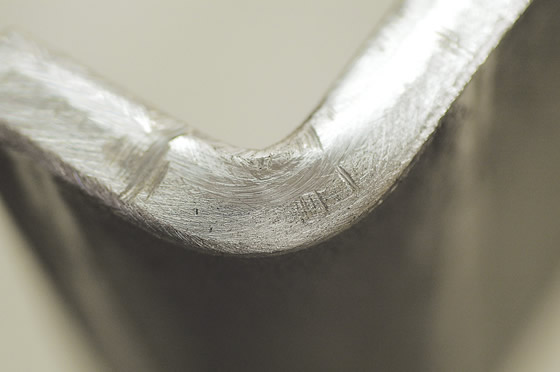
Skim over flame- or plasma-cut edges with a sander or grinder to eliminate potential crack-formation points.
■ Flip the layout for cutting on a vertical bandsaw and don’t forget about the limited throat. You can flip your layout to the opposite side to keep cutting with the stock on the outside of the machine.
■ A simple centering bar speeds up the all-too-common task of finding the centerline of strips and bars. You can use a transfer punch or a scriber made from a broken ¼” carbide endmill to scribe a line. I made mine with little rollers so I can easily slide it down the length. The rollers are spaced equidistant from the center of whatever width bar is used as long as both rollers are touching.
■ Even for a small amount of layout work, a combination square is mandatory. If you have one of those cast aluminum combination squares, do yourself a favor and throw it away. Better yet, break it into pieces so nobody pulls it out of the trash can, where it belongs. You can judge peoples’ commitment to their profession by the tools they use. If you don’t already have one, get a professional forged and hardened combination square set with an additional long blade. These tools last so long that your grandkids will be using them long after you’re gone. Normally, I use the long blades as straight edges or to set distances off an edge. You have to be careful and have a fine touch when using a long blade to check squareness. I like to have several squares when doing repetitive layouts. All I need to remember is the small square’s small dimension, the medium square’s middle dimension and the big square’s big dimension.
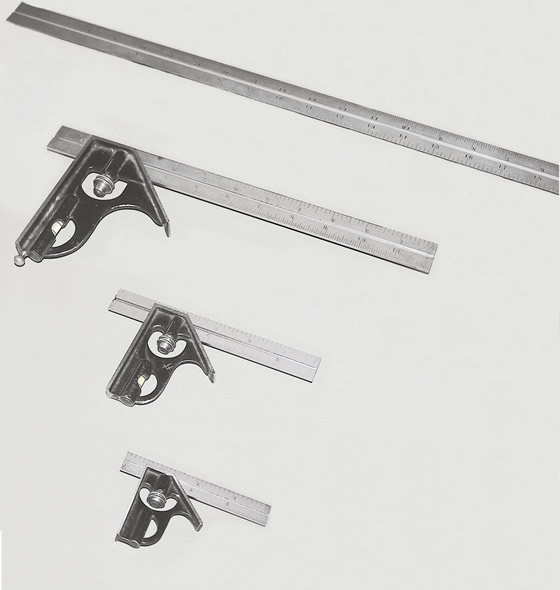
Get a professional forged and hardened combination square set with an additional long blade to ensure long tool life.
■ Use a centering head to transfer a line 90° around a corner. If you’re placing a cross-member in relation to your layout mark, be sure to indicate on which side of the line the part sits. I mark the correct side with a big X. There is not much worse than having to cut out a fully welded cross-member that’s in the wrong place. CTE
About the Author: Tom Lipton is a career metalworker who has worked at various job shops that produce parts for the consumer product development, laboratory equipment, medical services and custom machinery design industries. He has received six U.S. patents and lives in Alamo, Calif. For more information, visit his blog at oxtool.blogspot.com and video channel at www.youtube.com/user/oxtoolco. Lipton’s column is adapted from information in his book “Metalworking Sink or Swim: Tips and Tricks for Machinists, Welders, and Fabricators,” published by Industrial Press Inc., South Norwalk, Conn. The publisher can be reached by calling (888) 528-7852 or visiting www.industrialpress.com. By indicating the code CTE-2014 when ordering, CTE readers will receive a 20 percent discount off the book’s list price of $44.95.
Glossary terms in this article
QR codes and videos from this issue
Print QR codes, video callouts, and in-magazine links for this article now point to the CTE video hub in the HTML version.
Related



Subscribers can use MFGAxis notes, saves and discussion tools with their innoNET account.