Flexible, accurate edge inspection
Flexible, accurate edge inspection
When choosing an edge inspection and burr detection system, users generally try to balance accuracy and speed. The EdgeInspect system from Novacam Technologies Inc., however, acquires and analyzes edge properties and detects burrs with micrometer precision and at speeds previously unimaginable.
When choosing an edge inspection and burr detection system, users generally try to balance accuracy and speed. The EdgeInspect system from Novacam Technologies Inc., however, acquires and analyzes edge properties and detects burrs with micrometer precision and at speeds previously unimaginable.
Based on low-coherence interferometry technology, EdgeInspect produces a high-precision, 3D-topographical surface rendering at the rate of 30,000 points per second or higher. The resulting 3D-surface point cloud gives micron-precision geometry of edges, which can be analyzed according to geometric dimensioning and tolerancing criteria set by the user.
The scanner covers a surface area as large as what can be reached by robotic arms. It can be angled to suit any type of edge, such as straight inside and outside edges and edges found on round holes and cross-holes. The process enables characterization of any number of edge specifications, including burr detection, edge-break requirements and angle measurements, as well as matching edge radii and checking tolerances after burr removal—all with 1µm precision.

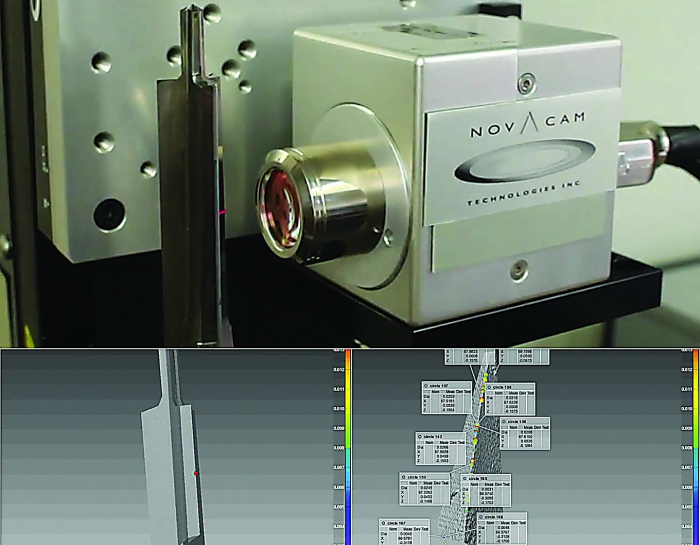
EdgeInspect quickly scans an edge of a drill for accurate analysis. Image courtesy of Novacam Technologies.
Depending on the application, the scanner can be mounted on a stage, robotic-arm tool exchanger or rotating arm that can enter deep cavities. The part itself can also be mounted on a rotating stage.
Interferometry has been around for more than 100 years, and other systems are capable of micron-level 3D measurements, said Novacam Technologies Marketing Director Radka Losert. EdgeInspect incorporates novel advancements, however.
"It uses optical fibers, making the system modular, and is suitable for applications in all kinds of automated production environments as well as lab settings," she said. Its flexibility provides the latitude needed to inspect almost any geometry in a single scanning sequence, with "no need for composite imagery."
And then there's the differentiator of speed. Scanning sequences can be automated and replicated, and at a rate of up to 30,000 points per second. "A part as large as your hand can be completely scanned and rendered within a few minutes," Losert said.
EdgeInspect, therefore, lends itself to high-throughput applications. The data collected by its optical scanner passes through an optical fiber, which can be hundreds of meters long, to the profilometer. The 3D point cloud is fed in real time to the accompanying metrology software on a PC. Several data-viewing options are available, including a 3D model, a comparison-with-CAD model and deviation maps, as well as exportable reports.
For more information about Novacam Technologies Inc., Pointe-Claire, Canada, visit www.novacam.com or call (866) 694-4002.


