A Simple Diagnosis
A Simple Diagnosis
It's not the most glamorous piece of equipment by any means, but the ball bar is a diagnostic tool used, in some form, to benchmark the performance of virtually every machine tool sold, according to Harold Schoch, vice president of technology and sales for Konecranes, Erlanger, Ky.
It's not the most glamorous piece of equipment by any means, but the ball bar is a diagnostic tool used, in some form, to benchmark the performance of virtually every machine tool sold, according to Harold Schoch, vice president of technology and sales for Konecranes, Erlanger, Ky.
"The telescoping ball bar is probably the best thing to happen to a machine tool maintenance guy in all of history," he said. "It's not the answer to every problem, but it's a really nice roadmap to taking some corrective action in a timely manner. It's the best tool you have for establishing trending in machine tool geometries and performance, and it lets you focus all your time and problem-solving efforts on the biggest contributors to machining errors or inefficiencies."


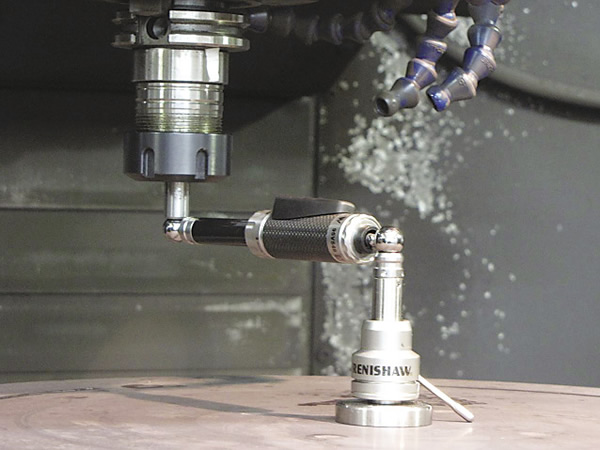
A Renishaw QC20-W wireless ballbar performs a test on a vertical machining center. Image courtesy Renishaw.

Operationally, a ball bar is little more than "an indicator on a stick," said Michael Wilm, business manager of calibration products for manufacturer Renishaw Inc., Hoffman Estates, Ill. Renishaw manufactures telescoping ball bars, which means that as a machine moves the "stick" in a circle around a central point in the machine—typically a machining axis—a transducer on the end moves in and out in a linear motion, acting as a plunger-type dial indicator. The ball bar is then able to monitor the radial deviation. The data can be used to determine machine errors —everything from geometric inconsistencies to servo performance to axial delays.
A telescoping ball bar can also be a valuable part of a shop's regular routine, Wilm noted. "You put it on a machine and within a matter of minutes you can get a picture of the machine's performance and how it relates to the last time you measured it," he said. "In one circle clockwise and one circle counterclockwise, we can determine the linear positioning differential between two axes. It's a quick, efficient tool for finding errors, and once you identify the errors, you can get the proper tool to address it."
But while a telescoping ball bar may be quick and easy to operate, the level of accuracy pales in comparison to the even-more-rudimentary rigid ball bar, noted Eugene Gleason, president of Los Angeles-based industrial ball manufacturer Bal-tec.
"We use a telescoping ball bar from Renishaw to certify our machines every 6 months," he said, "because the [0.015" to 0.050"] tolerance is fine for those purposes. But, especially on large equipment, there's just no comparison when it comes to telescoping vs. rigid."
A rigid ball bar is based on trigonometric measurements, which can be accurate down to ±0.00005", according to Gleason. The ball bars are made of Invar, known for expanding and contracting less than a 10th as much as steel, and the most common length (2.3m or 7.54') is part of a number of ANSI standards for measurement.


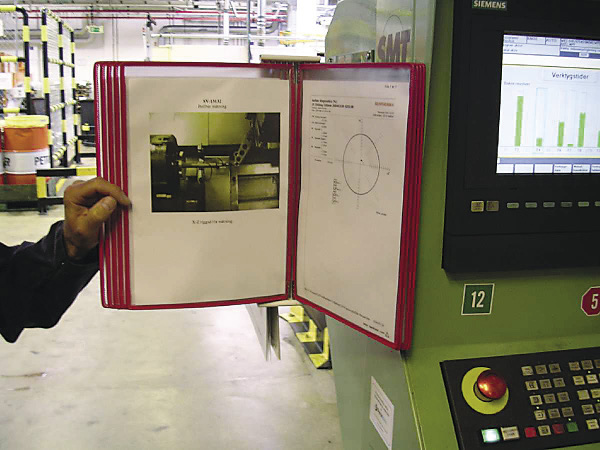
One manufacturer records the results of ball-bar tests on history charts. Doing this allows the company to predict when maintenance tasks will be required, rather than having to 'put out fires' when machine performance becomes so bad that scrap is produced. Image courtesy Renishaw.

"You have a perfect ball that gives you a perfect dimension in 3-dimensional space, a second ball, and a certain distance between it," Gleason explained. "You can then use trigonometry to measure machines of almost unlimited size, and the uncertainty is almost zero."
Rigid ball bars from Bal-tec start at under $150; a basic telescoping ball bar system from Renishaw costs around $10,000. However, while a telescoping ball bar can take measurements virtually effortlessly, a rigid ball bar requires extensive knowledge, training and experience to use. The telescoping ball bar itself is battery-powered and wirelessly communicates with the diagnostic software, which can run on any Windows-based computer.
Based on the utility and range of applications, whether rigid or telescoping, there's a good chance a ball bar has played a role in every machinist's success at some point in the machine tool's life.

Avoid Lubricious Lapses
Machine tools have changed significantly over the years, but the need to maintain their mechanical components hasn't, according to Doug Hilker, national service manager at machine tool builder Hurco North America, Indianapolis.
"The nuts and bolts of the machine still need to be maintained in order to let the advanced controls and automation functions work properly," he said. For example, all machine tools—new and old alike—have mechanical parts that require lubrication.
"It sounds so simple, but failure to perform proper analysis on lubricants and lubrication systems has a tremendous impact," said Harold Schoch of Konecranes. "If customers would just maintain their lubrication systems properly and replace the metering units at recommended intervals, the vast majority of catastrophic failures to ballscrews, weight systems and spindles would be mitigated."
Not only should the lubricant and lubrication systems be regularly maintained, Hilker said, they should actually be used more than they are. "Don't use air hoses to blow chips off a part. We supply different ways to clean the chips off the part, but I would always recommend using the coolant gun to wash the chips off and move them into the chip removal system. With an air gun, chips fly everywhere and can get built up in places where they shouldn't be in the first place." These chips can increase friction, affect temperature control or even throw the machine tool out of alignment.
Hurco offers maintenance contracts on its machines at three different "levels," each with a 50-point checklist that involves "cleaning the machine, pulling the covers back, removing all the backed-up chips, checking the lube points and lube injectors and doing a parameter check on the spindle," Hilker explained. Hurco's basic "silver" contract consists of that "general tune-up." The "gold" level costs more up front, but provides additional discounts on labor, travel and parts. "Platinum" adds a ball-bar examination to check the mechanical soundness of the machine and a laser certification to recalibrate the machine back to factory specs.
—E. Jones Thorne

Contributors
Bal-tec
(800) 322-5832
www.precisionballs.com
Hurco North America
(800) 634-2416
www.hurco.com
Konecranes
(866) 265-0516
www.konecranesmts.com
Renishaw Inc.
(847) 286-9953
www.renishaw.com


