


Tips for operating a CNC mill
Shop Operations columnist Tom Lipton offers tips for operating a CNC mill.
Rather than get specific about the types and styles of CNC milling machines, a better way to present information about CNC mills is in a more general format. Most of what I have to offer I learned by trial and lots of errors. For each type of job or class of work, there are optimal machine configurations and setups.
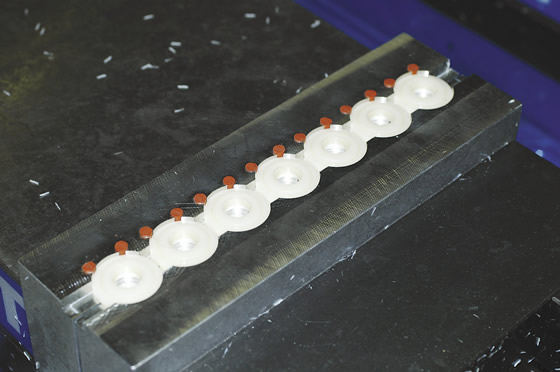
All images courtesy T. Lipton
Pieces of O-ring cord stock added to soft jaws is a neat workholding trick.
■ Sometimes it’s safer and the machine can run longer unattended if you machine an interior slug into chips rather than keeping the interior slug intact. It takes a little more machine time, but it can be a real part saver and eliminate babysitting a bunch of M01 (optional stop) lines of code.
■ An alternative is to remove the slug with a large-diameter endmill. The gap between the wall and slug is large in relation to the slug diameter. This gap allows the slug plenty of room to jiggle around and fall free without wedging in the part. Make sure there are no obstructions below the part, such as a pile of chips.
■ Everybody seems to have trouble holding multiple parts in a single vise to take advantage of the speed of a CNC machine. Cut soft jaws to hold the parts and add some pieces of O-ring cord stock. The O-ring intrudes into the part pocket by 0.010″, compensating for any size variation in the individual parts. Drill the O-ring holes before cutting the pockets.
■ Another way to use O-rings to help hold parts involves cutting a standard dovetail O-ring groove into the movable soft jaws of the vise. The bit of O-ring sticking out above the surface grips all the parts securely for a facing operation. You can use a piece of Delrin rod instead of the O-ring.
■ For one or two parts, you can run a second drill cycle after partially pocketing through drilled holes. This will reduce subsequent deburring operations. The vertical burrs on the hole edges are difficult to manually deburr. If you have time, you can apply a small endmill and radius these edges.
■ For some profiling operations, you can leave 0.010″ or less of material on the bottom of the profile to retain the part for the finish pass. I like to leave 0.030″ on the bottom just before the finish profile cut. Then on the last pass, I take it down to 0.010″ on the bottom. The part can then be cut free with a utility knife. For this kind of profiling, it helps to use bottom-up programming to make sure you leave exactly the right amount on the bottom, regardless of material variation.
■ Double check your rapid planes when using bolts or clamps to secure a part for full profiling. I think everybody has a little box of bolts next to the machine with the heads machined in some very disturbing ways. Count yourself lucky if this is all the damage you’ve had to endure.
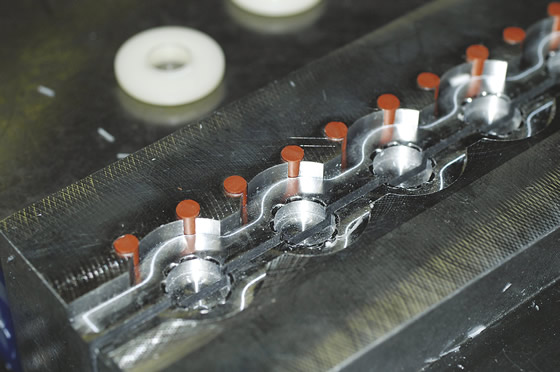
The O-ring intrudes into the part pocket by 0.010″, compensating for any size variation in the individual parts.
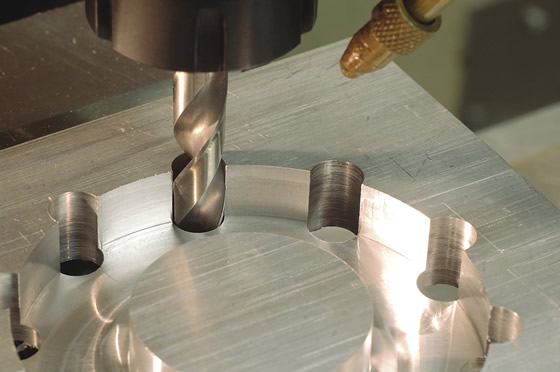
For producing one or two parts, run a second drill cycle after partially pocketing through drilled holes.
■ A quick, custom-sized subplate can make full profiling easier by providing clamp access all the way around the edges.
■ Sandwich thin materials and cut them all at once. Use a soft cap plate to spread the clamping force over the parts.
■ For parts without interior holes to hold them down, use a technique I call “musical clamps.” This requires operator intervention at critical times to move clamps and holding fixtures. It helps if your CNC allows a manual spindle stop with feed hold from the operator station.
■ For a quick setup and secure holding, I sometimes use heavy-duty, pattern C-clamps. These clamps are strong enough to pick up the milling machine, so they should hold your workpiece without breaking a sweat.
■ Be careful when cutting stacks. Better to turn holes fully into chips than to risk a loose slug upsetting the whole job. Use a combination of DOC and number of passes that leaves a thin web between each of the stack layers. You can also predrill out most of the material to make the remaining slugs more flexible.
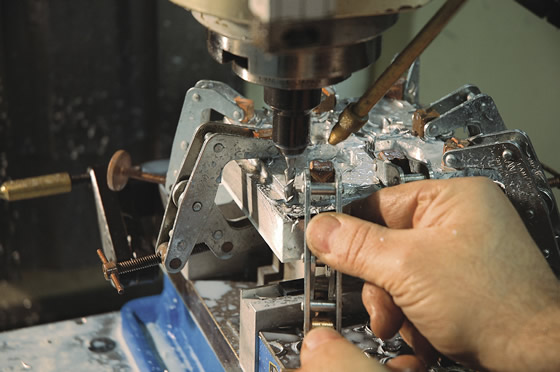
The “musical clamps” technique requires an operator to move clamps and fixtures at critical times when machining parts without interior holes to hold them down.
■ Cut a shallow recess into the back of soft jaws you intend to keep. This makes registering the two sides accurately to one another much easier. Another method might be to add a dowel pin hole or vertical slot in the vise jaw. A short dowel pin could be installed into the soft jaws for accurate location. This requires modifying your vise, however, and has the potential to be cut into when preparing the soft jaws.
■ Store-bought soft jaws are hard to beat from a price point of view. They do leave a little to be desired in the way of available configurations and features, however. One thing I have done to make commercial soft jaws more useful is to recut the counterbores and use flathead screws for a little better location repeatability for repeat jobs. CTE
About the Author: Tom Lipton is a career metalworker who has worked at various job shops that produce parts for the consumer product development, laboratory equipment, medical services and custom machinery design industries. He has received six U.S. patents and lives in Alamo, Calif. Lipton’s column is adapted from information in his book “Metalworking Sink or Swim: Tips and Tricks for Machinists, Welders, and Fabricators,” published by Industrial Press Inc., New York. The publisher can be reached by calling (888) 528-7852 or visiting www.industrialpress.com. By indicating the code CTE-2013 when ordering, CTE readers will receive a 20 percent discount off the book’s list price of $44.95.
Related


Subscribers can use MFGAxis notes, saves and discussion tools with their innoNET account.