Tips for preventing workhardening when boring
Tips for preventing workhardening when boring
One of the challenges when boring workpiece materials susceptible to workhardening is recognizing whether the prebored hole is already workhardened.
One of the challenges when boring workpiece materials susceptible to workhardening is recognizing whether the prebored hole is already workhardened.
"The biggest issue is that most of the time the people who are boring that workhardened material don't realize it," said Harvey Patterson, product development manager for Scientific Cutting Tools Inc., Simi Valley, Calif.
As a result, they typically program the machine to bore with parameters appropriate for a metal in a nonhardened condition, such as soft steel, and experience degraded tool life, he added. However, the hole may have already workhardened because it was produced with a drill that was dull or inadequate for the job, and the end user troubleshoots the wrong operation.
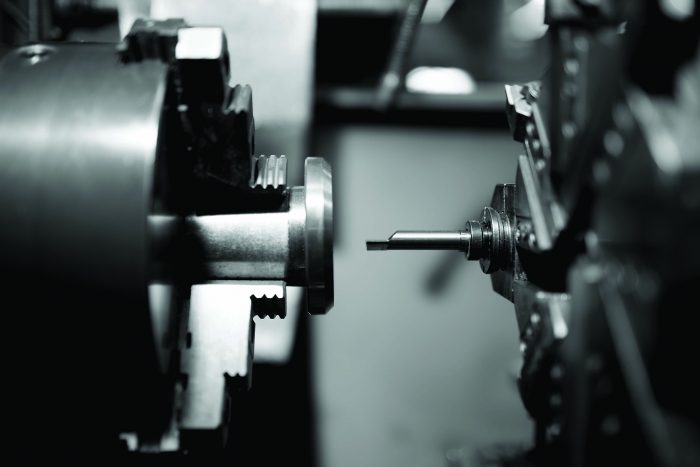
Image courtesy of Scientific Cutting Tools.
"A lot of time, the manufacturer of the boring bar will get a call and hear that tool life isn't as good as it used to be—'What's going on? Are you making substandard tools now?'—when that's not even the issue," Patterson said.
Sarang Garud, product manager for turning, boring and indexable drills at Walter USA LLC, Waukesha, Wis., agreed. "A dull or misapplied drill will leave the bore in a very nasty workhardened state," he stated. "No matter how many of the best practices you use during boring, you will pay the price for a bad roughing cut. Instead of blaming the boring tool manufacturer, a good applications engineer should be able to spot workhardening based on insert condition after the cut."
Materials prone to workhardening include nickel-base superalloys, such as Inconel 718, and austenitic and duplex stainless steel, Garud noted.
He explained that the tendency for a material to workharden increases in the presence of heat, which machining puts into the workpiece. Materials even tend to workharden when their crystal structure is realigned during a cold-working process, such as stressing, pressing or burnishing. However, "the crystal structure of the material gets rearranged much more easily in a heated state."
Chip Check
To know if drilling caused the material to workharden might require visually examining the chips generated during that operation, according to Patterson. Because signs of workhardening can't be determined during boring, as chips are flying and coolant is splashing, a machinist will need to dig through the chips and examine the larger ones that drilling creates compared to the ones boring produces.
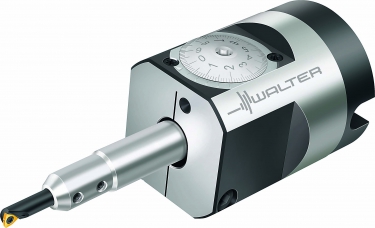
When boring a workpiece that tends to workharden, Walter recommends applying a tool with a sharp edge radius and sharp corner radius to reduce the radial cutting force and take a DOC that is well-past the corner radius. Image courtesy of Walter USA.
"The chips might appear a lot darker," he said about the chips from workhardened material, "so I'm creating more heat, and that heat creation is workhardening the material. Looking at the chips of the prior operation is probably the quickest check."
Another visual indication of workhardening is inconsistent shine and slipperiness on the bore's surface, according to Garud. When boring causes the problem, workhardening is usually detected as a symptom, such as insert DOC notching and chipping, after the first pass. In addition, when boring a workhardened, thin-walled part feature, the wall tends to deflect because of excessive forces.
"Some advanced nondestructive techniques, such as ultrasonics, may help, but not all shops are equipped and trained for it," Garud stated. "Lab testing or destructive testing, such as splitting open the bore and testing the workpiece before and after machining on a hardness testing machine, is also possible."
Ben Morrett, product manager for Allied Machine & Engineering Corp., Dover, Ohio, added that chip formation and control provide further clues.
"When breaking a chip in a material known to be poor chipping," Morrett said, "your material is likely workhardened."
Geometries at Work
To prevent workhardening while effectively boring a hole, Morrett said Allied offers an ISO-standard insert with a positive cutting edge geometry that gets underneath the chip to shear it and reduce the amount of heat generated during boring.
"This geometry is a good starting point for materials that are likely to workharden and is available in three different ISO sizes" he added.
A slight hone on the cutting edge is also beneficial when boring materials susceptible to workhardening. Patterson pointed out that a notch can form at a tool's DOC line when boring a workhardened hole, and the hone helps stop the notching.
Garud recommends varying the DOC of each pass if the process and the available amount of stock to be removed allow for it. When that approach isn't possible, apply a tool with a sharp edge radius and sharp corner radius to reduce the radial cutting force and take a DOC that is well-past the corner radius, he added. "Plan the depth of cut in advance."
Morrett added that the Allied insert also has a PVD multilayer titanium-aluminum-nitride coating for finish-machining difficult-to-cut high-temperature alloys and stainless steel.
"This coating is excellent at resisting heat and minimizing material adhesion, like built-up edge," Morrett said. "Our WHC111 coating and substrate combination does really well for materials up to 58 Rockwell."
Patterson concurred that a TiAlN-coated tool is effective for boring workhardened material. However, many parts manufacturers apply uncoated tools because they cost less and are suitable for softer metals. "But if you're workhardening it, you may need the coating."
Beat the Heat
When an end user realizes he or she is no longer boring soft, annealed steel, for example, and is facing a workhardened bore, Patterson recommends reducing the cutting speed by up to 30 percent.
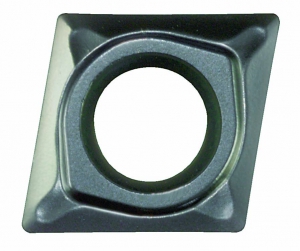
Allied Machine & Engineering says its positive-geometry inserts, such as the F101 02 GN 200 WHC111, are effective for boring materials susceptible to workhardening. Image courtesy of Allied Machine & Engineering.
When boring materials susceptible to workhardening, Morrett agreed that a reduction in cutting speed is required. However, the feed rate can be increased to help maintain the penetration rate and prevent workhardening. "You can't be afraid of higher feed rates in order to get in and out of the cut quickly," he said, "because the longer you are in the cut, the more likely you are to workharden the material. Our approach to boring these materials is similar to how we approach drilling them."
Garud added that an extremely low feed rate causes a boring tool to plough material rather than shear it. "A sheared metal means less energy goes into the system to do the same amount of work, and this leads to less workhardening."
Another common method to beat the heat is by applying coolant, especially when it's accurately directed at the tool/workpiece interface. "Through-the-tool coolant does help," Patterson said. "The coolant is getting to the bottom of the hole and flushing backwards out of the hole."
He added that when inducing coolant to enter the hole and not through the boring bar, obstacles, such as chips and the bar itself, interfere with its path. "Your likelihood of getting workhardening that way is greater."
Morrett said, "When it comes to the coolant pressure, most end users apply metalworking fluids below 400 or 500 psi with success and it is not necessary to have coolant at 1,000 psi for boring."
Hard Counts
Although polycrystalline cubic boron nitride is the go-to cutting tool material when hard boring, it isn't suitable for boring holes that haven't been heat-treated, even if the workpiece material tends to workharden. This is because, as previously noted, it's difficult to know if the material is workhardened, and it's likely not if sharp, fresh tools are applied throughout the holemaking and hole-finishing processes, Patterson explained.
"If your material is not at least 45 Rockwell, a CBN-tipped tool doesn't work well," Patterson said. "When you machine soft steel with CBN, the CBN wears out real quick, quicker than a carbide tool. But when you get above 45 Rockwell, CBN works far better than standard carbide tools."
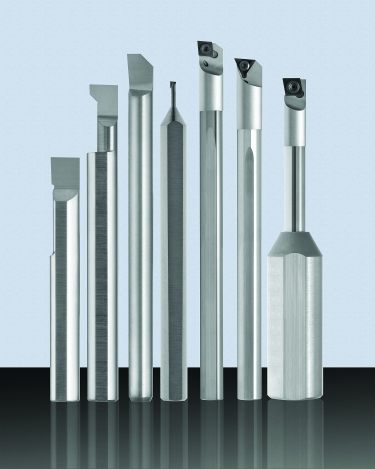
Scientific Cutting Tools offers a range of boring bars. Image couresy of Scientific Cutting Tools.
In addition, Morrett said PCBN-tipped inserts have a blunted cutting geometry that tends to generate additional heat. "CBN is specific for applications where the material has been heat-treated or intentionally hardened—not like a stainless or heat-resistant superalloy."
According to Garud, a heat-treated or prehardened material's hardness range is more controlled than a workhardened material's range. With the latter, the depth of the hardened layer may vary according to process parameters and tool condition.
"In some sense, a hard material is a hard material," Garud stated, adding that the difference is consistency of the hardened layer.
To avoid insert notching and chipping, shortened tool life and other pitfalls that can occur when boring a workhardened material, Patterson recommends examining all the tools in the holemaking operation, including the drill, the reamer (if one is applied) and the boring tool, to see if they are sharp and free of chips or nicks. Viewing them with the naked eye might suffice, but a peek under a microscope with at least 10× magnification is more revealing.
"Some young operators just look at a tool and see a chip," Patterson said. "I'll look and say, 'Where?' "
For more information about boring tools from Scientific Cutting Tools Inc., view a video presentation here.
Boring Printed Metal
As more metal parts are 3D-printed that require boring and the number of powder recipes continually expands, parts manufacturers are likely to face difficulties. Unfortunately, little if any machining recommendations are available for 3D-printed metal parts, which typically still require some machining.
"To my knowledge, no one yet is doing tool life tests on 3D-printed materials to give shops that have to machine them information on how to machine them," said Harvey Patterson with Scientific Cutting Tools. "Do you slow down because it is hard? Is the transverse-rupture strength of the material really high, and, therefore, it takes a lot of force to cut it?"
He added that the higher the transverse-rupture strength, the more force is exerted on the tool to peel a chip. This scenario increases tool deflection and requires taking a lighter DOC.
For now, however, the number of applications for boring 3D-printed parts appears small. "I've had only one customer call who is machining it," Patterson said. Nonetheless, the customer was having a problem with premature tool wear because of the metal's abrasiveness, but the exact material properties were a mystery. "I didn't have enough information on it to determine if he could run a CBN or a diamond insert or what he could do to take care of that abrasive wear."
Allied Machine & Engineering's Ben Morrett estimated that only a few customers are machining 3D-printed material. "They are using some of our roughing tools, like our twin-cutter roughers, to better round out a hole."
—A. Richter


