AESUB Transparent
AESUB Transparent
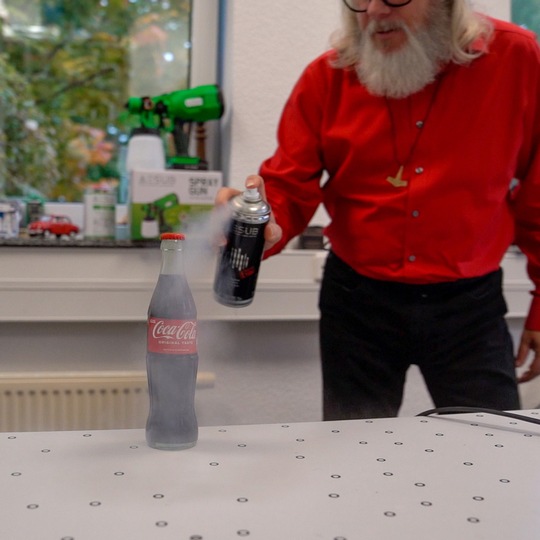
A spray with which workpiece dimensions and colour values can be digitised in one scan: AESUB transparent. The workpieces are sprayed uniformly with AESUB transparent from a distance of 15 to 20 centimetres. After just a few seconds, a matt, transparent layer is generated on the workpiece's surface. In addition to capturing the surface contours, optical scanners can simultaneously capture the colour values of the object being measured.

Whether reverse engineering, 3D printing or quality assurance, workpiece dimensions and colour values are often equally important.
However, many scanners are not able to capture shiny and reflective surfaces, which is why workpieces are matted prior to scanning. Most scanning sprays form a white layer on the surface of the workpiece. Workpiece dimensions can therebybe captured effectively, but colour information is lost because of the opaque layer. Additional scans are needed. With the dulling spray AESUB transparent, not only can colours be made scannable, but unwanted reflections in the scan result can also be avoided. A further area of use is product photography and/or general photo and video applications.
The transparent scanning spray
Scanningspray Vertriebs GmbH has now developed a spray with which workpiece dimensions and colour values can be digitised in one scan: AESUB transparent. The workpieces are sprayed uniformly with AESUB transparent from a distance of 15 to 20 centimetres. After just a few seconds, a matt, transparent layer is generated on the workpiece's surface. In addition to capturing the surface contours, optical scanners can simultaneously capture the colour values of the object being measured.
Minimal layer thickness, no pigments
The matting has a layer thickness of approx. 8 to 15 µm.AESUB transparent does not contain any pigments, which means it is also free from the pigment titanium dioxide, which is hazardous to health.
Another major advantage:
AESUB transparent sublimates
AESUB transparent evaporates after approximately four hours. The matted workpieces do not have to be cleaned, and the spray can be used directly in the measurement area.
Fields of use
Where products with complex surfaces are designed, optimised, tested or digitally archived, colour values are usually just as important as workpiece dimensions. Areas of application for AESUB transparent can be found for example in industrial design, quality control, medical technology, modelmaking and in the documentation of archaeological artefacts as well as art objects.


