Automated Measurement and Evaluation Systems
Automated Measurement and Evaluation Systems
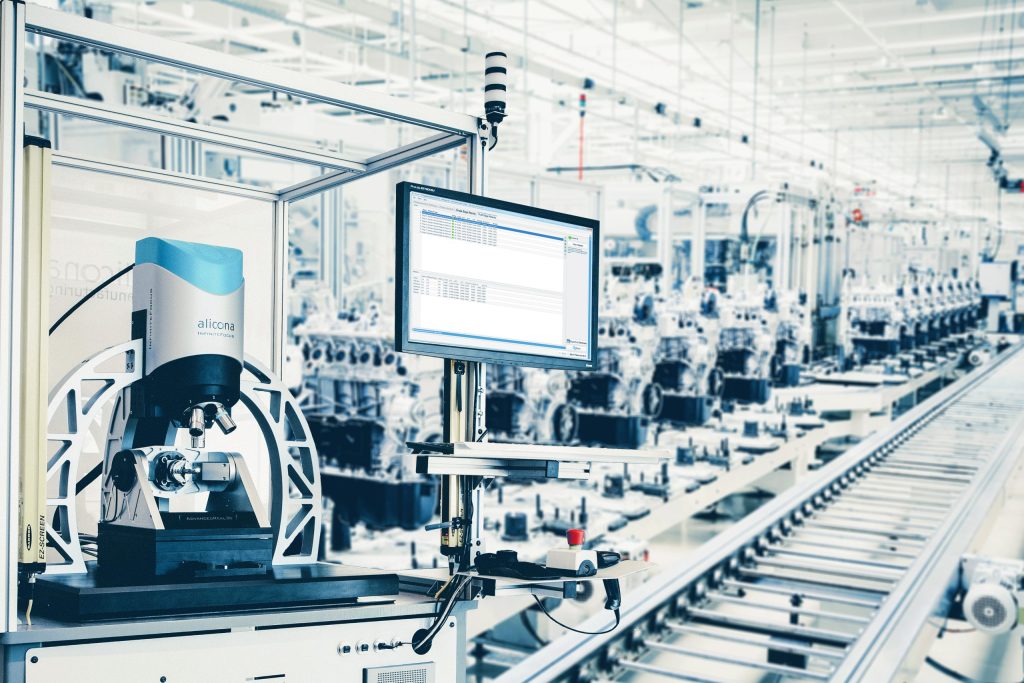
Alicona is expanding its range of production-integrated measurement solutions. The producer of high-resolution optical 3D measurement systems is demonstrating how new automation software allows laboratory measurement systems to be automatically used as part of the production process.

Alicona is expanding its range of production-integrated measurement solutions. The producer of high-resolution optical 3D measurement systems is demonstrating how new automation software allows laboratory measurement systems to be automatically used as part of the production process.
Fully automatic measurement and evaluation—these are the requirements of modern production concepts that have made measurement systems an integral part of their processes. "In my view, there are two main trends in the development and implementation of modern production strategies," Stefan Scherer, CEO of Alicona, explains. "First of all, measurement systems must become an integral part of production processes. It used to be common to e.g. carry out measurements for inspection only at the very end of a product's manufacturing process. Today, that's simply not feasible anymore. To ensure proper integration of measurement systems into the production process, they must be fully automated and operated without metrology know-how. Second, the industry demands measurement systems that are highly customized to individual applications." As a supplier of high-resolution optical 3D measurement systems for quality assurance in laboratory and production environments, Alicona knows exactly how to meet the requirements of quality assurance and production managers. Alicona's automated tool measurement systems of the EdgeMaster product range are tailored exactly to the applications and measurement tasks of the tooling industry. Consequently, they are used by all major tool manufacturers in the world. Now, Alicona is expanding its range of automated solutions to other industry sectors. A new automation interface allows users to employ other high resolution optical 3D form and roughness measurement systems of the Alicona product range to carry out fully automated measurements as part of the production process, regardless of industry sector. One example is the use of "InfiniteFocus" to measure micro structured components.
Automated dimensional measurements during production
InfiniteFocus is a high-resolution optical 3D surface system for the measurement of microstructure surfaces. The system offers various functions for measuring both form and surface finish. The range of measurable surfaces and components is almost unlimited, which is due to the system's combination of coaxial illumination and a ring light. Until now, the system has mainly been utilized in laboratory settings. However, with the new automation interface Automation Manager, measurements can now be carried out automatically, enabling the use of InfiniteFocus in production without any measurement know-how. The measurement results are directly relayed to a production control system.
The main focus of these automated measurements lies on the dimensional and GD&T inspection of components. Parameters and positions to be measured are individually defined by an administrator beforehand and include, among others, angle, distances, roundness, or flatness. In production, workers then choose the component that needs to be measured from a drop-down menu or by using a bar-code scanner and initiate the measurement by simply pressing a button. Everything else is carried out automatically. Once finished, the system then provides a report including OK or Not OK status. "The entire dimensional measurement process, even of complex components, is automated. Users can't influence the results in any way," CEO Stefan Scherer emphasizes. "This type of automation makes it possible to control the entire production process without interruption. Components can be inspected during any stage of manufacturing. This ensures consistent product quality and an economically efficient production process," he adds.
The automation software also controls the automatic positioning at the relevant surface features of the component. "This also works with our rotational unit that is used to measure undercuts and chamfered edges of tools," Stefan Scherer explains. "An integrated zero-point clamping system ensures that every component is secured in a defined and repeatable position. A corresponding calibration routine makes it possible to carry out the measurement in the coordinate system of the component," says the Alicona CEO, elaborating on the system's technical implementation.
The automated measurement routines are suitable for all industries the high-resolution measurement system InfiniteFocus is commonly used in. This includes, among others, the tooling, molding, automotive, electronics, and aerospace industries, as well as micro and precision manufacturing and medical engineering.
CAD/CAM integration
"To us, automation means to establish metrology in the entire production process and, consequently, making production more efficient. It goes beyond data exchange at a single isolated point," Scherer explains. An additional CAD/CAM interface works in combination with the software Automation Manager.
CEO Scherer on Alicona's philosophy in this respect: "Quality assurance starts in the design phase. InfiniteFocus can already be implemented at this point". The measurement system is operated virtually. This allows the designer to define the correct and necessary measurement positions in a component's CAD file. The virtual operation of the system includes all handling, from probe positioning to defining measurement ranges in 3D."
Closed-loop manufacturing as a production strategy
Alicona is constantly working on implementing its Focus-Variation technology into ever different production concepts. This year the 3D metrology specialist celebrates its´ 15-year anniversary and since the very beginning of that history, Alicona has been dedicated to the refinement of Focus-Variation—the core technology of all provided measurement systems. Today, Focus-Variation ensures interaction between machine and measurement, making it possible to automatically measure complex high-tech products with close tolerances. Alicona already has valuable experience in implementing production-integrated measurement technology, especially using a robot combined with a high-resolution optical 3D measurement sensor, or closed-loop manufacturing. In closed-loop manufacturing, a measurement sensor is directly integrated into the manufacturing machine. This allows production to optimize itself and users profit from up to four times improved machining accuracy. Robot-based quality assurance, on the other hand, uses a robot to flexibly position the measurement system, allowing it to be integrated into the production line.


