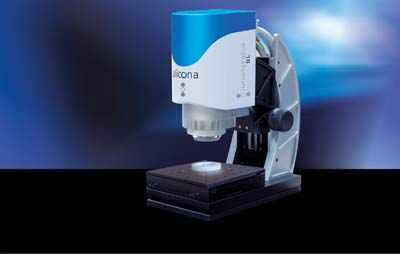
InfiniteFocusSL 3-D Profiler
InfiniteFocusSL 3-D Profiler
With InfiniteFocusSL from Alicona, a new and cost efficient measurement device for the 3D characterization of micro structured surfaces is available and be displayed at IMTS 2012, booth E5344.

With InfiniteFocusSL from Alicona, a new and cost efficient measurement device for the 3D characterization of micro structured surfaces is available and be displayed at IMTS 2012, booth E5344. Users measure surface roughness including surface finish with only one system. In addition, InfiniteFocusSL delivers brilliant color images with high contrast and high depth of focus. The low-cost system enhances the Alicona product range with another measurement system that is based on the technology of Focus-Variation and used in both research and a production near environment.
InfiniteFocusSL is in particular attractive because of its' high value for money and its universal applicability from cutting edge measurement in tool industry to quality assurance of micro components in automotive and aerospace industry, mold industry as well as medical device development. Basically, as soon as a surface shows a minimum surface roughness of only a few nanometers the system can be applied. Traceable measurements in high repeatability in combination with the system's ease of use meet essential requests from industry to perform 3D measurements also in a production near environment. The remarkable user friendliness is achieved throughout a series of special features such as a comfortable coarse drive which allows a quick positioning of the sample, a coaxial laser for the easy localization of the measurement area as well as efficient tools for quick and easy automation.
InfiniteFocusSL is the most recent system of Alicona's product line "InfiniteFocus," consisting of the high resolution measurement system InfiniteFocus to measure form and roughness and commonly used in research as well as a number of industry specific variants. As it is with all measurement systems from Alicona, InfiniteFocusSL is based on the technology of Focus-Variation and combines all functionalities of a surface roughness measurement device with those of micro coordinate measurement system. For a user this means being able to measure both roughness and form with only one system. Consequently, dimensional accuracy as well as the surface state of components is verified.
"The market launch of InfiniteFocusSL strengthens Alicona´s position as supplier of optical 3D measurement solutions that deliver high resolution measurement results also in a production near environment. With the new system we demonstrate that all the benefits which are known and well established from the use of optical measurement devices in research can also be achieved in production," states Alicona CEO Dr. Stefan Scherer.According to Alicona, these benefits include areal instead of profile based measurements or the measurement of very fine and sophisticated surface features. "Our customers confirm that in many cases those surfaces cannot be measured adequately by using traditional techniques only,", says Scherer.
InfiniteFocusSL is a solution for the measurement of also complex components. This is also valid for the measurement of difficult to access surface features such as steep flanks or the tooth root of an implant. The flexible use in various industries is enabled via the high working distance of up to 33mm and a measurement field (XY) of 50x50mm. Results are achieved within seconds whereat InfiniteFocusSL measures with 1.3 mio measurement points per second. In total, the system uses a measurement point density of 4 mio measurement points. For a user, this means that within seconds he is able to achieve measurements in a high vertical resolution even under conditions such as ambient light or vibrations. The possibility to verify vibrations, temperature and temperature gradients is another feature which makes InfiniteFocusSL to a valuable instrument for quality assurance also in a production near environment.
In daily use, the system is characterized by the possibility to also measure complex forms and shapes comfortably and in high measurement speed. Besides the robust technology Focus-Variation, this is achieved throughout the intelligent illumination technology. The illumination concept is based on the principle of using existing light conditions as well as the surface reflection properties of the specimen. In doing so, light is optimized which results in an optimal illumination of the component. This is achieved via a patent pending concentrator optics which includes a range of single controllable segments. By using these segments, a surface is illuminated from different perspectives which results in diffuse illumination.


