Pyramid Workholding Platform
Pyramid Workholding Platform
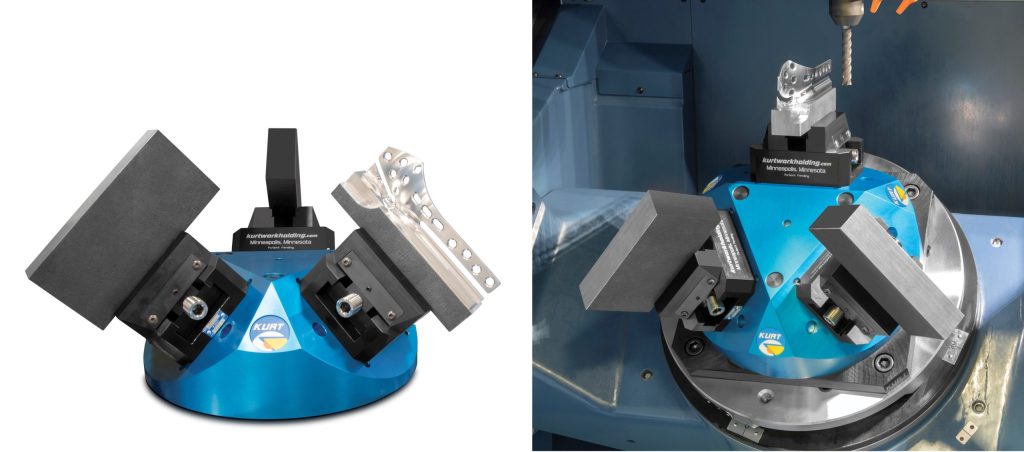
The new Kurt Pyramid workholding platform is designed to attach three Kurt vises for 5-axis machining multiple parts in one load. The 45-degree vise mounting surface is positioned so each vise provides maximum access to all machined surfaces and allows for enhanced spindle and cutting tool clearance.

The new Kurt Pyramid workholding platform is designed to attach three Kurt vises for 5-axis machining multiple parts in one load. The 45-degree vise mounting surface is positioned so each vise provides maximum access to all machined surfaces and allows for enhanced spindle and cutting tool clearance.
The Pyramid platform is constructed of 7075 anodized aluminum and has a 12"-dia. base to fit a wide variety of 5-axis CNC machines. The Pyramid comes pre-drilled for easy mounting to most machine tables, pallets or wide variety of sub plates.
The Kurt vises that are designed to fit the Kurt Pyramid include 5 -axis Dovetail vises, and 5-axis Self-centering vises with a wide variety of workholding capacities. Workpiece sizes can range from 2" up to 12" blanks. The Kurt vise models equipped to fit the pyramid include these models: HP420, HP440, HP460, SCMX250, SCMX425, DTR20 and KTR35.
A variety of jaws can be utilized in the Kurt 5-axis vises from dovetail jaws, machinable jaws and serrated jaws. These options provide capability to hold machined dovetail workpieces, castings, round components and a wide variety of workpiece shapes.
Kurt Manufacturing can provide additional setup options such as quick-change pallet systems, hydraulic or pneumatic actuation, robotic machine tending for automation, in-process gaging and inspection.


