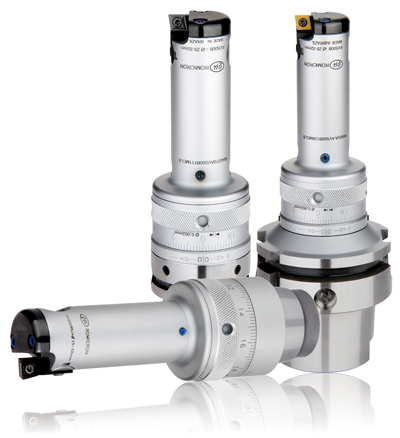
Romicron Fine Boring Tools
Romicron Fine Boring Tools
Romicron fine-boring systems from Kennametal allow users to dial in extremely close tolerances while the tool is mounted in the machine tool, saving time and easing training.

Romicron fine-boring systems from Kennametal allow users to dial in extremely close tolerances while the tool is mounted in the machine tool, saving time and easing training. They can produce finish bores with tolerances of a fewµm in diameter (1µm = 0.001mm) and bore-to-bore variations of just a few tenths of aµm.
The need for delivering high-quality, tight-tolerance holes is growing significantly in many manufacturing segments, including aerospace, energy, transportation, and medical. Traditionally, this has meant dedicated jig boring or other fine-boring capital equipment requiring expensive setups, sister tooling, extensive operator training, and time-consuming test cuts.
Newly upgraded Romicron precision fine boring tools from Kennametal can be used at existing machine tools and produce finished bores in automated production with tolerances of a fewµm in diameter (1µm = 0.001mm or 0.000039 inches). Using cartridges or boring bars, every Romicron tool can be adjusted in diameter with a dial ring in 2-micron increments to achieve extremely close tolerances. To provide instant adjustment feedback, Romicron has a clicking mechanism so machine operators not only see the adjustment at the scale, but also hear and feel it.
The Romicron AVS tooling covers the diameter range of 25 to 79mm (0.984 to 3.11 inches) and can run in high-speed spindles up to 20,000 RPM. It accommodates standard ISO inserts including the latest Kennametal Beyond tooling, and can run with high-pressure coolant systems up to 120 bar for better chip evacuation and reduced temperatures at the cutting edge.
Basically, the Romicron system consists of proprietary slide-gate mechanics that work similar to a transmission and translates an adjustment in a relationship of about 10:1. This means a small adjustment by the operator at the tool is converted into a still smaller change of diameter at the cut. The slide-gate valve mechanism is self-locking so no clamping screw is required. The spindle is decoupled from the cutting force and the entire mechanism has nearly no backlash. With such straightforward and robust engineering, almost no training or experience is necessary to use Romicron. The nearly backlash-free adjustment mechanism allows adjusting to larger or smaller diameters without rotating more than required compared to numerous back and forward movements with conventional compensating for backlash. Since adjustments with the Romicron system are easy and require no tools or additional measurement devices, adjustments can be made on the machine for higher uptime and process stability.
Because the Romicron does not require a lock screw or additional tools, the adjustment process can be automated by a machine tool's CNC, resulting in a closed-loop boring (CLB) system. With respective in-process measurement equipment, current hole dimension measurement data can be sent to a machine tool's CNC after machining. The CNC calculates the number of adjustment increments to bring the hole within tolerance. To achieve this adjustment the machine moves the Romicron tooling inside of the machine to a position. A retractable, spring-loaded locking pin is located and engages at respective CLB holes on the Romicron tool's adjustment ring. Based on the calculation, the spindle rotates the required amount of increment to adjust the Romicron tool and continues machining till the next planned measurement and adjustment cycle. Existing machines become capable of extremely close-tolerance hole finishing, increasing a shop's capabilities and productivity.
Romicron boring systems can produce finish bores with tolerances of a fewµm in diameter and bore-to-bore variations of just a few tenths of aµm under ideal machining conditions, including the following:
Stock removal of the finishing cut should be regularly and evenly distributed concentrically, and stock removal should be kept within 0.010" (0.25mm) or smaller.
Feed should be at 0.006" (0.15mm) or less per revolution depending on the material to machine and surface requirements.
Tool tip radius should be properly checked prior to boring.
A tolerance equivalent to ISO precision class IT6 can be achieved under normal conditions.
At larger sizes IT5 might be able to be reached as well.
Solid, secure workholding is key.
Thin-walled workpieces, for example, are prone to distortion and must be clamped properly.
Special shanks may be required if bore lengths exceed 2.5 times the diameter.
Exotic materials must be carefully examined to determine best machining methods.


