Shapetracer
Shapetracer
The requirements for quality assurance have increased with 3D technologies. Previously all major dimensions could be taken from a 2D drawing for tactile measurement which is no longer the case today. Modern 3D drawings include little in the way of explicit dimensions. The curves of the free-form surfaces are almost impossible to verify, using traditional tactile measurement techniques. Wenzel/Xspect Solutions Inc. is providing new advanced 3D measuring technology to solve these measuring issues and their new Shapetracer laser line scanner is quickly becoming a preferred solution.

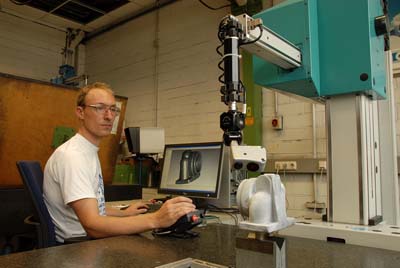
The requirements for quality assurance have increased with 3D technologies. Previously all major dimensions could be taken from a 2D drawing for tactile measurement which is no longer the case today. Modern 3D drawings include little in the way of explicit dimensions. The curves of the free-form surfaces are almost impossible to verify, using traditional tactile measurement techniques. Wenzel/Xspect Solutions Inc. is providing new advanced 3D measuring technology to solve these measuring issues and their new Shapetracer laser line scanner is quickly becoming a preferred solution. The Wenzel Shapetracer is a high-precision line scanner developed together with the Pointmaster evaluation software from Wenzel Knotenpunkt. Shapetracer is an extremely compact scanner that can be connected to the Renishaw PH6M or PH10M probe head via the Renishaw Autojoint connection and, consequently, can be adapted to almost every coordinate measuring machine. In conjunction with the PH10M rotary swivel head, five axis measurement is available. From the outset, the Wenzel development team decided that the laser line scanner should be used on a coordinate measuring machine with a stable support table, and not just on a mobile measuring arm. Higher production applications require automatic measurement of several workpieces which is only possible on a large stationary measuring machine. In addition, if probe and sensor changing is to be automated, the Shapetracer can be cabled via the Renishaw Multiwire connection so its storage together with other measurement heads is easily accommodated. In operation, scanning of the workpiece, where the operator is supported by the Pointmaster kinematics module and the software, takes over the full command of the measuring process. The measuring machine can be completely and virtually mapped so that simulations of the measuring process are also possible. A point cloud is generated from the scan data and, from that a polygon model with homogenous surface is computed (triangulation). Finally the polygon model is converted into a CAD model in IGES format. Quality technicians can receive the CAD data, also in IGES format, from the design department. Both datasets are aligned and compared with the software. Pointmaster highlights the differences between the two models in different colors where the variances in dimension can be discretionally selected and marked by flags. All dimensions are listed and contrasted in the evaluation protocol. This applies particularly to components with complex inner workings. These parts must be dissected in order to simulate both the external and internal contours. With the Pointmaster software it is no problem to construct a model from the component scanned in different directions. The system provides a series of functions, both for aligning the components and for manufacturing homogeneous contour transitions in order to remove any cut surfaces and to add consecutively scanned areas. The assembly of the contours does not rely on mathematical tricks, but always uses real data so a highly precise scanner is a prerequisite. After the CAD model has been generated the finest surface structures become visible. Ingrained lettering, for example, appears distinctly and clearly legible on the display screen. Overview of the Shapetracer system include: Dimensions: 100 x 68 x 58mm Working clearance: 40mm Scan width: 35mm Scan depth: 60mm Scan capacity: 48,000 points/sec Measurement accuracy: better than 20µm .


