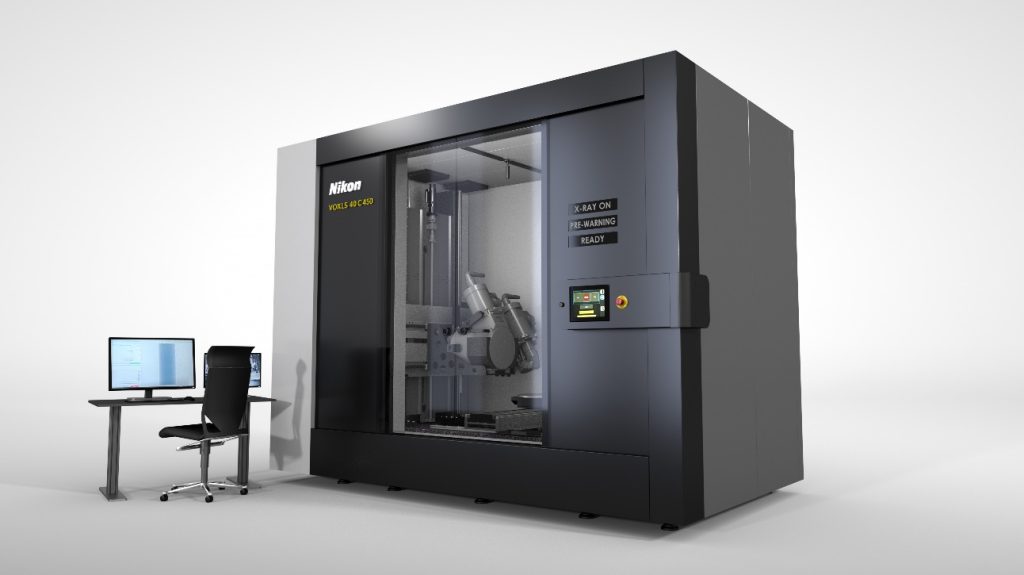
VOXLS 40 C 450
VOXLS 40 C 450
Nikon emphasizes that the VOXLS 40 C 450 is just the first of a next generation of X-ray CT systems of similar construction, featuring a single-piece cabinet, the same metrology-grade manipulator concept, Nikon's unique microfocus X-ray sources, and extensive CT acquisition technologies. The upcoming models will broaden the range even further to provide users with more options that will not only meet their immediate business and technical requirements, but will also help them to identify new opportunities and raise operational efficiency.

The first of an innovative range of high-performance X-ray CT (computed tomography) systems offering enhanced levels of precision, resolution and scan speed has been introduced and is ready to order from the Industrial Metrology Business Unit (IMBU) of Nikon Corporation (https://industry.nikon.com).The large-volume VOXLS 40 C 450 is able to inspect items of diverse size and density, internally and externally, allowing it to perform virtually limitless tasks within industry, inspection services and academia. Whether it is a lithium-ion battery module or the cells it contains, an additively manufactured aerospace or automotive part, or carbon fiber chassis components for a Formula 1 race car, all will benefit from non-destructive inspection in the new system.
The VOXLS 40 C 450 comprises a single-piece cabinet housing a metrology-grade, granite-based manipulator combined with rigid steel towers and it incorporates high precision motors and encoders. The resulting construction provides superior mechanical and thermal stability, leading to more accurate manipulator positioning and hence the generation of highly precise, repeatable measurement data throughout the full scan volume. The equipment exterior has been extensively redesigned to have a sleek, contemporary appearance, instantly recognizable as a Nikon product, consistent for use in a cutting-edge inspection environment. A modern, intuitive, touch-screen interface allows easy system configuration for performing a vast range of quality control applications.
To give users the flexibility to inspect a wide variety of components, the system contains two microfocus X-ray sources that are manufactured by Nikon and are exclusive to the manufacturer. One source is rated at 450 kV for penetrating large or dense parts, while the other is 225 kV for examining smaller components or those of lower density. Both sources are equipped with Nikon's unique rotating target technology, providing ultra-high resolution at industry-leading power to enable even the smallest defects inside an object to be identified quickly and easily. Nikon's extensive CT acquisition modes, including X.Tend helical CT, Offset.CT, Panel Scan and Half.Turn CT, are all compatible with the VOXLS 40 C 450, offering increased measurement volume, resolution and image quality.
Dr. Andrew Mathers, IMBU X-ray and CT Product Manager said, "Based on proven features and technologies, the VOXLS 40 C 450 is an exceptionally versatile, microfocus solution that has been introduced in response to market trends and feedback from users over the last few years."
Both large and small items of any complexity may be inspected. At one end of the scale, the enclosure can accommodate assemblies up to 1,275 mm in diameter by 1,800 mm tall and the scan envelope is the largest in any single-piece cabinet on the market at 800 mm diameter by 1,415 mm high. However, the versatility of the system means that it is equally well suited to the inspection of small parts at high resolution, making the equipment a truly multi-purpose resource for R&D, failure analysis, first article inspection and quality control.
It is just as capable of high-throughput series inspection on the shop floor, in part because the motorized radiation safety doors have been designed to open or close within six seconds. When combined with the integration of a robotic loader and the Nikon Automation OPC UA Interface, the system is automation-ready for closed-loop inspection at high speed in a Quality 4.0 production line environment.
The equipment's ergonomics make it particularly easy to set up and operate. Manipulator-interlocked, bi-parting glass outer doors have been incorporated to give the operator unrivalled visibility into the enclosure for precise and confident positioning of the scan object, minimizing the risk of collision with the X-ray sources and detectors. Four internal video cameras continue to provide an excellent view with the radiation safety doors shut.
Not only does the system have dual X-ray sources, but there is also the option of having two types of detectors, a choice of industry-leading, flat panel detectors with horizontal shift as well as Nikon's unique CLDA (curved linear diode array). The former produces ultra-clear images for 3D CT or 2D digital radiography, while the latter line detector is ideal for 2D CT and scatter correction of high-density materials.
Nikon emphasizes that the VOXLS 40 C 450 is just the first of a next generation of X-ray CT systems of similar construction, featuring a single-piece cabinet, the same metrology-grade manipulator concept, Nikon's unique microfocus X-ray sources, and extensive CT acquisition technologies. The upcoming models will broaden the range even further to provide users with more options that will not only meet their immediate business and technical requirements, but will also help them to identify new opportunities and raise operational efficiency.
Dr. Mathers concluded, "Our latest offering, the highly versatile VOXLS 40 C 450, brings exceptional scan volume, resolution and speed to your inspection applications, with unparalleled image quality and repeatability of results. All this and more are packed into the stunningly iconic and ergonomically designed enclosure, rounding off Nikon's first next generation system that excels in all environments, from R&D labs to the shop floor."
Breaking news: Nikon Corporation has just announced that its subsidiary Nikon Americas Inc ("NAI") has started the procedures for the acquisition of Avonix Imaging, LLC, USA, based in Minnesota, which will make Avonix a subsidiary of NAI.
This move will reinforce our position as market leader and greatly enhance the company's ability to deliver best-in-class, next-generation inspection solutions.


