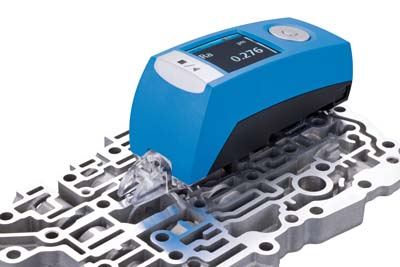
W5 Surface Roughness Measurement System
W5 Surface Roughness Measurement System
Light and compact in design, easy to operate with long-lasting battery power, the Hommel-Etamic W5 surface roughness measuring system is ideally suited for measurements on the production line.

Light and compact in design, easy to operate with long-lasting battery power, the Hommel-Etamic W5 surface roughness measuring system is ideally suited for measurements on the production line. Capable of a wide range of measuring tasks using an extensive array of probes and accessories, the W5 can match the performance of more expensive stationary systems with its accuracy and precision.
The new Hommel-Etamic W5 is ergonomically designed, with the device easily fitting into the user's hand making it simple to precisely position on the workpiece. The W5 is capable of tracking five separate measurement programs, up to 100 separate profiles, with a total storage capacity of up to 10,000 completed measurements. The integrated click wheel allows the operator to intuitively select device functions.
In conjunction with the large color display with graphic interface, this makes operation of the W5 simple and transparent; delivering easy to see results and tolerance evaluations. More than 800 measurements with one battery charge guarantee a high level of reliability even during frequent use. Measuring results may be quickly printed out on the optional printer, wirelessly via Bluetooth technology.
The roughness probes and measuring instrument electronics are calibrated independently from each other at the factory. This eliminates the need to make regular adjustments to the amplification or to recalibrate, a big advantage for everyday measuring. The extendable tripod legs can be used to adjust the measuring instrument to the height of small workpieces. This allows such measuring applications to be implemented without an additional means of holding.
Measurement on small shafts: The support prism centers workpieces like small shafts from 10mm diameter reliably on the correct measuring position and protects the probe for measurements in bores from 12mm diameter.
Precise workpiece support: The contact to the workpiece is made by precisely polished support shafts. This guarantees permanent, stable workpiece support. A height measuring stand can turn the W5 in a complete measuring station for tasks that require precise positioning.
Intuitive operation: The graphic user interface combined with the click wheel allows the instrument to be operated reliably. Self explanatory and no time-consuming training required.
Tolerance evaluations at a glance: The colored display of the measurement results depending on the tolerance evaluation allows the measurement results to be assessed at a glance.
Measurement position lighting: The transparent probe cover combined with the measurement position lighting makes the exact measurement position of the roughness probe very easy to see. This makes the positioning of the measurement easier when it counts.
No risk of confusion: all the necessary functions are covered with just one USB port.


