More tips for effective finishing
Shop Operations Columnist Tom Lipton shares more tips and tricks for effectively performing finishing work.
Presented here are more tips and tricks to effectively perform finish work.
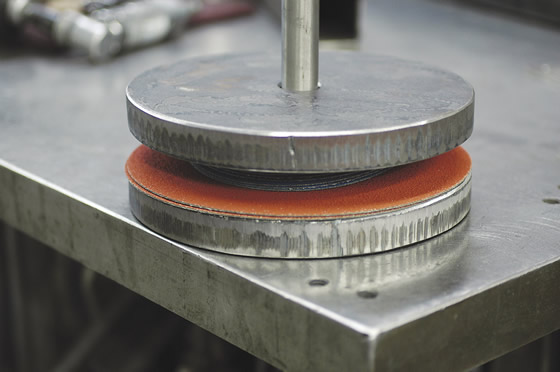
■ It’s a real pain when sanding discs are warped from improper storage or high humidity. Warped discs only cut on the high points, so it’s important that discs are fairly flat if you want to do decent finish work and get the most from your premium abrasives. Use a flattener to keep a little pressure on the discs as the humidity changes. Another trick to extend the life of sanding discs is to rotate them after you have used them for a while. When you rotate the discs slightly in relation to the backing pad, you can sometimes move the low point of the disc to an area on the backing pad that is higher.
Courtesy of All images: T. Lipton
A simple shop-made flattener keeps a little pressure on the sanding discs to prevent warping as the humidity changes.
■ Wrap your abrasive around a stiff, flat bar with a small clamp to keep the abrasive from moving for better cutting action. The hard backing of a metal bar converts more of your elbow grease into removed metal. Flat bars sneak into gaps and openings where regular sanding pads won’t fit. It might be helpful to think of this idea as using a fine-grit file. The action is similar.
■ Tape abrasive paper to a surface plate to keep wrinkles out. I hate it when I get a nice, fresh sheet of silicon-carbide paper out to do a little flat lapping and the first thing that happens is I crinkle the paper and ruin it. This trick allows you to focus on the lapping job instead of concentrating on holding the paper steady.
■ Change the direction of sanding to give a balanced crosshatch pattern. I call this fake surface grinding. It’s not meant to deceive anybody; instead, it mimics a Blanchard ground surface. In some cases, it looks better than the standard figure-eight pattern normally created.
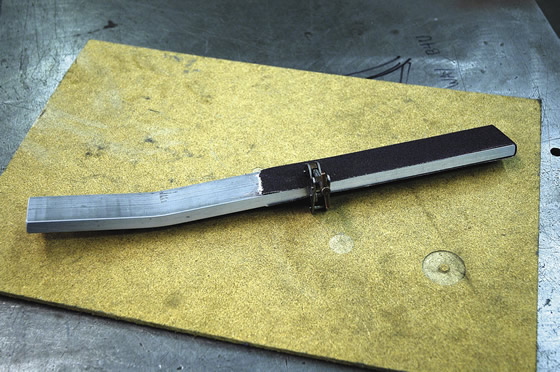
Wrap abrasive around a stiff, flat bar for better cutting action and use a clamp to secure the abrasive.
■ Change direction 90° each time you change abrasive grits. This makes it easy to see the scratch lines from the previous grit. There is nothing worse than trying to remove 100-grit lines with 600-grit paper.
■ Add a little light machine oil or WD-40 to make an abrasive act like a finer grit. This trick reduces the effective grit by about half. The kerosene in WD-40 keeps the abrasive clean and cutting.
Review the print ads from this magazine to continue
This quick advertiser review unlocks the rest of the article and keeps the full-screen reader focused on the ads instead of the page chrome.
Continue reading
September 2014
QR codes and videos from this issue
Print QR codes, video callouts, and in-magazine links for this article now point to the CTE video hub in the HTML version.


MFGAxis Discussion