60 years for Kaiser AG
60 years for Kaiser AG
In 2008, Heinz Kaiser AG celebrated its 60th anniversary, a year that also marked a change in the ownership of the company. On Jan. 1, 2008, Chris Kaiser, Karlheinz Kaiser and Gabriela Brasher-Kaiser assumed ownership of the company from their father, Heinz Kaiser, who founded Kaiser AG in 1948.
With a new ownership structure in place, Kaiser AG is entering its 60th year
In 2008, Heinz Kaiser AG celebrated its 60th anniversary, a year that also marked a change in the ownership of the company. On Jan. 1, 2008, Chris Kaiser, Karlheinz Kaiser and Gabriela Brasher-Kaiser assumed ownership of the company from their father, Heinz Kaiser, who founded Kaiser AG in 1948.


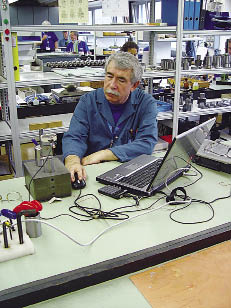
A technician at Kaiser's manufacturing plant in Switzerland performs final inspection. After finish-boring heads are assembled, the accuracy of each batch is measured and recorded by serial number. This final inspection guarantees accuracy and repeatability of all finish heads. Image courtesy A. Rooks.

With headquarters in Rümlang, Switzerland, Kaiser AG manufactures and distributes precision boring systems worldwide. Through a global partnership with BIG Daishowa Seiki Co., Japan, and distribution agreements with other companies, Kaiser offers a range of other cutting tools, toolholders, workholders and other products. A U.S. operation, BIG Kaiser Precision Tooling Inc., Elk Grove Village, Ill., has been fully owned by BIG Daishowa since 2003. BIG Kaiser offers brands such as Kaiser, BIG Daishowa, Speroni, Unilock and Sphinx.
While Heinz Kaiser has retired from active participation in the company, his presence is still felt. "In a parting letter to the company, my father wrote that this company has come of age, but he hopes it will always stay young," said Chris Kaiser, co-owner and chairman of Kaiser AG, at a 60th anniversary celebration held last summer at the company's headquarters. In addition, Chris Kaiser is president of BIG Kaiser.
HK, as people call Heinz Kaiser, is not just about business. "My father was always focused on the well-being of his employees," said Chris Kaiser. "He taught us about social responsibility. He has a passion for the arts and is an avid supporter of classical music. He was really interested in sustainable relationships with licensees, agents and distributors. As long as they held up their end of the bargain, they always had a long-term relationship with him."
New Product Focus
Today, Kaiser AG is focused on developing boring tools that meet new demands, particularly in the aerospace and medical markets. For example, market demand led Kaiser to develop heads for applications such as high-speed machining and micro-size holemaking, and to design boring tools with 1µm adjustment accuracy.
"About 10 years ago, the high-speed boring market was really starting to kick into high gear and it required balanced tools," said Jack Burley, vice president of sales and engineering for BIG Kaiser. Most boring heads are neutrally balanced (prebalanced for the work range the tool is normally used in), which is acceptable for most applications. However, many high-speed applications require a different approach—boring heads that can be balanced by the operator throughout the entire speed range in which they will be used, according to Burley.
The result was the development of Kaiser's EWB line of high-precision boring heads. One of the earliest users of the EWB toolholder and a mechanism permits fine adjust…" title="Single- or multiple-point precision tool used to bring an existing hole within dimensional tolerance. The head attaches to a standard toolholder and a mechanism permits fine adjust…" aria-label="Glossary: boring head">boring head in the U.S. was The Boeing Co., which was using a range of high-speed machine tools and wanted all of its cutting tools to be balanced throughout their speed ranges.
The growth of micromanufacturing, and in particular the need by manufacturers to make large numbers of small holes, has also led to new boring tools. "Customers were looking for a small tool that could run at high speeds and be adaptable to small spindles, so we looked at a new concept for a toolholder and a mechanism permits fine adjust…" title="Single- or multiple-point precision tool used to bring an existing hole within dimensional tolerance. The head attaches to a standard toolholder and a mechanism permits fine adjust…" aria-label="Glossary: boring head">boring head that is self-balancing through the entire working range," Burley said. Kaiser developed several products that fit this need, including the EWBO.4-12 for hole diameters as small as 0.016 ". The boring heads can operate at up to 30,000 rpm.


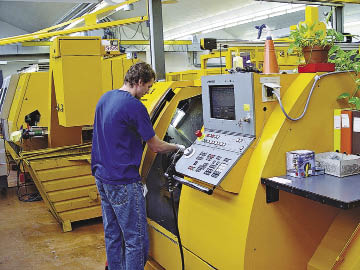
A CNC lathe at Kaiser's plant in Rumlang, Switzerland, is set up for hard turning. The process removes excess stock to reduce grinding time and imparts smooth finishes on noncritical surfaces. Image courtesy A. Rooks.

At the other end of the size spectrum, demand was growing for balanced heads for boring large holes up to 8 " in diameter. "For a balanceable boring head of this size, the whole construction had to be rethought because steel was too heavy to be used as a tool material," said Burley. "So we focused on creating an aluminum tool, which is not an easy task because aluminum is not as stable as steel and requires extra processes to maintain tolerances and surface hardness." The result was the EWB-AL series, a balanceable tool that accommodates hole diameters from 3.937 " to 8 ".
For end users who require the highest level of precision, Kaiser developed the EWB-UP, a balanceable boring head that features adjustment increments of 0.00005 ", or 1µm. "Our standard tools have a graduated dial with increments of 0.0005 ", which is acceptable for most applications," said Burley. "However, there was demand for higher accuracy, driven largely by statistical quality control requirements." This meant that CPK limits on holemaking needed to move from 1.33 to 2, said Burley.
If an end user was working with a standard boring head dial with 0.0005 " increments, he would have to split divisions on the dial to reach the new CPK requirement. The 0.00005 " divisions on the EWB-UP allow operators to make that adjustment more easily and accurately, without using a vernier. An integrated counterweight in the EWB-UP unit can be adjusted to any bore diameter by a separate scale to enable high-speed operations.
A digital version of the EWB-UP, introduced this year, allows operators to make adjustments via a digital readout, but the tool is twice the cost of the standard EWB-UP. "People with less experience can learn how to handle the digital heads faster," said Burley, "so the scrap rates in those environments will be lower."


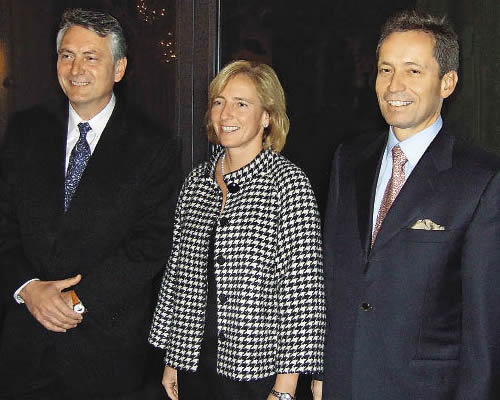
(Left to right) Chris Kaiser, Gabriela Brasher-Kaiser and Karlheinz Kaiser assumed ownership of Kaiser AG last year. Image courtesy Kaiser.

All of BIG Kaiser's product offerings in the U.S. market are available in inch increments, which requires the use of special parts. "We make a straight-inch pitch screw," said Chris Kaiser. "We are one of the few [European-based manufacturers] that do that. Other manufacturers typically use a metric adjusting screw and a dial that has inch increments, which results in a small conversion error. Small adjustments may not amount to much error, but larger adjustments of, say, 0.015 " produce an error of 0.00024 " on the radius, or nearly 0.0005 " on diameter."
The EWB-UP is manually balanced. Operators select a bore diameter and use a separate scale to adjust the tool. Some products in the EWB line, however, are self-balancing, using a rack-and-pinion system; as the insert holder is moving out, the pinion gear and rack moves a precision counterweight in the opposite direction to offset it exactly.
The demands of an application typically determine if a boring head can be manually balanced or if it needs to be self-balancing, according to Matt Tegelman, application and product manager for BIG Kaiser. "For high-speed nonferrous material applications where you need higher cutting speeds to stay productive, you definitely want to use the auto-balance tools," he said. "These are applications where you want to run as fast as the insert will allow you to cut." Other applications that might require a self-balancing tool include long-reach applications and jobs using boring tool assemblies that include several modular components. "In situations like these, it is very important to have a balanced tool to allow you to maintain hole roundness," said Tegelman.
Made in the U.S.A.
While some of the boring tools offered by BIG Kaiser are made in Switzerland by Kaiser AG, many are manufactured in the U.S. "All the parts that are specific to the American markets, such as CAT V-flange shanks and modular toolholder components, are manufactured here," said Chris Kaiser. "When we began in 1990, we started manufacturing here to maintain a good inventory of common components." Also, about 10 percent of BIG Kaiser's sales are specials, which are designed and manufactured in the U.S.
Like Kaiser AG, BIG Kaiser has grown over the years. BIG Kaiser currently has 32 employees, including five engineers on staff for application and technical support. BIG Kaiser has 20 exclusive territories and more than 100 distributors in the U.S. Having outgrown its current building, BIG Kaiser is in the process of building a new headquarters in Hoffman Estates, Ill. It plans to move into the new building in October 2009.


