How flame straightening works
How flame hardening works
Metals, like all materials, expand when heated. In the case of steel, it expands 0.000006 ” per inch per degree of temperature change. By using flame straightening, the technique of localized, intense heating, you can cause a small cross section of material to expand considerably and form an actual material upset, as well as the subsequent mechanical contraction of the material as it cools.
The goal is to induce a large temperature difference between the area being heated and the surrounding, cooler metal. The contraction, or shrinking effect, is created by the temperature difference, or gradient. You are, in effect, creating the same conditions seen when welding: very hot, intense localized heating surrounded by a cooler base material.
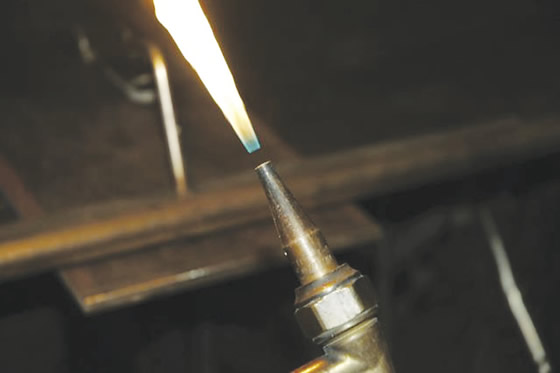
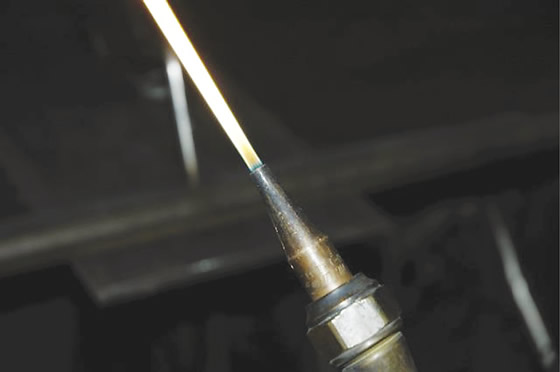
Open the fuel valve until there is a separation between the base of the pure fuel flame and the tip (left), then slowly close the fuel valve until the base of the flame reconnects with the torch tip (right). All images courtesy T. Lipton.
As this local area is heated, it tries to expand rapidly. It encounters resistance from the cooler, surrounding material, which creates pressure. This pressure flows in the path of least resistance which, in most cases, is upward along the area softened by heating. This upward swelling forms the upset. As it cools, the upset area contracts and acts like a tiny, heavy-duty turnbuckle, pulling the surrounding metal with it. This upset can be seen as a bulge on thinner materials.
One of the secrets to using this technique is controlling the heat input. The trick is to heat the material as quickly as possible in as small an area as possible. If you use a normal rosebud-type heating tip, you cannot confine the heat to a small, weld-sized zone.
The best tips for most flame straightening jobs are cutting tips. Only the preheat flame is used to form the upset. These tips heat a small area quickly, so they work well for the rapid heat input into a small area. Rosebud tips are best for large-area heating—or for burning weeds in back of the shop.
When flame straightening, always use the correct flow and fuel-and-oxygen pressure for the tip size. There is some confusion as to how far to open the fuel valve when setting a flame for a particular size. The best approach is to open the fuel valve and light the torch in the normal manner with the correct regulator pressure settings for the tip size you are using. After you have it lit, open the fuel valve until there is a separation between the base of the pure fuel flame and the tip. Slowly close the fuel valve until the base of the flame just reconnects with the torch tip. This is the correct amount of fuel for the tip. More than this and the flame will be hard and forceful; less and you are not heating efficiently.
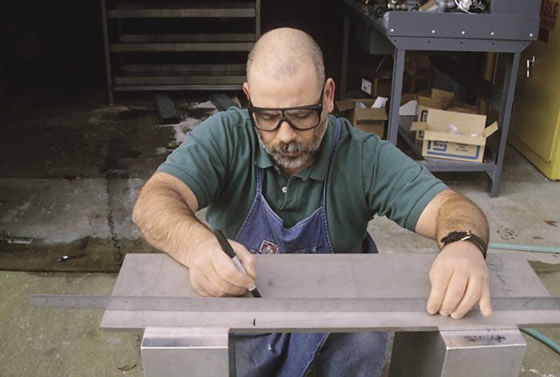
Plot the direction of the worst distortion, and move the straightedge perpendicular to the edge of the plate.
The first step in any correction job is mapping the high points with a straightedge. As a demonstration, let’s map and correct the distortion in a typical mill-supplied plate.
You will need a few tools to help you: Several straightedges of different lengths and markers that won’t wash off with water are used to plot the typical wandering distortion found in plates. I like the faithful Sharpie. It leave a hazy reminder of where you have applied shrinks even after the intense heating.
Review the print ads from this magazine to continue
This quick advertiser review unlocks the rest of the article and keeps the full-screen reader focused on the ads instead of the page chrome.


MFGAxis Discussion