ALTERAC Coordinate Measuring Machines
ALTERAC Coordinate Measuring Machines
A range of coordinate measuring machines has been introduced by British manufacturer LK Metrology that offer high accuracy and repeatability in a compact footprint. Manufactured at the company's factory near Derby, the new ALTERAC machines are available in three sizes - 7.7.5, 10.7.5, and 10.7.7 - their respective X-, Y- and Z-axis movements being 700 x 650 x 500 mm, 1,000 x 650 x 500 mm and 1,000 x 650 x 650 mm.
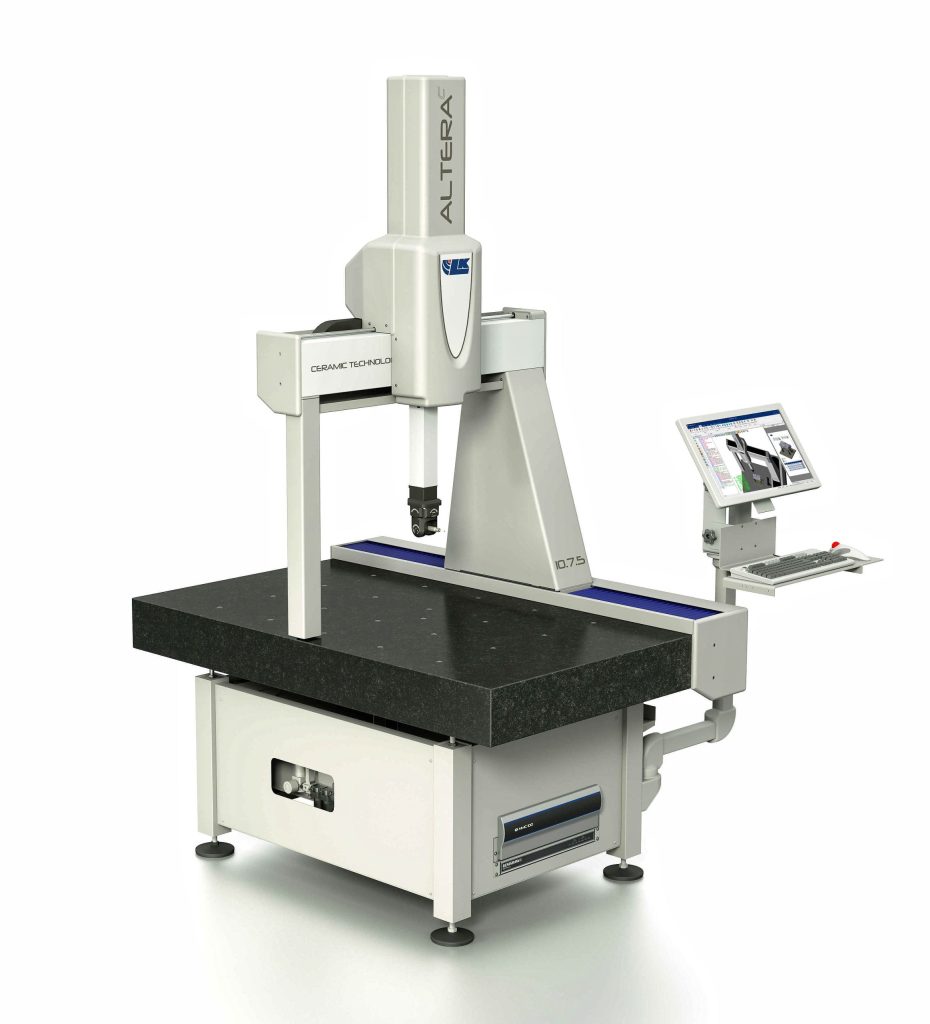
A range of coordinate measuring machines has been introduced by British manufacturer LK Metrology that offer high accuracy and repeatability in a compact footprint. Manufactured at the company's factory near Derby, the new ALTERAC machines are available in three sizes - 7.7.5, 10.7.5, and 10.7.7 - their respective X-, Y- and Z-axis movements being 700 x 650 x 500 mm, 1,000 x 650 x 500 mm and 1,000 x 650 x 650 mm. Typical applications are likely to be found in the aerospace, automotive, medical and other industries with demanding inspection requirements.
ALTERAC is equally at home in an inspection department or on the shop floor, especially as pneumatic mounts isolate the CMM well from nearby sources of low frequency vibration such as large machinery. The CMM control may be either stand-alone or integrated into the machine base with a keyboard on an arm at the side, giving the customer a choice that best suits the installation site. The latter option also facilitates relocation of the equipment once installed. The inclusion of Renishaw encoders with 0.05 μm resolution optical scales for high volumetric accuracy not only leads to outstanding metrology but also provides immunity to the ingress of contaminants.
Measurements taken with a touch-trigger probe at a series of points, ideal for acquiring information on dimensional accuracy, is increasingly being augmented by continuous-contact probing (analogue scanning) and laser scanning to allow high-speed collection of data on complex freeform surfaces. ALTERAC measuring machines can deploy all three types of sensor. Such flexible data acquisition boosts measurement throughput to avoid bottlenecks in the metrology department, provides a comprehensive awareness of component conformance, and meets today's manufacturers' requirement for a CMM that underpins concurrent engineering practices to speed time to market for new products.
The CMM structure has been optimized using computer aided solid modelling and finite element analysis, particularly within the bridge section, and is finely tuned to maximize stiffness, reduce vibration and provide smoothness of axis motion, all of which are fundamental to delivering high accuracy measurements. Such is LK's confidence in its design methods that it offers a 10-year guarantee covering dimensional stability.
All guideways use LK-designed, low maintenance, pre-loaded air bearings of wrap-around design offering 3.5 times higher stiffness than standard air bearings. They run with a reduced air film thickness for low energy consumption and give repeatable measurement results, even at fast axis speeds. Friction drives provide smooth motion and exact positioning at continuously varying speeds, as well as zero backlash, overload protection and low maintenance costs.
Careful selection of materials in the machine construction includes, as with all LK CMMs, the use of ceramic for the moving bridge and spindle. It is more than three times stiffer than aluminum yet only one-third heavier by volume, resulting in higher machine acceleration and speed. Ceramic does not stress-relieve like aluminum, leading to better long-term dimensional stability. The thermal expansion coefficient of ceramic, which is like that of granite but four times lower than aluminum's, makes the structure highly resilient to thermal movement. Moreover, ceramic is three times harder than aluminum, so is more resistant to abrasive wear and indentation.
ALTERAC is available with LK's powerful CAMIO8 DMIS-based, multiple-sensor software enabling programming and measurement based on 3D CAD data and comprehensive reporting.


