Inspection

Industry News for Inspection

+ click to show 138 more results
Michelli Weighing & Measurement, a provider of industrial and precision measurement equipment and services, acquiredthe assets of Perry Scale Company, a respected name in the industry since 1936.
General Carbide Corporation, in partnership with Westmoreland County Forum for Workforce Development; held an exclusive student tour at its state-of-the-art manufacturing facility.
A Dormer Pramet pilot project for AI-based quality inspection has been successfully launched in the production unit in Šumperk, Czechia. The company said that the project has opened the door to achieving even higher quality in its Pramet inserts.
The American Ladder Institute is spreading the word about safe ladder practices and training opportunities. Here are safety tips to keep in mind.
Renishaw heads to Eastec to demonstrate its latest smart manufacturing innovation designed to optimize shop floor processes.

With a market full of PPE options, choosing the right safety gear isn’t always an easy task. Plus, finding safe, comfortable PPE that workers will want to wear is more important than ever as the Occupational Health & Safety Administration continues to increase fines.
March is Ladder Safety Month. According to the U.S. Bureau of Labor Statistics, ladder deaths accounted for 161 on-the-job fatalities in 2020, the most recent year for which statistics are available.
Trenton, a manufacturer of machines and tractors used for agricultural applications, has invested in new inspection technologies to improve quality and its processes.
PG Inspection Technologies has acquired the assets of Laser Measuring Technologies, manufacturer of the Accu-Tool and Accu-Edge inspection systems.
​​​​​​​“Before purchasing a Vicivision, we had to use a variety of different machines,” explained a representative for Didimo Zanetti, a leader in the production of gears, as he opens the doors of the workshop and details how quality control worked before investing in an optical measuring machine.
For manufacturers looking to reduce setup times, increase machine usage time and improve the dimensional accuracy of the finished workpieces, touch probes can offer great advantages.
At the U.S. transmission plant of a global automotive manufacturing group, component inspection times have been reduced by half or more by upgrading the company’s coordinate measuring machines (CMMs) to incorporate 5-axis scanning technology in addition to touch probing.
When looking at the place of metrology in the “Fourth Industrial Revolution,” it is interesting to ponder whether Industry 4.0 is being driven by developments in metrology or metrology developments are being driven by Industry 4.0.
Counterfeiting is a challenging problem for bearing manufacturers. Laser marking is one way to overcome this problem.
A safe landing – with measuring technology from BLUM.
To ensure the surfaces on the gears are optimized, it is essential to use metrology tools to analyze, understand, and characterize.
In the cutting tool and toolholder industry, one of the reasons for Big Kaiser's success is its adherence to quality control -- in part by using measurement technology from Kistler to benchmark cutting tools.
The ultimate accuracy and reliability of a machine tool depends in no small degree on the alignment checking during its assembly. Seeking an alternative to traditional error measurement techniques, Hurco Manufacturing Ltd. (Hurco) chose Renishaw’s XK10 alignment laser system to increase both precision and throughput of its machine tools..

Technoset UK specializes in manufacturing highly complex, precision machined components for the aerospace market. After investing in production equipment, the company recently invested in a Vicivision laser-scanning machine.
The Star Cutter Co. in Farmington Hills, Michigan, has promoted Bradley Cooper to service manager at its Elk Rapids, Michigan, location.

Using a Vicivision optical measuring machine to verify quality during grinding and other operations, Italy-based Bavieri Alfeo Precision Mechanics can obtain accurate results in seconds .
Precision aerospace part manufacturer Alloy Specialties is one of the first adopters of a new robotic quality inspection technology, Tempo, from Hexagon’s Manufacturing Intelligence division.
Voestalpine Rotec GmbH, a global leader in the manufacture of precision steel pipes and tubes, integrated an automated Rösler drag finishing system, the R 4/700 SF, that doubled the usable life of stamping tools.
Nightforce Optics in Orofino, Idaho, manufacturers riflescopes and other high-precision optics. To achieve quality specifications, the company upgraded its technology with a new CMM that supports a probe.
Eriez’ new white paper, “Six Ways to Attack Metal Contamination to Improve Product Purity and Avoid Recalls,” covers best practices processing plants should implement to achieve the highest product purity and avoid costly tramp metal damage.
MaTech managed production for years using a project management software and a variety of Excel spreadsheets and manual processes. The company upgraded to an integrated production management system. The ERP software is from Global Shop Solutions.
Marposs, a supplier of measurement, inspection and test technologies, has launched a real-time remote testing and acceptance service.
At Emuge-Franken, manufacturers of threading, gaging, clamping and milling technology, sensors and dynamometers from Kistler are used to aid in the development of new precision tools.
Grinding jobs requires strict tolerances. On grinding machines, the tolerances for the dimensions, form and position of finishing processes run tight, and in many cases, shops check these specifications against hard data. Studer machines can use cameras and laser systems to in-process measurements.
To contact or not to contact. That is the measurement question. Today,  as parts get smaller and more complex, metrology discussions center around contact or non-contact measurement especially as these smaller and more complex components can be damaged by contact with a probe. 

Chicago Jet Group retrofitting a Dassault Falcons plane turned to a leading metrology provider for help in recreating a replica of a cockpit panel to ensure it would fit snugly in the cockpit.. 
From September to November, optical measurement supplier Bruker Alicona is hosting a U.S. roadshow. In more than 20 cities, exclusive demos of their optical metrology equipment will be organized under consideration of COVID regulations.  
Michigan Metrology, experts in solving problems related to surface texture, wear, finish and friction, are now offering courses in surface texture analysis, friction and wear in online formats.
Vision Engineering Inc., a manufacturer of optical and digital inspection and non-contact measurement systems based in New Milford, Connecticut, in June launched a microscope trade-in program for North America. Set up for a trade-in on any microscope, the program in return offers participants a 25% discount on Mantis eyepiece-less microscopes until Aug. 31.
Woodward Inc., with over 50 years of heritage in the aerospace industry, develops and delivers motion control and integrated propulsion systems. Much of Woodward's success can be attributed to an approach of applying total system solutions in meeting the needs of customers and staying at the forefront of served industries.
(Southlake, Texas) -- Two recent personal protective equipment-related projects completed by NVision Inc. demonstrate the growing role that noncontact scanning/measurement technologies have in the race to create products and designs to minimize exposure to COVID-19.
Exact Metrology Inc., a comprehensive metrology service provider, is offering free training videos on the company’s YouTube channel.
Weatherford, Texas – The Coordinate Metrology Society in collaboration with the PrecisionPath Consortium today announced the official launch of their 3D measurement industry-at-large survey at https://uncc.surveyshare.com/s/AYAGK6A.
LK Metrology Inc. has undertaken a targeted CMM assistance program for medical equipment manufacturers that is fully functional and ready to support and enhance their manufacturing capabilities during the COVID-19 crisis.
Wheeling, Illinois – SMW Autoblok, which focuses on the design and manufacture of rotational chucks, stationary workholding, tooling and custom-engineered solutions for the machine tool industry, announced that Shaun Thomas rejoined the Wheeling, Illinois, company as technical operations senior manager.
Exsys Tool Inc., the exclusive importer of Eppinger toolholders, adapters and specialty products, celebrates its 25th anniversary this June. For a quarter-century, Exsys, San Antonio, Florida, has served as an industry-leading supplier of CNC tooling and tool holders, including innovative products like the Preci-Flex modular toolholding system and a wide range of high-precision live and fixed toolholders for turning centers.
Materialise Group spin-off RapidFit has deployed a horizontal-arm coordinate measuring machine manufactured by LK Metrology in Derbyshire, U.K., to check the accuracy of bespoke gaging and holding fixtures produced for the automotive industry.
Of unique importance today is the role of post-process metrology to validate the integrity of AM builds. One specific reason for this importance is that many parts produced by AM end up in safety critical applications where end-use functionality is of vital importance. The nature and relative roughness of AM surfaces, whether analyzing individual layers within a build, or the surface of a finished part render conventional metrology solutions somewhat impotent. In this article, I review developments from Zygo including work alongside Richard Leach that allow for hitherto unattainable metrology results, which are being used to enhance the use of AM as a production technology by making validation protocols more efficient.
The ability to “see through” a solid object was once thought to be a tool of the future, or a power belonging to Superman–but the technology is here today, and more widespread and accessible than you may have though
MC Machinery Systems Inc. announces that Mark Kauffman has joined the team as a regional sales representative for Southern California, Nevada and New Mexico. Kauffman will utilize his industry expertise to increase product sales and customer satisfaction.
The Coordinate Metrology Society (CMS), Weatherford, Texas, announced the launch of the industry’s first Level-One and Level-Two Certifications for traditional coordinate measuring machine professionals. Applicants for the CMS Level-One Certification must submit an application, meet eligibility requirements, sign the CMS code of ethics, and pass a peer review. Candidates for the CMS Level-Two Certification must possess a Level-One Certification, have two years experience using a CMM (minimum 400 hours), and submit an application with two references who can confirm their hands-on expertise.
Markus Stolmar has been elected as the new president and CEO by the board of directors for United Grinding North America Inc., Miamisburg, Ohio.
Continental needed a high capacity system capable of rapid inspection cycles combined with fast surface scanning and accurate feature measurements, the aim being to gain more comprehensive insight into the company’s products. The range includes electronic and hydraulic brake and chassis control systems, wheel and engine speed sensors, airbag electronics and electronic air suspension systems.
Test Equipment Distributors LLC (TED) has appointed Jeff Sengenberger as sales representative for nondestructive testing (NDT) equipment and services. He is responsible for sales and technical support in the Midwest U.S., including Iowa, Illinois, Minnesota, Missouri and Wisconsin.
NVision Inc., in cooperation with the Nasher Sculpture Center in Dallas, is making it possible for those with vision-impairment to interactively engage with some of the great works by modern sculptors. NVision, a leader in 3D noncontact optical scanning/measurement for more than 29 years, recently scanned several sculptures by Auguste Rodin (perhaps best-known for his sculpture, The Thinker) and Julio González for the Nasher. The scanning data was used to 3D-print to-scale replicas of the sculptures for a tactile educational experience for the blind and visually impaired.

The National Institute for Metalworking Skills (NIMS) and the Oregon Manufacturing Innovation Center – Research & Development (OMIC R&D) have united to define a set of Metrology standards and to develop a metrology certification process. Metrology, the study of measurement, has far-reaching applications in the manufacturing industry. The ability to compare and verify a physical part against its CAD model is in high demand, and that demand is predicted to increase.
DAYTON, Ohio—Five-axis coordinate measuring machine OEM AIMS Metrology announced the hiring of Chris Brown as national sales manager.
G.H. Tool & Mold has expanded its capacity and capability by adding a second GOM ATOS Triple Scan high-resolution, 3D optical digitizer for automated measuring and inspection of its casting dies.
Contract inspection and reverse engineering capacity has doubled in terms of throughput, while the size of the component that can be measured has increased more than five-fold at Laser Scanning Ltd., based in Chapeltown, U.K., near Sheffield. It follows the installation of a second, larger coordinate measuring machine built by LK Metrology Ltd. at its Castle Donington, England, factory.
The National Institute for Metalworking Skills (NIMS) has launched a new credential to validate an instructor’s or evaluator’s parts inspection skills.
Swift work by NVision Inc. helped a major U.S. airline quickly repair a bird-damaged Boeing 737 wing and return the restored jet back to flight in just two days. The rapid turnaround helped the airline avoid the financial losses typically incurred by grounding aircraft.
The ability to “see through” a solid object was once thought to be a tool of the future, or a power belonging to Superman–but the technology is here today, and more widespread and accessible than you may have thought. Until recently, the technology of CT imaging was only available for use in medical settings. Over the last several years, it has found a new home in the world of manufacturing, and is opening up myriad opportunities never before available.
All machining operations have inherent variation caused by machine positioning errors, material variances, fixturing, tooling load and thermal changes. Many companies employ metrology at the end of machining to ensure that good parts go out the door, but it does little to improve manufacturing efficiency. Applying metrology before and during machining processes keeps operations in tight control, significantly improving process yield and final part quality at a much lower cost of production.
My latest trip took me to Las Vegas, where I attended HxGN LIVE 2019. Hosted by Sweden-headquartered Hexagon AB, the ninth biennial conference took place June 11-14 at the Sands Expo & Convention Center adjacent to The Venetian and The Palazzo resorts, and I participated in the Hexagon Manufacturing Intelligence division’s media program.
The National Institute for Metalworking Skills (NIMS), in partnership with Festo Didactic, will establish industry-recognized skills standards and ultimately credentials for jobs related to Industry 4.0. In light of the significant trend in digitalization of manufacturing through technology advancements such as Industrial Internet of Things (IoT), training in these skills is vitally needed now. With NIMS’ emphasis on manufacturing skills training, credentialing and standards, plus Festo’s complete Industry 4.0 learning Factories, courseware and eLearning integration, the two organizations are poised to provide the training programs for Industry 4.0.
Industry 4.0 is making inroads into several industrial sectors, creating massive demand for measurement and inspection technologies offering superior reliability precision, and stability. There has been a quantum leap in growth of the global industrial landscape, resulting in higher demands for high-quality precision measuring tools for reduced turnaround time and costs. Rising end user focus on quality-orientated operations as a key to high competitiveness is fuelling investments in the precision measuring tools market. Sensing the importance of a synchronized production as an essential aspect in optimal productivity, operators of manufacturing industries are willing to spend on better-than-the-rest precision measuring tools more than ever before.
For the second time in its North American Headquarters, Zoller Inc. is hosting an Open House and Technology Days Event May 8-9.
As the aerospace industry in Canada and around the world continues to increase its use of automated composite manufacturing techniques to produce large aircraft components, the industry is eager to find solutions to manufacture reliable, safe, and cost effective composite structures. The National Research Council of Canada (NRC) and Fives are working together to improve the efficiency of manufacturing composite parts. They are developing an advanced profilometer that will provide faster and more accurate part inspection.
ST. LOUIS (November 7, 2018)- WB industries, a custom metal and structural fabrication, welding, and precision machining company, announces the addition of Ricky Goble as its Machining Supervisor.
umati (universal machine tool interface) moves one step ahead towards becoming a generally accepted standard. VDW, the German Machine Tool Builders’ Association and the OPC Foundation establish a so-called joint working group. Interested parties are cordially invited to participate with immediate effect.
PROVIDENCE, RI – September 6, 2018 –  Mahr Inc., a provider of dimensional metrology solutions, announced today a three-year extension of the company’s long-standing technology partnership with Joe Gibbs Racing (JGR) to ensure the ultimate quality of designs for its racing teams through the use of metrology.
From a one-man engineering office to a technology and global market leader in just 50 years - a rare occurrence even in south-west Germany with all its "hidden champions." Blum-Novotest GmbH has achieved this not only through hard work but by being innovative, intelligent and diligent. To mark this event, the company held the BLUM TECH-TALK under the title "50 years of Innovation" in a special setting on 7 June 2018: Numerous guests from more than 20 countries heard keynote speeches from leading experts, saw interesting demonstrations in the BLUM Tech-Centre and witnessed the unveiling of a product that combines the experience gained from over 50 years in this field.
Rocklin Manufacturing, Sioux City, Iowa, has a long and storied history that began in 1934 during the height of The Depression. Just 8 years later, founder I.J. Rocklin moved the company to a uniquely constructed, two-story brick building built in 1912. Now, after a massive restoration effort that began in 2016, the company once again is calling this historic building home.
Measuring and gaging are two distinct forms of dimensional inspection. Measuring is a direct-reading process, in which the instrument incorporates a continuous scale of units, against which the part is compared directly. Examples of measuring instruments include steel rules, Vernier calipers and micrometers.
An interview with Nikon's Corporate Vice President Tadashi Nakayama provides insight into the strategy of the firm's Industrial Metrology Business Unit, of which he is deputy general manager. In particular, he explained the company’s strategic focus on Quality 4.0, where digital, automated and connected inspection enables complete process control from design through manufacture.
ZOLLER Inc. welcomed more than 150 visitors to its premier 2-day Open House & Innovations Days event, which took place on June 19th and June 20th at the company's new North American Headquarters and Industry 4.0 Tech Center, in Ann Arbor, Mich. Apart from offering customers, partners, suppliers and the press the opportunity to tour the new state-of-the-art building, the key focus over the 2 days was demonstrating ZOLLER’s ‘Smart Factory” Solutions. The solutions, including tool presetting and measuring, tool inspection, software and automation solutions, offer seamless connectivity at each stage of the production process. ZOLLER’s innovative, Industry 4.0 solutions allow significant time and cost savings for companies of all sizes in diverse industries.
Zoller Inc. hosted its open house and Innovation Days event June 19-20 at the tool presetting and measuring equipment manufacturer’s new facility in Ann Arbor, Mich.
It is certainly not news that, more and more, dedicated gages are being placed at the point of manufacture. Tight-tolerance measurements that were once performed in a semiclean room by a trained inspection technician are now being done right next to the machine, often by the machinist. But just because shop floor gaging has become commonplace, doesn't mean that just any gage can be taken onto the shop floor. To assure good gage performance, there are a number of specifications and care issues which need to be addressed.
When the topic of energy efficiency comes up, energy-efficient machine tools don’t immediately spring to mind. Yet machine tools contain motors and auxiliary components whose energy demand varies widely during machining operations. Happily, a new series of ISO standards can help measure energy supplied and improve machine design and performance.
Mahr Inc. has partnered with the University of Rhode Island’s (URI) engineering department to offer students the opportunity to work on real-world engineering and manufacturing problems. As part of the URI capstone project, students in their senior year are selected to take part in a year-long capstone project focused on automation of submicron precision finishing of ring gages.
When seeking straightness, as well as parallelism, perpendicular end cuts and other important geometric dimensioning and tolerancing features, the goals at Metal Cutting Corp. are cost-effectiveness and high-quality, tight-tolerance parts. To that end, the company finds that using qualitative test methods for straightness and other features consistently helps keep production costs under control while delivering the results that customers need.
If a spindle breaks down, what is your company’s plan of action? Is it the most practical and efficient way to deal with a down spindle? Spindles need maintenance at varying intervals based on the length and design of their operation. Normal use of any machine will cause wear and tear, the spindle being the component that receives the majority of the wear. It is necessary for spindles to run at the right speeds and feeds to minimize wear. Because of this, a good spindle program should consider the specific operational information of each individual spindle.
Last week's blog post on the successors of Rosie the Riveter inspired a reader to share her own experience as an early woman in manufacturing. Lois Anderson was tasked with walking into plants in Southwestern Michigan to convince dubious managers and workers to use new methods to improve their production quality and efficiency. In the end, she helped them excel.
Easy, accurate tracking of items through the manufacturing process is becoming more and more important in the quality-conscious 'Smart-Factory' era. RFID tagging has distinct advantages as a tracking method, but barcode scanning has its adherents too.
In the digitized manufacturing world being born, the product that a job-shop produces is less a piece of engineered metal and more a piece of intellectual property. So said Tom Kelly, the executive director and CEO of Detroit’s Automation Alley. That difference brings risks but also unprecedented opportunities for those who are ready.
I attended ‘Integr8,’ an Industrial Internet of Things conference hosted by Automation Alley at Detroit’s Renaissance Center last month. At numerous breakout sessions, a common question from participants was, “How do I get started with getting my shop floor connected?” This was an event full of experts enthused by the possibilities that IIoT hold for manufacturers, so I was pleasantly surprised to hear many of them reply, in effect: “With moderation.”
Frost & Sullivan's latest analysis, "Adoption of IIoT in the Global Test and Measurement Market, Forecast to 2022," finds that the value of the Industrial Internet of Things in test and measurement market is expected to reach $104.8 million by 2022 growing at a compound annual growth rate of 6.7 percent from 2016. The research assesses market dynamics including trends, drivers, restraints, forecasts, mega trends and industry convergence implications, and opportunities in end-user verticals.
Kitagawa-NorthTech Inc., Schaumburg, Ill., which specializes in standard chucks, advanced chucks, custom-engineered workholding and steady rests, announced that Shawn Luschei has rejoined the company as senior manager of sales for North America.
Like most of us, Jay Hegemann deletes a lot of emails every day. Everything from miracle cures for baldness to special offers from credit card vendors go right into the trash. However, something about the email from Keyence’s sales engineer earlier this spring caught Hegemann’s eye and he decided to take another look. It’s a good thing, because the product advertised in that message has been a game changer for this small manufacturing firm.
User error is a more common cause of unplanned downtime in the manufacturing sector than almost any other sector, according to a new Vanson Bourne global study, sponsored by ServiceMax from GE Digital. Unplanned downtime triggered by user error is 23% compared to as low as 9% in other sectors. (And did that robot just snicker?)
A survey designed to assess manufacturers’ preparedness for Industry 4.0 changes polled 537 manufacturing executives across eight industry segments. The vast majority of manufacturers surveyed have recognized the need for industrial transformation, with most already taking action. Those that have done so say they are already seeing benefits as a result.
Most inspection-in-manufacturing features these days are about precision metrology equipment. This one is about people. More frequent rotation of (human) plant inspectors at medical device manufacturing facilities could benefit consumers and lead to fewer product recalls. That's the finding of a seven-year review of Food and Drug Administration inspections of and subsequent recalls at such facilities.
FANUC America has selected HEIDENHAIN’s tocuh probes for use and training on its popular ROBODRILLs in its recently expanded CNC machining laboratory in Hoffman Estates, Ill.
Vision Engineering Ltd. announces the loss of founder Rob Freeman, MBE, who passed away on Aug.19, aged 84.
Hexagon Manufacturing Intelligence North America hosted an exclusive celebratory event and book signing Aug. 21 to recognize the nearly 185-years of Rhode Island’s rich industrial history. The event showcased Gerald Carbone's new book titled "Brown & Sharpe and the Measure of American Industry,honoring the legacy of Henry D. Sharpe Jr.
Vision Engineering Ltd., Surrey, United Kingdom, a manufacturer of ergonomic inspection and measurement microscopes, opened its new global headquarters.

Articles on Inspection

+ click to show 170 more results
Author:
Column: Productive Times
Published:
Author: Brandt Taylor
Column: Machinist's Corner Column
Published:
Author: William Leventon
Column: Machine Technology Column
Published:
Author: Alan Richter
Column: Feature Article
Published:
Author: William Leventon
Column: Feature Article
Published:
Author: William Leventon
Column: Feature Article
Published:
Author: Brandt Taylor
Column: Machinist's Corner Column
Published:
Author: Edmund Isakov, Ph.D.
Column: Feature Article
Published:
Author: William Leventon
Column: Machine Technology Column
Published:
Author: Edmund Isakov, Ph.D.
Column: Feature Article
Published:
Author: Edmund Isakov, Ph.D.
Column: Feature Article
Published:
Author: Edmund Isakov, Ph.D.
Column: Feature Article
Published:
Author: Kip Hanson
Column: Feature Article
Published:
Author: Christopher Tate
Column: Feature Article
Published:
Author: Jeffrey A. Badger, Ph.D.
Column: Ask the Grinding Doc Column
Published:
Author: Edmund Isakov, Ph.D.
Column: Feature Article
Published:
Author: Edmund Isakov, Ph.D.
Column: Feature Article
Published:
Author: William Leventon
Column: Machine Technology Column
Published:
Author: William Leventon
Column: Machine Technology Column
Published:
Author: William Leventon
Column: Feature Article
Published:
Author: Kip Hanson
Column: Feature Article
Published:
Author: Kip Hanson
Column: Feature Article
Published:
Author: Kip Hanson
Column: Feature Article
Published:
Author: Steven Anderson
Column: Shop Operations
Published:
Author: William Leventon
Column: Machine Technology Column
Published:
Author: Robert Weinstein
Column: Look Ahead Department
Published:
Author: Holly B. Martin
Column: Feature Article
Published:
Author: Jeffrey A. Badger, Ph.D.
Column: Ask the Grinding Doc Column
Published:
Author: Alan Richter
Column: Feature Article
Published:
Author: Christopher Tate
Column: Feature Article
Published:
Author: William Leventon
Column: Machine Technology Column
Published:
Author: Keith Jennings
Column: Manager's Desk Column
Published:
Author: Keith Jennings
Column: Manager's Desk Column
Published:
Author: William Leventon
Column: Feature Article
Published:
Author: Doris Schulz
Column: Feature Article
Published:
Author: Alan Richter
Column: Feature Article
Published:
Author: Robert Weinstein
Column: Look Ahead Department
Published:
Author: Robert Weinstein
Column: Look Ahead Department
Published:
Author: Robert Weinstein
Column: Look Ahead Department
Published:
Author: William Leventon
Column: Machine Technology Column
Published:
Author: John Hagan
Column: Feature Article
Published:
Author: Dr. Scott Smith
Column: Machine Technology Column
Published:
Author: CTE Staff
Column: Feature Article
Published:
Author: Dr. Scott Smith
Column: Machine Technology Column
Published:
Author: Michael Deren
Column: Machinist's Corner Column
Published:
Author: Daniel McCann
Column: Feature Article
Published:
Author: Dr. LaRoux K. Gillespie
Column: Feature Article
Published:
Author: Steve Logee
Column: Feature Article
Published:
Author: Alan Richter
Column: Feature Article
Published:
Author: Bill Kennedy
Column: Feature Article
Published:
Author: Susan Woods
Column: Feature Article
Published:
Author: Bill Kennedy
Column: Feature Article
Published:
Author: Susan Woods
Column: Feature Article
Published:
Author: Charles Russell
Column: Feature Article
Published:
Author: Susan Woods
Column: Feature Article
Published:
Author: Greg Landgraf
Column: Feature Article
Published:
Author: Alan Richter
Column: Feature Article
Published:
Author: Rich Dzierwa
Column: Feature Article
Published:
Author: Kip Hanson
Column: Feature Article
Published:
Author: Edmund Isakov, Ph.D.
Column: Feature Article
Published:
Author: Michael Smith
Column: Feature Article
Published:
Author: Martin Eastman
Column: Feature Article
Published:
Author: Kevin Harding
Column: Feature Article
Published:
Author: Martin Eastman
Column: Feature Article
Published:
Author: Thomas Service
Column: Feature Article
Published:
Author: Steve Pike
Column: Feature Article
Published:
Author: Lisa Mitoraj
Column: Feature Article
Published:
Author: James Mullineaux
Column: Feature Article
Published:
Author: Lisa Mitoraj
Column: Feature Article
Published:
Author: Paul Sagar
Column: Feature Article
Published:
Author: Keith Mills
Column: Feature Article
Published:
Author: Christopher Tate
Column: Feature Article
Published:
Author: Christopher Tate
Column: Feature Article
Published:
Author: Keith Jennings
Column: Manager's Desk Column
Published:
Author: Christopher Tate
Column: Feature Article
Published:
Author: Christopher Tate
Column: Feature Article
Published:
Author: Robert Weinstein
Column: Look Ahead Department
Published:
Author: Robert Weinstein
Column: Look Ahead Department
Published:
Author: Greg Bartlett
Column: Feature Article
Published:
Author: Greg Bartlett
Column: Feature Article
Published:
Author: Dan Davis
Column: Get With The Program Column
Published:
Author: Dan Davis
Column: Get With The Program Column
Published:
Author: Michael Deren
Column: Machinist's Corner Column
Published:
Author: Robert Weinstein
Column: Look Ahead Department
Published:
Author: Alan Richter
Column: Feature Article
Published:
Author: Michael C. Anderson
Column: Feature Article
Published:
Author: Michael C. Anderson
Column: Look Ahead Department
Published:
Author: Michael Cope
Column: Machine Technology Column
Published:
Author: Kip Hanson
Column: Feature Article
Published:
Author: Kip Hanson
Column: Feature Article
Published:
Author: Alan Richter
Column: Productive Times
Published:
Author: Tom Lipton
Column: Shop Operations
Published:
Author: Michael C. Anderson
Column: Feature Article
Published:
Author: Michael C. Anderson
Column: Feature Article
Published:
Author: Kip Hanson
Column: Feature Article
Published:
Author: Alan Richter
Column: Productive Times
Published:
Author: Michael C. Anderson
Column: Look Ahead Department
Published:
Author: Christopher Tate
Column: Feature Article
Published:
Author: Alan Richter
Column: Feature Article
Published:
Author: Michael C. Anderson
Column: Feature Article
Published:

Videos on Inspection

+ click to show 48 more results
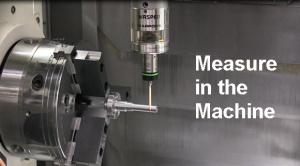
Marposs WRSP60 scanning probe with radio data transmission performs profile and surface contact scans on newly worked parts as well as measurements for run out, roundness and concentricity evaluation directly inside the machine.
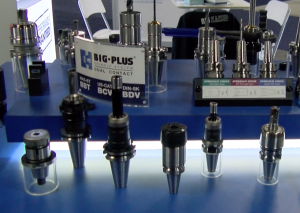
Cutting Tool Engineering's video booth visit with BIG DAISHOWA Inc. at EASTEC 2021 covers an array of the company's latest products.
Confirming that your parts are properly supported and ready for clamping has never been easier and more reliable. Be confident your part is safe and secure every time with Vektek’s latest Part Present Sensing Work Support. To learn more, please enjoy this short instructional video.
Join Zoller's tool inspection solutions experts, Werner Lueken & Matt Brothers, for a special edition of the ZOLLER75LIVE event series on May 19/20 as we unveil the latest ZOLLER Innovation in tool inspection — the »genius« — during a live broadcast from our North American Headquarters in Ann Arbor, Michigan.
Marposs’ WRSP60 scanning probe with radio transmission enables complex measurements quickly and directly in the machine environment, helping increase quality and productivity, while providing opportunity for real-time monitoring of production processes. 
Marposs provides a full range of top-quality, innovative solutions for real-time tool and process monitoring and detection of machine conditions to improve machine efficiency, deliver higher quality and reduce costs.
Leading manufacturers in the cutting tool industry know there are many factors that contribute to producing superior quality tools.
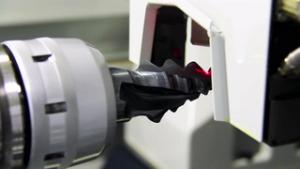
With LaserPlus from ANCA, operators can measure tool geometries in process to within +/- 2 µm or less. The laser measurement and compensation system is available as an option in select ANCA machines.
Marposs Monitoring Solutions can monitor both machines and machine processes by detecting machine conditions and mitigating crashes while providing vital data on the condition of machine components, supporting predictive and preventive maintenance.
See how the PRAB Guardian recycles your spent cutting fluids
The new NC4+ Blue system is designed to help machine shops across many industries
Koma Precision has introduced a new line-up of offline tool presetters focused on increasing a shop's current production capacity at an affordable cost.
Society's rapid digitalization brings opportunities for the manufacturing industry to overcome challenges, minimize waste and ultimately become more profitable.
Non-contact laser tool setting systems use a beam of laser light passing between a transmitter and a receiver. Positioned correctly these systems can also be used to measure geometry and detect broken tools.
Renishaw plc recently posted a brief video to YouTube that offers an overview of the company's new SPRINT system with SupaScan. The system is designed for simple integration into machine tool applications requiring exceptionally fast workpiece set-up, and where overall cycle time is critical.
Highlighting the benefits of modular metrology fixtures versus traditional methods, this brief video covers the differences in set-up times, ease of set up, inspection repeatability, part stability and metrology accuracy.
The new M4 Inline part marking system from Dapra Marking Systems, Bloomfield, Conn., is a turnkey solution that features an integrated 16 bus card and is said to eliminate the need for vision identification/control equipment, making the system ideal for efficient, cost-effective inline part marking for everything from automated production lines to manual loading stations and custom-engineered systems, according to a Dapra news release issued Jan. 25.
The 3D-Sensor New Generation from Haimer USA LLC builds on the success of its predecessor, the Haimer Universal 3D-Sensor, according to a Haimer USA blog post dated Jan. 12. The 3D-Sensor New Generation reportedly features enhanced mechanics, a compact and easy-to-grip casing, and a large 1/100mm dial gauge with two easy-to-read hands.
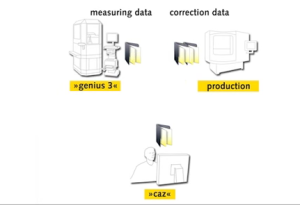
Another recent Zoller innovation is »caz« software – Computer-Aided Zoller, the virtual measuring machine. “It’s going to be a huge time-saver,” Matt asserted. “Previously we would have to create the inspection program in front of the inspection machine. Since our Star Cutter tool grinding machines come with Numroto operating software, we can export the tool model from the Numroto machine programming software as an STL file, including a 3D image, and write the inspection program from that before the tool is even ground.”
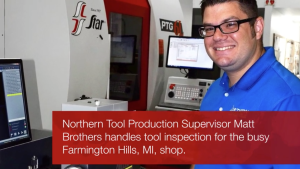
Northern Tool, a division of Star Cutter Company, Farmington Hills, MI, is well-known for designing and producing special carbide cutting tools, often for automotive powertrain production, that accomplish more than one cutting operation in a single pass.
Zoller unveils 3D Check, Titan and cost per click calculator at IMTS 2014.
Zoller displays its 3D Check machine during IMTS 2014.
Röhm Products of America’s F-senso pull-in force measurement device enables you to check the pull-in force of your tool clamping system. The regular monitoring of the pull-in force makes it possible to detect changes in the clamping strength before they have an effect on the quality of processing.
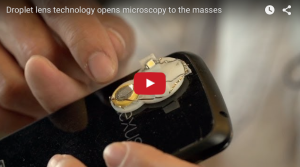
Scientists at the Australian National University have invented a method to make a high-powered lens that can transform a smartphone into a high-resolution microscope, according to the university. The lenses are made by using the natural shape of liquid droplets, and can cost less than a penny to produce.
A Rockwell Automation representative talks about the Ethernet trend based on open standards and how its potential application for many industries. The video captures a robot arm sorting and aligning pucks. Driving the automation are Stratix switches, which were jointly developed by Cisco and Rockwell Automation.
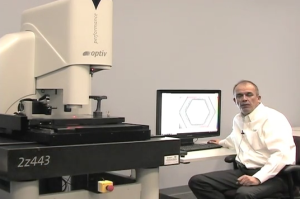
Hexagon Metrology's Gary Hobart, the company's national sales manager, demonstrates the Optiv Performance multisensor optical measurement system equipped with a rotary table and a chromatic white-light sensor.
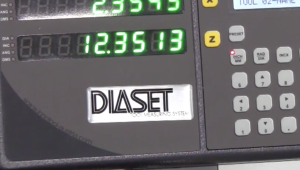
The Diaset is an ideal bench-top machine for shops looking for an economical, yet precise, tool measuring and presetting system. The Diaset features a stable measuring column and base made of mineral cast; a large multi-functional readout; fine-adjust handwheels; pneumatic locking; serial printer port for labels; and adapters for most taper types.
The portable coordinate measuring machine (CMM) arm-free probing system HandyPROBE and the C-Track dual-camera sensor form a unique duo that generates high accuracy measurements and increases the reliability and speed of the measurement process.
Jesse Garant & Associates Metrology Center provided a brief animated view of various computed-tomography scanning analysis systems.
Inspection is a crucial process in the making of safety-critical medical components. One shop offers a glimpse into its process.
Thomas Hoenig, president of GTI Spindle Technology Inc., Manchester, N.H., discusses how Apple's new iPad technology is changing the face of vibration analysis in manufacturing. Presented as part of Cutting Tool Engineering's Fast Track Seminar series hosted at our booth during IMTS 2010, Hoenig's seminar includes a brief demonstration of the iPad at work.
Focus Variation, the technique behind Alicona's Infinite Focus 3D optical metrology system, has enabled EDM Department, Bartlett, Ill., to measure and see what it is making down to 1.7µm tolerances. Watch this brief report to see the system in action and learn about how EDM Department implemented the system.
Acoustic emission (AE) sensors detect ultrasonic sound waves emitted when the grinding wheel contacts a part or the dressing wheel and send that information to a process control unit. Monitoring the sound waves and comparing them with reference values allows operators to control the grinding and dressing processes. Variations in acoustic emissions indicate changes in cutting forces, which can then be modified. Some AE sensors are stationary while others rotate with the wheels.

Products for Inspection

+ click to show 945 more results
The Starrett AVR400 offers full CNC capabilities including X-Y-Z positioning and comprehensive zoom and telecentric lens options. Users can also choose to use motorized manual positioning via a pendant with a joystick and track ball. Equipped with the M3 software package from MetLogix™, a traditional mouse as well as a touchscreen monitor make user interaction easy and intuitive.
The NVH G-EAR system can identify potential gear defects at the component level prior to gear box assembly. It works on the Single Flank testing principle where one master gear meshes with the component under inspection, detecting macro-geometry (nicks, runout etc.) and micro- geometry (gear mesh excitation, ghost orders) defects that cause gear whine and noise phenomena.
The versatility of the Protomar Mini is proven through its application in multi-diameter machines, such as grinders for broaches or turbine blades. What sets it apart from conventional measurement systems is its ability to eliminate the setup and zeroing procedure on a master workpiece for the various diameters across its measuring range. Protomar Mini provides absolute measurements across its 100mm measuring range, eliminating the need or retooling when changing diameters. Operators can achieve exceptional measurement performance with 2.5μm repeatability, ensuring uninterrupted productivity and significant reductions in setup time.
SG SmartCapture software offers a direct PolyWorks Plug-In for streamlined workflow, GD&T measurements and fitting with SmartProfile integration, and STEP file reverse engineering for automatic CAD conversion. Fully supported robotic integration is available for automatic part handling and sorting.
At the core of M-Series systems is the patented* IntelliCentric-M Optical System which features fixed optics with a 20-megapixel camera and proprietary Virtual Zoom. Built from the ground up at OGP headquarters in Rochester, NY, the streamlined IntelliCentric-M optics employ a variety of exclusive technologies allowing for instant magnification changes throughout the same zoom range as a traditional mechanical zoom system, resulting in faster runtime while requiring far less downtime for maintenance.
The cam followers incorporate a polymer layer that is molded directly onto the IKO exclusive thin-walled steel outer ring. This construction solves the dilemma of being able to install a cam follower with special polymers, offering self-lubricating and shock-absorbing properties into existing applications. 
The system uses a confocal chromatic measurement principle, where different wavelengths of light focus at different distances, allowing for precise measurement of the strip’s micro profile. This data is used to calculate key roughness parameters such as Ra (arithmetic average roughness), RPc (peak count), and Wsa (waviness). By integrating this solution into a production line with a traversing unit, EMG SORM® provides continuous roughness and waviness monitoring across the entire width and length of the strip, ensuring comprehensive surface quality assessment.
With a choice of three stands and two lenses, OPTA redefines the entry point for users to benefit from Vision Engineering’s exceptional image quality, ergonomic design and ease of use.
Equipped with high-resolution cameras and custom lenses, the VisionLab-X-300 handles parts up to 12 inches (300mm) in length and 2 inches (50mm) in diameter, offering precise measurements for complex features (achieving part measurements within two microns). Enhanced slewing optics allow for accurate pitch diameter and root radii measurements, while the bottom vision system—featuring a rotating sapphire stage and LED front lighting—supports thorough inspections of internal and external diameters, concentricity, roundness, thickness, and head stamp details.
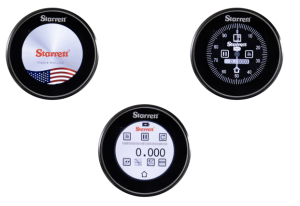
Supporting Industry 4.0, IoT and the Digital Factory, all of the W4900 Indicators will be integrated with the Starrett DataSure 4.0 Wireless Data Collection System for automated wireless measurement data capture and transmission. Attendees can collect and transmit measurement data instantly for analysis to Starrett associates in the booth who will be running the DataSure mobile application, and be available to review the results and discuss any specific application requirements and questions.
EMG SORM is a state-of-the-art measuring system based on the confocal chromatic principle and is suitable for both online roughness and online waviness measurement of surfaces. It delivers precise, fast and non-contact roughness and waviness measurements calculated in accordance with the definitions of DIN EN 10049 and the SEP 1941 testing sheet. This makes EMG SORM® an indispensable tool for quality control and ensuring the surface condition of cold-rolled flat steel products. Thanks to its versatility, it can be used for different surface structures without adjustments and ensures reliable measurements at a production speed of up to 350 m/min.
The Surface Measure 1008S aims to disrupt the surface measurement processes across a wide range of industries, offering unprecedented precision and accuracy, even with in-line and near-line shop floor applications. The SM1008S leverages a propriety Mitutoyo optical system alongside our traditional sensor technology to deliver versatile performance that includes 2D profile measurements and comprehensive 3D dimensional inspections.
TraceBoss+ software interfaces with most portable surface roughness gages. A user can take a measurement, view the results and graphics full screen, save data, and reload it for comparison and statistical process control. It reports most common roughness parameters, showing at a glance whether a surface passes or fails user-provided limits.
Now, My rConnect is completely cloud-based, so as long as a computer is connected to the same network as their current GFMS machine, that machine is connected to My rConnect. However, GFMS machines that don’t have network access and are connected to the Internet can also use My rConnect.
The L-703SP System is 30-40% faster than electronic levels, more rugged and reliable, and more repeatable from one tech to the next. In addition, the L-703SP is set up directly on surface plates, so each line segment setup is much easier than autocollimators and laser interferometers, which require floor mounting and touchy setups. This results in 50-60% faster plate calibrations and, unlike these devices, does not require re-taking data if the laser beam is broken.
The headset works much like a smartphone. It communicates through Wi-Fi or the mobile network and the user connects to AP&T’s support through Teams or the like. Why not just use a mobile phone then?
The PC-based "iShield Archive Tool" (iAT) software is used to set up the card. Both the security parameters and user PIN are configured here. Following the initial configuration, iShield Archive securely stores data in the end device and uses hardware AES-256-bit encryption to protect it.
The airbrush is easy to operate and merely requires the flow rate to be set. The airbrush works most accurately at a constant pressure of approx. 1-2 bar which is set individually.
The airbrush is solid and robust, resulting in a long tool service life. The wooden handle facilitates ergonomic, balanced handling.
Renishaw Central is a smart-manufacturing data platform that collects, presents, and initiates accurate process and metrology data. The platform connects to measurement devices across the manufacturing process and provides valuable insights that manufacturers can use to analyze, identify, predict, and correct process errors before they occur. 
The DSC 5+, equipped with FlexMode functionality, is the first ever DSC capable of measuring in two different measurement modes. This allows users to run DSC measurements to be carried out in either power compensation mode or heat flux mode, therefore optimizing the measurement conditions for the application needs. The optimized measuring cell design is thermally isolated from the environment providing world-class enthalpy reproducibility and cp accuracy.
High pressure gases create high frequency turbulence when moving into an area with lower pressure, creating an ultrasonic or “white noise” sound that is beyond the range of human hearing. The ULD can detect these vibrations, creating an audible sound through supplied headphones as well as indicating intensity via front-facing LED display as it moves closer to the leak origin.
Along with E7, E45 features the brand-new fixed lens IntelliCentric™ optical system - a fully telecentric optical system providing super high-resolution images, perfectly suited for video edge detection metrology. The digital zoom allows for instantaneous magnification changes, while the standard all-LED lighting system illuminates parts from all angles. E45 features a generous stage to handle large parts or a variety of smaller parts.
The LH-600F now features a touch screen interface that allows for easy and intuitive operation, allowing users to measure with the press of a button or through touchscreen icons. The rotatable and adjustable display of the LH-600F also allows for use from both front and rear orientations as well. There are new output options including a Digimatic output that allows data to be sent directly to Excel or SPC software, wired or wirelessly, while maintaining USB and RS232C output capabilities.
Mantis 3rd Gen features include; improved optics for both hand-to-eye coordination and excellent depth perception, a 3-position turret to house up to 3 objectives ranging from 3x to 15x, the introduction of an 8x super long working distance lens, five different illumination options providing flexibility to optimize the lighting to view the perfect image, and the Mantis PIXO offers an improved, higher resolution camera for image and video capture. The system also features an option to switch between white light and UV light using a toggle switch.
Igaging EZ-View DRO Plus Digital Scales with Remote Readouts for horizontal or vertical measurements, with absolute encoders, are available with measurable ranges of 0-6”/150mm, 0-12”/300mm, 0-24”/600mm, 0-36”/900mm from KBC Tools & Machinery.  They have a resolution of .0005”/.01mm/1/128”.  Igaging EZ-View DRO Plus Digital Scales with Remote Readout Kits come complete with on/off button, present button, hold button, origin button, a 76” remote cable length, mounting brackets, 3V CR2032 battery,and an articulating arm to allow for stacking multiple displays
Continuously improved by customer input and rigorous usability testing, the new SPECTROLAB S LAS02 features proprietary CMOS+T technology to identify and measure, with high accuracy and precision, all elements in incoming, in-production, and out-going materials as well as in researching new materials. The new analyzer is ideal for primary and secondary metal producers, automotive and aerospace manufacturers, and makers of finished and semi-finished goods.
Designed for touch-trigger probing only, the CMM is capable of capturing precise measurements very rapidly, as it is able to deploy a motorised PH20 5-axis probe head from Renishaw for a three-fold increase in inspection speed. Continuous angular rotation and infinite positioning (similar to the company's top of the range REVO2 probing system) avoids having to move the machine's X, Y, and Z axes at high speed, minimising dynamic errors. For some measurements in a cycle, it is not necessary to move the linear axes at all. The results are better accuracy and repeatability.
The Swissbit Device Manager is the systematic further development of the successful Swissbit Lifetime Monitoring Tool, whose feature set and ease of use have now been expanded even further. All the benefits of a complete monitoring and system tool are provided by the SBDM. This includes both the standard S.M.A.R.T. parameters (Self-Monitoring, Analysis and Reporting Technology) as well as the utilization of the individual flash blocks. Important telemetry data, general device information like serial number or firmware version, utilization statistics like NAND flash erase cycles, and ECC/CRC counters are all visualized using SBDM. The history of all these values is recorded for each memory device.
The durable construction of both L-Series models consists of a long, thin, and rigid stainless-steel tube body. The tube features a lens on one end and a light source (sold separately) on the other. The tube further contains an optical fiber bundle that transmits light from an external light source, thereby illuminating the area under inspection. The image is then transmitted by the fiberscope lens to an eyepiece or camera for remote viewing and diagnostics.
Two variants are available. The VOXLS 30 C 450 is ideal for inspecting tall samples such as a large turbine blade. The VOXLS 30 M 450 is defined by its ability to be equipped with an internal autoloader for holding multiple samples. They may be scanned without operator intervention, freeing up personnel for other duties and facilitating unattended operation overnight and at the weekend, resulting in a big increase in productivity. In combination with external robotic handling and the Nikon Automation OPC UA Interface, both systems are compatible with fully automatic, closed-loop inspection at high speed in a Quality 4.0 production line environment.
Nikon emphasizes that the VOXLS 40 C 450 is just the first of a next generation of X-ray CT systems of similar construction, featuring a single-piece cabinet, the same metrology-grade manipulator concept, Nikon’s unique microfocus X-ray sources, and extensive CT acquisition technologies. The upcoming models will broaden the range even further to provide users with more options that will not only meet their immediate business and technical requirements, but will also help them to identify new opportunities and raise operational efficiency.
Powered by a Nikon 225kV microfocus source, the innovative systems feature the company’s Rotating.Target 2.0, which is unique in the industrial sector. It results in high resolution X-ray images to enable even the smallest defects inside an object to be identified quickly, easily, and non-destructively. Speed of operation is enhanced using Nikon’s extensive CT acquisition technologies and reconstruction algorithms, making the systems ideal for automated inspection applications on the shop floor.
Featuring a 1:4 zoom ratio, the Titan Tool Supply Model ZMM-1 industrial inspection zoom microscope offers constant focal length, highly favorable depth of field, a large field of view at 15X magnification, and a higher magnification with smaller field of view at 60X as standard. When used with the optional extra 20X eyepiece, the Model ZMM-1 can additionally perform reliable and accurate remote visual inspections of a workpiece over an expanded magnification of up to 120X –all without the need for a change of lens.
The density determination solution is a metrological system which has been developed for the rapid and highly accurate density determination of components, and has a particular significance when analysing AM-produced parts. Porosity in AM parts can be a problem because it can weaken the mechanical strength and stability of the parts, reduce their durability, and make them more susceptible to failure under stress. Porosity can also affect the thermal and electrical properties of the parts and make them less resistant to high temperatures, corrosives, and other environmental factors.
The results of a single dispense of up to 12 channels are calculated in under one minute. The unique and innovative XPR105MCP tests each pipette channel individually on the same load cell to ensure equal measurement performance. The load cell is protected from any spills to ensure lifelong performance.
The measurement targets are distributed uniformly at intervals of approx. 100 millimetres across the entire Target-Net. The Target-Net itself measures 1500 x 2500 millimetres and has in total  approx. 300 measurement targets. Thanks to the high measurement target density, several scans can be performed very quickly from different perspectives.
Mx 9.1 software extends Zygo’s collaborative metrology software with Asphere+ Analysis functionality, providing a common toolset to explore aspheric surface data obtained using any instrument. Best-fit prescriptions can be obtained for a wide range of surface types, and the 3D deviation between part and design can be examined and exported for process control feedback
With the use of the PM controller, several times stiffness is achieved compared to solutions using capillaries. This produces extraordinarily high stiffness with respect to radial, axial and moment loads. With the help of extensive computer programmes, an optimum in dimensioning is achieved regarding dynamic loads, so the best-possible damping is achieved. By precisely determining the limits of use and loads, an optimum in functional reliability is achieved.
The system recorder eliminates the ambiguity in diagnosing issues by recording all changes in their programming code for several minutes before and after an event takes place. Users can review the changes that took place in their code leading up to and after the event. In addition, the system recorder allows users to record the data visually, in video format, directly to the module to note environmental conditions that the code cannot see.
The blast specimen created by the Guyson Institute of Standards determines a specific Ra value on a calibrated profilometer which will enable the user to correctly match that Ra Value on a product finish. All previous Ra measurements up to this point, are inconsistent because there was no scientifically certified specimen to determine the gloss value of a non periodic finish.
The IDC and IDF series Digimatic Indicators have new designs and functions. Improvements include higher resolutions down to 20μinch / 0.5 μm, a built-in Calibration date warning, larger LCD and “analog” bar, and new S1 output (bidirectional communication) which allows settings to be changed through the new USB ITPak 3.0 software (free and paid versions).
The Acoustic Performance Measurement (APM) system is capable of monitoring the parameters of ultrasonic frequency and power in-line at each processing station and for each batch. Special directional microphones are used for this, which are placed in a fixed position at the edge of each tank, and directed towards the centre of the bath surface. Thus, measurements are carried out without any movement or contact, ensuring reproducible results and enabling them to be precisely assigned to the batch concerned. Analysis, evaluation and storage of the data are carried out by the software of the innovative measuring system.
The DAX® linear encoder is suitable for measuring positions in many applications, including injection molding machines, presses, automotive machinery, printing and packaging machines, wind, hydro and solar plants, in wood processing, or medical technology.
As it is automated, reconstruction by Dual.Material CT is highly repeatable from component to component and does not require advanced knowledge of scanning techniques when inspecting assemblies comprising two materials of different densities. QC productivity is raised by enabling better visualization and more accurate definition of defects (on the surface or inside a component) in a fraction of the time taken by traditional CT image reconstruction. The high-speed scanning, and the fact that no manual data editing is required thanks to the new software and automated part handling, enables fast and automated quality control of dual material assemblies in a production environment, consistent with the requirements of Quality 4.0.
Nikon's alignment with the industry-standard OPC UA communication protocol reaffirms its dedication to developing fully automated, non-contact, X-ray CT quality control systems for the shop floor. There is a growing, industry-wide trend towards using this technology for feeding back data in real time to optimize production line operation – the goal being zero defects. X-ray CT is especially relevant, as it is able to inspect and measure the interior of components non-destructively as well as the exterior.
A spray with which workpiece dimensions and colour values can be digitised in one scan: AESUB transparent. The workpieces are sprayed uniformly with AESUB transparent from a distance of 15 to 20 centimetres. After just a few seconds, a matt, transparent layer is generated on the workpiece’s surface. In addition to capturing the surface contours, optical scanners can simultaneously capture the colour values of the object being measured. 
Hamar Laser’s L-703B Self-Centering Bore Alignment System makes bore alignment easier and up to 75% faster than competing systems. The new L-703B Laser replaces the L-705 Laser for applications where the laser is mounted externally. Smaller and lighter than the L-705, the L-703B works with Hamar Laser’s patented, self-centering targets that require only one measurement per bore. Applications include engine blocks, compressor bores, cylinder bores, shaft bearing bores, stern tubes and more.
Swissbit's S-600 series is the first range to incorporate the new Hyperstone S9 NAND Flash Controller, explicitly developed for use in industrial applications. Unique firmware features guarantee an extended lifetime of safe and reliable storage of even the smallest data. First-class data preservation and data integrity is delivered in all situations: in high temperature conditions, through non-continuous writes, or sudden power failures.
In a typical application, the Duo Air offers linearity of < 0.4% of the working range, repeatability of < 0.15 µm, noise of <0.1µm, resolution of 0.01 µm and a response time of only 200 milliseconds.
Using NextMeasure is easy. Once the software is downloaded, anyone on the team is able point and click to take the required measurements. Because the solution is universal and works with all major sensors and portable measurement devices, upgrading and evaluating equipment is straightforward; multiple platforms can be evaluated from a single user environment.
The TraceBoss software interfaces with most portable surface roughness gages via a USB connection. One click in TraceBoss configures the gage, initiates a measurement, and presents the results and graphics full screen and in high resolution. The software display is optimized for the highest visibility in shop environments.
The laser profilers project a laser line on the gear at a specific angle, collecting data to generate the entire Z-X profile through an image sensor placed behind the optical receiver. The gear is then quickly rotated 360° to collect data points from movement along the Y axis, which is combined with the Z-X profile to create a complete 3D reconstruction of the part, made possible through specific software algorithms. The system then executes the requested measurement and inspection tasks. Line operators can easily review images and navigate to the desired level of detail to identify any anomalies.
The TD 110 tool breakage sensor can be placed in the work envelope so that it is fast and easy to reach during the tool change. The inductive sensor can detect tools as they pass by while they are spinning at their operational speed.  Thanks to its rapid scanning technology, even very small tools made of HSS steel and carbide are detected.
The system comes with a choice of two different touch probes. The UWP45 is a 45mm diameter touch probe ideal for multi-axis machining centers and compatible with the Marposs T25, TT25, TT30 and T25P probe ranges. The UWP60 is a 60mm diameter touch probe that is suited for use on large scale workstations and vertical lathes. It can be configured for use with Marposs T25, TT25 and T25P probes with extensions up to one meter in length. 
OGP has reimagined the trusted SmartScope system to be accessible for all skill levels and budgets. SmartScope E7 features the brand-new fixed lens IntelliCentric optical system, a fully telecentric optical system that provides a super high-resolution image perfect for video edge detection. The digital zoom allows for instantaneous magnification changes, while the standard all-LED lighting system provides illumination from all angles.
TurnCheck systems are precision optical instruments that measure shafts, cylinders, and other turned, ground, or extruded parts in the most demanding shop floor environments. The fully telecentric large field of view optics combined with highly collimated light at a constant wavelength results in a crisp, uniformly magnified image with no edge effects or exclusion zones. TurnCheck systems scan and measure all points and features automatically, handling the full range of dimensions and tolerances found on shafts and cylinders.
ShapeGrabber 3D Laser Scanning systems are metrology-class machines that combine powerful laser and camera technology to capture up to 1.5 million data points per second. At the heart of each ShapeGrabber system is a high-resolution scanhead offering dynamic range that delivers fast and accurate measurement of parts in a wide variety of materials, colors, textures, and finishes.
The Digimar 817 CLT provides a variety of interfaces for saving measurement data. Data transfer is possible both wirelessly and by the new duplex cable via the proven MarConnect data management software. It also allows the transmission of a measuring device ID to ensure the traceability of all measurement results. For measurement reports, users can choose between complete representations in PDF format, sending individual measured values to a PC, Bluetooth printer or saving as a TXT file.
With practical touch control panels, the new digital comparators offer maximum measuring reliability even in harsh workshop environments. A light tap on the touchscreen is sufficient to safely operate the digital comparators with most commercially available gloves. This eliminates the possibility of measurement errors by accidental adjustment or deformation of the comparator. The full-surface glass display also offers protection against liquids and dirt, which cannot penetrate the sealed housing.
The wireless RCD from Kistler has a 10 kHz sampling rate that allows to capture highly dynamic foot-prints of the measurement in applications with up to 16 000 RPM. Overall, piezoelectric sensors ensure more accurate measurements than other technologies, such as strain-gauge sensors, which have significant limitations especially when measuring small forces and high dynamic processes. Highly accurate measurements are not only important for research but also for production monitoring. The piezoelectric measurement technology can capture very small changes and deviations before they have a significant effect on product quality.
Bluetooth technology along with an IBT interface box in the droPWR system allows connection to multiple machine configurations in one tablet including for milling, turning, and grinding machines with up to six axes.  Designed to be simple and functional, this tablet DRO can be moved and used with various machines, making it perfect for many production environments such as small shops and students in shop class.
The blue laser, paired with an intelligent measuring system, provides high-precision measurement of various tool parameters on cylindrical tools with diameters from one to 52 mm. Since it does not contact the surface, the Laser Contour Check avoids possible damage to cutting edges or measuring errors that can occur due to wear on the probe tip during tactile measurements.
The QV Pro Series features newly developed StrobeSnap vision measuring function that speeds up run time by approximately 35 to 45 percent regardless of measurement position or continuity while achieving higher throughput and high-precision measurements. Auto focus on the QV Pro Series is about 39 percent faster than previous models, which were already fastest in their class, without loss of accuracy.
Scytec Consulting Incorporated is proud to announce a partnership with CGTech and the integration of DataXchange into the Digital Twin standard VERICUT. This is an incredible offering for the manufacturing industry at large by making CGTech VERICUT infinitely more valuable by adding a robust machine monitoring solution via CGTech’s new module called CNC Machine Connect in the launch of VERICUT 9.3 to enhance the quality of the simulation.
Offered in four standard models, TVM Series industrial videoscopes provide high-quality, speedy remote visual inspection and diagnostic capabilities across a diverse array of applications. All TVM Series models feature a 4.3-inch monitor and user-friendly button technology. Individual models are further offered with a choice of either a 4.5 mm or 6.2 mm diameter cable, and either a 1.5 m or 3 m working cable length. All TVM Series cabling further includes a Tungsten braided sleeving for added durability and reliability within dirty or harsh industrial applications.
PI introduces the new L-836 Stepper Motor Linear Slides, a newly designed motorized linear translation stage family that combines high performance, small dimensions, and low cost of ownership. These compact micro-positioning translation stages are driven by a robust, direct-drive rotary stepper motor, available as in-line design and folded drive train design for reduced overall length.
The SCT5564 differential current transformer (type B/B+) can be used as a residual current monitor (RCM) and can measure DC and AC residual currents with up to 100 kHz frequency in the 0 to 2 A range. With its numerous setting options, this RCM offers a flexible platform for differential current measurement and is suitable for a wide range of systems engineering applications.
The comprehensive dashboard provided by Monitoring Box provides an overview of the status, name, and location, which includes job recommendations. Live status data provides all relevant data in real time. This includes device information and status, operating mode, and other data points that help to detect errors and malfunctions. In addition, historical data is available to understand past issues and better predict the future.
The data in the Surface Library was generated using a variety of areal (3D) measurement instruments. The data is in .os3d format, the native file format for Digital Metrology’s OmniSurf3D surface texture software. Each dataset includes hints for analyzing the data within OmniSurf3D. A free 10-day trial version of the software is available separately. The .os3d file format description is also freely available on the website for those who wish to analyze the data with their own mathematical tools.
Using Remote Access, rather than waiting hours or days for a technician to arrive on site and diagnose problems that must be fixed, authorized users and third-party vendors can monitor machines remotely and access that data in a fraction of the time, enabling them to quickly respond with a technician or spare parts. Should a problem arise, machiNetCloud automatically alerts third-party technicians and internal users by email and SMS, helping reduce downtime and save on maintenance costs.
With the 4017A, Kistler is taking pressure measurement technology to the next level: the miniature absolute PR pressure sensor has a mounting size of only M5x0.5 and was specifically designed for maximum robustness and accuracy. Its oil-filled measuring cell is media-isolated by a stainless-steel diaphragm and delivers a very high level of media compatibility for both gaseous and liquid media.
New motorized sliding axis, detector and detector holder gives it the ability to change the stylus angle, making it easier to perform inside diameter measurement of thick workpieces while avoiding interference. Roundtracer Extreme features best-in-class speeds with a maximum of 100mm/sec with improved positioning accuracy and greatly reduced positioning times compared with conventional models.
Artec Micro’s advanced twin color cameras and blue LED lights are synchronized with the scanner’s dual-axis rotation system to create a digital copy of your object with a minimum of frames captured. In addition, the Smart Scanning mode captures every surface of the object in the least amount of time, using an ideal number of frames.
The system comprises an ultra-compact RMI-QE radio interface with an updated communication protocol, as well as major updates to the complete range of market-leading radio transmission probes. The new enhancements deliver significantly improved battery life, simplified set up, and remote diagnostics to all radio probes.
This AMO speed sensor includes a USB interface which allows the operating status of the spindle to output to the machine control.  This enables the user to record rotational speed, operating time, temperature and more. Put these factors together, and overall performance and uptime expectations are optimized.
5-axis provides increased feature access with infinite probe angles: Infinite positioning guarantees optimal feature access, minimizing stylus changes, thereby improving usability over fixed-angled probe heads. 5-axis motion allows larger part access on the CMM by minimizing space required around the part for probe orientation.
The RUP1 probe uses a 20 MHz transducer and provides a thickness measurement range of 1 mm to 20 mm with an accuracy of better than 10 microns using touch points. The tip ball is user-replaceable and is preserved by a protective cap that can be automatically removed and maximises tip ball life. The RUP1 probe is fully compatible with the MRS2 change rack using the RCP TC-3 rack change port and is interchangeable with all other probe options available for the REVO system.
The Digital Static Meter is a sensitive and responsive product that indicates surface voltage and polarity on objects up to ±20 kV from one inch (25mm) away. After zeroing the meter, move it to within one inch of your problem surface(s) for a LED illuminated reading of the static voltage. It includes a National Institute of Standards and Technology certification for accuracy, and will help discern the most troublesome static areas in any process.
Makrolite 4K is flexible, easy to use, and provides high definition video images with a wide dynamic range and up to 330x magnification. It delivers both versatility and high performance in applications such as production, lab research, R&D, micro assembly, quality control, inbound/outbound product checking, dissection and re-work.
Cost optimized for large quantities, the lightweight P-604 amplified piezo fixture actuator provides a large travel of 300µm in a small footprint of 13x20mm, engineered for a long maintenance-free life. Zero-play flexure guides deliver frictionless and ultra-straight motion. At the heart of the motion-amplifying flexure design is a multilayer piezo ceramic element, of the same proprietary construction as the ones used on the Mars rover for their extreme reliability and lifetime beyond 100 billion cycles.
Packed with new and established features that are available on Vision Engineering’s EVO Cam ll, the VE Cam enables users to do more within a smaller footprint making it ideal for many routine inspection tasks. The VE Cam is stand alone and does not require a PC, keyboard or mouse.
Hexagon MyQuality provides access to the highest level of industry know-how provided by road tested applications engineers and inspection programmers serving a wide range of industries including aerospace, automotive, power generation, and medical. MyQuality was designed to build a strategic bridge between Hexagon and its customers to support changing quality plans or further automate part inspection programs. Contract programming services can include custom operator interfaces including touch-screens, interfaces for automation and customized logic routines, PC-DMIS inspection routines, barcode reader device integration, customized reporting, as well as programming parts with intricate geometries, difficult surfaces, or hard to reach features.
The Marameter 844 K probes form a comprehensive modular system that includes measuring heads, driving needles, measuring holders for indicators or probes, depth extensions, right-angle attachments and setting rings. Made of hardened steel, the new Marameter probes are ideal for bore measurement at the point of manufacture, offering extremely long life. The Marameter 844 K probes are available in three versions as determined by the application needs. 
The ModuleWorks CAS uses real-time machining data and look-ahead technology to detect immanent collisions and stop the machining process before an actual collision occurs. The CHIRON Group uses CAS as part of their ProtectLine digital system to protect their high-end machining centers from potentially expensive damage and downtime. 
The 70% reduction in measurement time compared to Laser Plus is achieved through the new Analog measurement. The Analog measurement is a continuous edge scan instead of number of digital points along the cutting edge. This process also eliminates variations caused by machine standing idle, errors due to manual wheel corrections and the requirement of skilled operators.  In its place LaserUltra has increased accuracy, productivity, and reduction of scrap.
Unlike traditional bridge CMMs, the AEROS main structure of support pillars and longitudinal guideways remains static, with only the gantry beam assembly moving during measurement. The open design is extremely adaptable, providing full access to the work area during loading and unloading of parts. It is particularly well suited to SMART factories with autonomous guided carts and manually operated wheeled or rail-type material handling systems.
Inspire’s sleek, streamlined interface offers the fastest means to access its new measurement, analysis, and reporting features for greater quality productivity. More software highlights include a new delete noise function to rapidly delete outlier data in point clouds, the addition of measurement triggers, and more data import and export options. The software also introduces the ability to create cross-sections of a point cloud without the need for a CAD model. Inspire’s learning curve is decidedly short for new and existing users with novice to expert skill levels. Hexagon offers a broad range of training materials from online videos and tutorials culminating in nearly four hours of user training resources.
iScan3D, with integral process controller, connects with API’s Radian Six Degrees of Freedom (6DoF) Laser Tracker to accurately monitor scanner position and deliver high accuracy measuring and scanning. iScan3D completely negates user inconveniences associated with Articulating Arm scanners: operator fatigue, arm gymnastics, part access issues, and limited measuring ranges. iScan3D combines tactile and scanning measurements, giving users the freedom to measure wherever and whenever, regardless of part size and feature locations, in a single setup. 
The varioSCAN product line is ideal for applications requiring f-theta lenses, as well as applications for which these costly lenses are unavailable. In the second case, the focusing system provides a plane focusing surface in addition to z-adjustment of the focus. Besides the processing of three-dimensional surfaces, classic fields of application requiring z-axis manipulation include additive manufacturing (3D printing) and laser cutting. In many of these applications, there is a trend towards higher laser powers, the use of ultrashort pulse lasers and the demand for improved image quality and positioning accuracy.
The SU Type has a length of 235mm and rubber bellows. The larger MU Type is 360mm in length and has a reinforced ball joint with a large collar. Both use serrated washers instead of flat washers to reduce slippage and increase stability of the center joint. 
FT-QPSI builds upon the QPSI anti-vibration solution that ZYGO introduced in 2014. Both solutions are a nod towards the fact that laser interferometry is transitioning away from carefully controlled lab environments as a growing number of applications demand easy, reliable solutions in environments where it was previously impossible to achieve quality metrology.
Manufacturing high quality, high performance tools requires the Total Indicator Runout to be perfect or minimal for overall tool life and surface finish. Runout on blanks before grinding can be achieved by either spending a certain amount of time for work holding setup or alternatively, compensating the runout in software. The latest software update of ToolRoom has an option to apply complete tool runout compensation when needed.
The rotary tables use low-cogging frameless and slotless torque motors to enable this excellent geometric performance. Different designs allow use in horizontal, vertical or any orientation. Air bearings guarantee a virtually unlimited service life with no wear, and zero required maintenance. As with all other PI linear air bearings and stages, the rotary tables are clean room compatible and requires no lubrication. For transmissive light applications, the A-688 direct drive rotary table with large aperture is available.
The dual-purpose m&h R-400 probe system is the first tactile probe on the market that includes a built-in display. It provides status data at a glance, enables users to save or load settings, and makes it easy to switch between tactile-sensor and tool-setting functions. Designed for shop-floor flexibility, the system can be used as a radio probe by equipping it with a probe shank or as a radio tool setter by mounting it on a tool-setter base. In addition to offering flexible in-machine measurement functions, the probe can help cut costs by eliminating storage of replacement sensors, as only one device needs to be stored.
Based on side-by-side two-dimensional image architecture, this allows images acquired by different sensors to be perfectly combined to generate a single workpiece image containing no defects or gaps at stitching edges.Measures parts up to 300mm in length without any vertical movement of the sensors or part. Executes 100 static measurements in two seconds regardless of how the measurement sections are distributed along the workpiece.
Go and No-Go Ring Gages are manufactured with hardened tool steel for exceptional durability and feature a fully knurled circumference for maximum gripping ability and safety. No-Go gages are clearly marked with a red ring. UNC and UNF gages have a 2A tolerance. UNC gages are available in 19 sizes from #2-56 to 2-4 ½ and UNF gages are available in 19 sizes from #0-80 to 1 ½ -12. Metric and metric fine gages have a 6g tolerance. Metric gages are available in 19 sizes from M2x.4 to M68x6 and metric fine gages are available in 19 sizes from M8x1 to M48x1.
CAMIO 2021 Geometry Validation reduces the time taken when preparing new inspection programs by automatically detecting which surfaces of the CAD model should be used to measure the feature. It ensures that all measurements are taken on suitable surfaces automatically and at the same time provides the programmer with the option to modify the default settings and selections. While the feature is being programmed, the CAD simulation highlights the geometry used for the validation and previews the measurement sequence. This combines with the Teach Path view to provide a full visual and numerical evaluation of the programming sequence prior to executing the touch points or scanning sequence, enabling the programmer to get the inspection sequence right first time when programming online or offline.
This latest release of software enables the XK10 to take measurements at multiple points along each rail. The benefit of an increased number of measurement points is that the straightness of each rail is also measured at the same time. Parallelism between the rails can then be determined by looking at the difference in straightness at each point, giving a more accurate picture than a measurement of the overall angle between rails.
The Absolute Scanner was developed from the ground up for smart manufacturing applications that require high-speed scanning within automated cells and assembly structures located in-line, near-line or in the quality room. The AS1 delivers scanning accuracy within 50 microns in a 60 meter volume, handheld or automated, with an Absolute Tracker AT960 laser tracker. For small to medium size parts or products, the scanner unit can be mounted to any current-generation Absolute Arm 7-axis system for scanning and hidden area inspection with scanning accuracy of 16 microns within a measurement volume from 2 - 4.5 meters. 

Buyers Guide Companies for Inspection