Measurement Technology for S Line Surface Metrology Systems
Measurement Technology for S Line Surface Metrology Systems
Sensofar Metrology has announced two new measurement technology features, as well as a hardware add-on, for its existing S line 3-in-1 surface metrology systems. Continuous Confocal refers to a proprietary measurement technique that represents a revolutionary step in confocal measurement technology. With Continuous Confocal, Sensofar has developed a confocal technique that utilizes a continuous Z-axis scan.

Sensofar Metrology has announced two new measurement technology features, as well as a hardware add-on, for its existing S line 3-in-1 surface metrology systems. Continuous Confocal refers to a proprietary measurement technique that represents a revolutionary step in confocal measurement technology. With Continuous Confocal, Sensofar has developed a confocal technique that utilizes a continuous Z-axis scan.
Acquisition speed is comparable to focus variation, and is roughly 3x faster than Sensofar's own Confocal approach while maintaining comparable repeatability and accuracy. Continuous Confocal is an ideal solution for Quality Control tasks where speed is a key factor, and is essential for reducing acquisition times for large area and extensive z-axis scans.
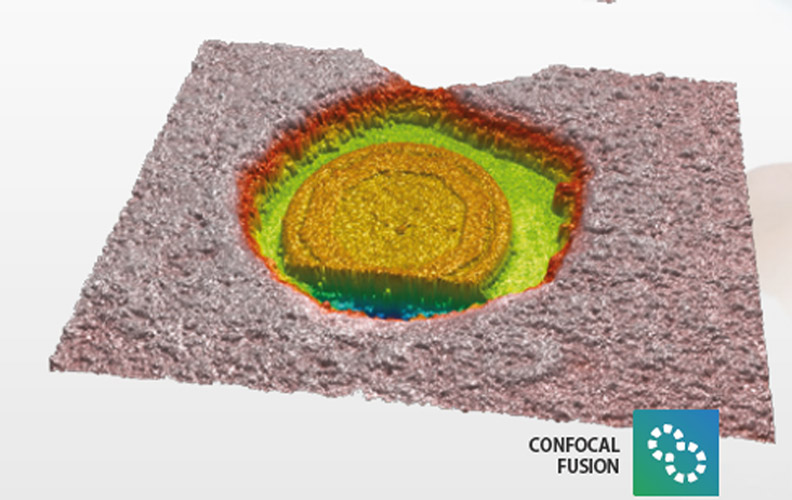
Confocal Fusion refers to another new and proprietary measurement technique that draws the best out of Sensofar's Confocal and Focus Variation techniques by using a unique smart algorithm that yields the most reliable data from a single scan. Where neither Confocal or Focus Variation can provide ideal results, Confocal Fusion surpasses the limitations of both techniques to provide high-quality measurements over spatially highly varying surfaces. It is ideal for highly complex or technical surfaces exhibiting both steep rough and steep smooth areas, and where a traditional confocal approach alone would fail to capture the surface adequately.
For those needing ISO norm compatibility, both Continuous Confocal and Confocal Fusion measurements still conform to ISO 25178 requirements.
Both these new measurement technologies draw on Sensofar's particular utilization of a microdisplay in their 3-in-1 3D surface metrology systems to provide confocal, interferometric and focus variation approaches. The unique inherent versatility contained within the systems is utilized here to expand the capability in a way that no other surface metrology system manufacturer can match.
Additionally, a new Ring Light add-on is now available for lower NA objectives for the Sensofar S line systems. Mounted above and around the objective, the Ring Light more effectively bathes the sample in light, providing more signal for both confocal and focus variation techniques on steep and/or technically complex surfaces. Out of the box, this new illumination option is controlled through the SensoSCAN user interface to deliver white light to the sample.
Both for more complex surface geometries and for more routine surface metrology, regardless of whether in an R&D or in an industrial environment, these new features can compound and complement each other in a myriad of different ways. Taken together, they greatly enhance the systems by improving overall acquisition performance, and also by further extending Sensofar's established signature of system versatility.


