Advancements in digital vision systems make measuring parts simpler, more repeatable
Advancements in digital vision systems make measuring parts simpler, more repeatable
The biggest benefit a digital vision system provides is the machine's ability to automatically measure parts, whereas the human operator influences a manual analog measurement device, such as an optical comparator.
You may be in the mood to pitch those cumbersome Mylars for measuring parts on an optical comparator, if you haven't done so already. This shop-cleaning activity could occur after acquiring a digital video measuring (DVM) system that enables electronically superimposing a CAD system's DXF file of the part to be measured over a live video image of the part.
"What you're doing is replacing the old Mylars used on comparators," said Mike Provenzano, applications engineer for Nikon Metrology Inc., Brighton, Mich.
Nonetheless, he emphasized that the biggest benefit a digital vision system provides is the machine's ability to automatically measure parts, whereas the human operator influences a manual analog measurement device, such as an optical comparator.
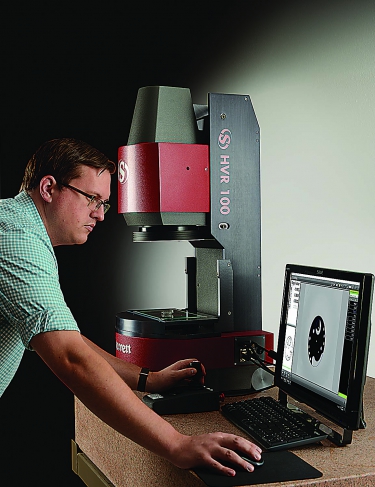
Greg Maisch, product development manager for Starrett Kinemetric Engineering, measures a part on the company's new HVR100-FLIP benchtop vision measurement system, which can also measure parts in the horizontal orientation. Image courtesy of Starrett Kinemetric Engineering.
Based on his studies with different types of metrology equipment, Provenzano concluded that a skilled technician can accurately and repeatably measure a workpiece from one point to another using a manual measuring device, but that accuracy and repeatability don't extend from skilled technician to skilled technician. The repeatability for one individual might be within 0.25µm, while the variation might be four to eight times as much from one technician to another.
"If you don't have good, experienced people who've been doing it for 20 years, then forget about it," he said.
Having the ability to superimpose, or overlay, a DXF file over a live video image of a part really shines when part complexity increases. If end users don't use an overlay, they can only see lines, curves, circles and a constant radius with any machine running the Metlogix M3 software suite, said Greg Maisch, product development manager for Starrett Kinemetric Engineering Inc., Laguna Hills, Calif. With an overlay, it's possible to compare significantly more complex curves, polylines and other compound features on a machined part to the actual part design and obtain quantitative data about geometric tolerances.
"You can watch that data migrate over time and make corrections as necessary," Maisch said, adding that suitably complex parts include knee implants and turbines for jet engines.
Going Digital
Rather than just having a technician look at a Mylar and determine whether a part is good or bad, Maisch said the main benefit of a DVM system is the ability to generate quantitative data to know which specific part features are in or out of tolerance or drifting toward bad. "You're going to see those trends much more clearly," he said, "and you can analyze that data to find the root cause. Root-cause analysis becomes much more powerful."
Cutting tool wear is one possible reason for producing out-of-tolerance parts, but the problem is preventable. "As the tool wears, you can monitor for tool wear and make a change before parts get out of tolerance," said George Schuetz, director of precision gages for Mahr Inc., Providence, R.I. "That what's the whole process of monitoring is all about."
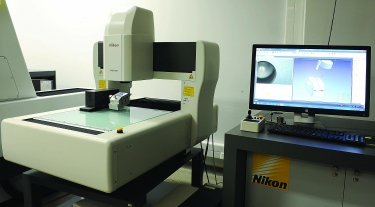
The addition of a rotary indexer on the VMA-4540 vision machine enables parts to be rotated into the field of view. Image courtesy of Nikon Metrology.
Ineffective workholders are another root cause to be considered. "We have a saying here that 'in order to gage it, you have to stage it,' and it's the same thing when you're manufacturing a part," Schuetz said. "If the fixture that's holding the part while it is being manufactured is becoming worn, then it doesn't hold as well, and you are more apt to get variation in the parts."
Unlike an optical comparator, a DVM system can measure hundreds of points in the field of view, Maisch said. The system runs the entire part measurement program with very little interaction, enabling a technician to perform other productive tasks.
Advancements in the sensors and cameras for these systems have enabled metrology equipment manufacturers to provide large field-of-view images that were typically only available on an optical comparator-type device, Maisch explained. He added that the latest sensors and camera have become considerably more sophisticated than past generations. "Because you have so many pixels, you can really cover a large field of view."
In addition, being able to better process data via newer computer interfaces, such as USB 3.0 with a data transfer rate about 10 times faster than USB 2.0, enhances the functionality of digital vision systems, Maisch said.
For a machine of comparable size, he said an optical comparator costs about half to a third as much as a DVM machine,
depending on the accuracy requirement. But the gap should shrink even as the digital side's technology advances. "As computers and sensors continue to get more sophisticated," Maisch said, "you will still see the cost come down."
Provenzano doesn't necessarily see prices coming down, but he said the capabilities of the cameras and lasers on Nikon's digital vision systems, such as the high-end VMZ-R series, continue to improve while the price tag remains the same. "Everything tends to go up in price, so, if we don't raise the price, that's almost like a cost savings."
And how capable are the cameras getting? "When you get into the high-resolution cameras," Provenzano said, "you are really just about knocking on the door of imaging equal to a microscope."
He added that the company is also making major strides in the level of available magnification. "I have machines that go way beyond what anybody needs."
Best of Both Worlds
Although end users are gradually shifting to the digital vision side of metrology, don't dismiss analog equipment. "There is still a big demand for traditional optical comparator technology with some enhancements," said Mark Arenal, general manager of Starrett Kinemetric Engineering, noting automatic edge detection as one such improvement. "A lot of our optical comparator products have very capable metrology readouts."
Maisch added that an optical comparator, which is a bit more shop-hardened and less susceptible to thermal cycling, probably is more appropriate for a small machine shop that only needs to spot-check parts. "It's very important with the vision machines that you keep them in a fairly controlled environment."
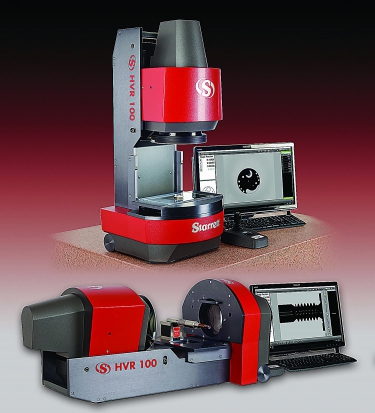
While flat parts are better-suited for measuring in the vertical orientation on the HVR100-FLIP vision system, the horizontal orientation works better for threaded parts. Image courtesy of Starrett Kinemetric Engineering.
In addition, some applications, such as measuring translucent parts, can be trickier to perform on a digital vision system than a comparator, he said.
For some applications, hybrid equipment is a suitable option. "We can give many of our customers the best of both worlds by adding video capability on an existing or new optical comparator," Arenal said.
Another best-of-both-worlds offering from Starrett is the HVR100-FLIP benchtop vision measurement system. It features a high-resolution digital video camera that minimizes optical distortion for accurate field-of-vision measurements up to 90mm (3.54"). While video measuring machines typically provide a vertical viewing format and most comparators have a horizontal format, the HVR100-FLIP can measure parts in both formats.
Maisch explained that when the part to be measured requires extensive fixturing, the horizontal format is more suitable. Examples are turned parts, such as camshafts and any kind of threaded part.
"Your fixturing can be a little taller, and you don't have to worry about the lens being above your part," he said.
On the flip side, Maisch said the vertical orientation is better-suited to measuring flat parts, such as ones that were laser- or waterjet-cut, and parts with pockets. It's important that the part is extremely square to the camera, he added.
The stages are square on the horizontal format, but the fixturing must also be square. It can take considerable effort to achieve square fixturing, especially for fixtures that a shop produces, which sometimes makes the vertical option more attractive.
A Visible Touch
Just because a machine measures parts visually doesn't mean it can't also touch them. Nikon's Provenzano said an inkjet printer cartridge is the classic application for measuring with vision and a touch probe. The bottom of the cartridge has very fine circuitry that cannot be touched and, therefore, requires vision. The touch probe, however, is the more appropriate device for measuring the datum on each side of the cartridge.
"You truly need a multisensory machine to measure an inkjet printer cartridge," he said.
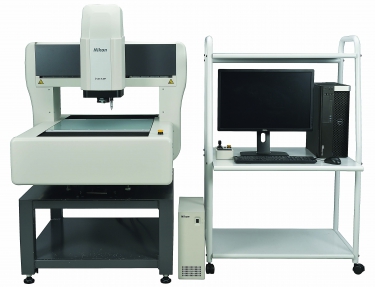
The VMA-4540 vision machine from Nikon Metrology has a measuring envelope of 450mm × 400mm and a 200mm Z-axis stroke. Image courtesy of Nikon Metrology.
Another option on some DVM machines is a laser for automatic camera focus, but it should be universal, Provenzano said. "I really feel that every vision machine should have a laser," he said. "I just don't understand why people buy vision machines without a laser."
He conceded that initially some people want to save a bit of money, but the enhanced functionality and ease of use a laser provides quickly cover that cost. Nikon's high-end vision machine comes integrated with lasers, Provenzano added.
Starrett also offers touch probes and lasers. "We've had customers who absolutely required those things," Maisch said.
Regardless of the specific type of metrology equipment and the configuration, in this era of big data, people want, well, lots of information. "People are always trying to get more data to document their process so they can measure and look for trends that are going on in the process," said Mahr's Schuetz, "and, hopefully, gain some feedback to make process improvements."
Cutting Cables
One method for simplifying part measurement is with integrated wireless data transmission. According to George Schuetz, Mahr Inc. offers calipers, digital indicators, depth gages and micrometers that feature wireless technology, so there are no add-on interface boxes or additional batteries, and data transmission is transparent to the operator.
"He can make his measurements, collect data and it's all part of his measuring process," Schuetz said. "There's nothing special needed to do that."
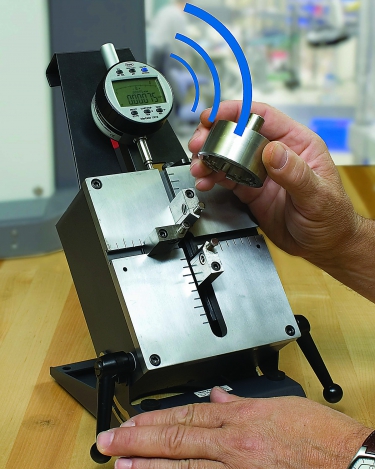
Mahr's Multimar 36 B indicator gage accepts a Mahr integrated wireless indicator for wireless data transmission. Image courtesy of Mahr.
In addition, taking measurements on the shop floor and transmitting them wirelessly speeds the quality-assurance process, he said. "It also adds flexibility and a measure of safety by eliminating troublesome cables. This speeds setup and provides more efficient data processing, especially for quality control in production or incoming-goods inspection."
By touching a button on the measurement instrument, acquired data is transmitted from the gage to an i-Stick radio receiver plugged into the USB port of a computer, the company reports. With Mahr's MarCom Pro 5.2 software, measured values from connected devices can be automatically transferred into separate Microsoft Excel columns, tables or files, or via a keyboard code into any Windows program or existing statistical process control application.
—A. Richter


