Getting to Know the Lead Angle
Choose the right facemill lead angle by comparing force direction, chip thickness and load direction for finishing, shoulder, and roughing applications.
Facemilling with indexable tools is common at shops. One does not have to look deeply into the offerings from indexable tool suppliers to realize that there are many tool designs. How to select the correct one for an application can be challenging. However, if the effects from the facemill’s main design features are understood, choosing a suitable cutter body becomes much easier.
Lead-angle choices are strongest when tied to planned feed targets. Pairing this geometry selection with chip-load and feeds/speeds checks improves setup defensibility.
One such feature is the lead angle of a tool. The lead angle is an angular dimension measured parallel to the cutting edge of the tool and to the face of the part being produced (Figure 1). The angle affects the way the tool performs, how it should be applied and how the finished part looks. Typical lead angles available in standard tools are 90°, 60°, 45° and 15°.
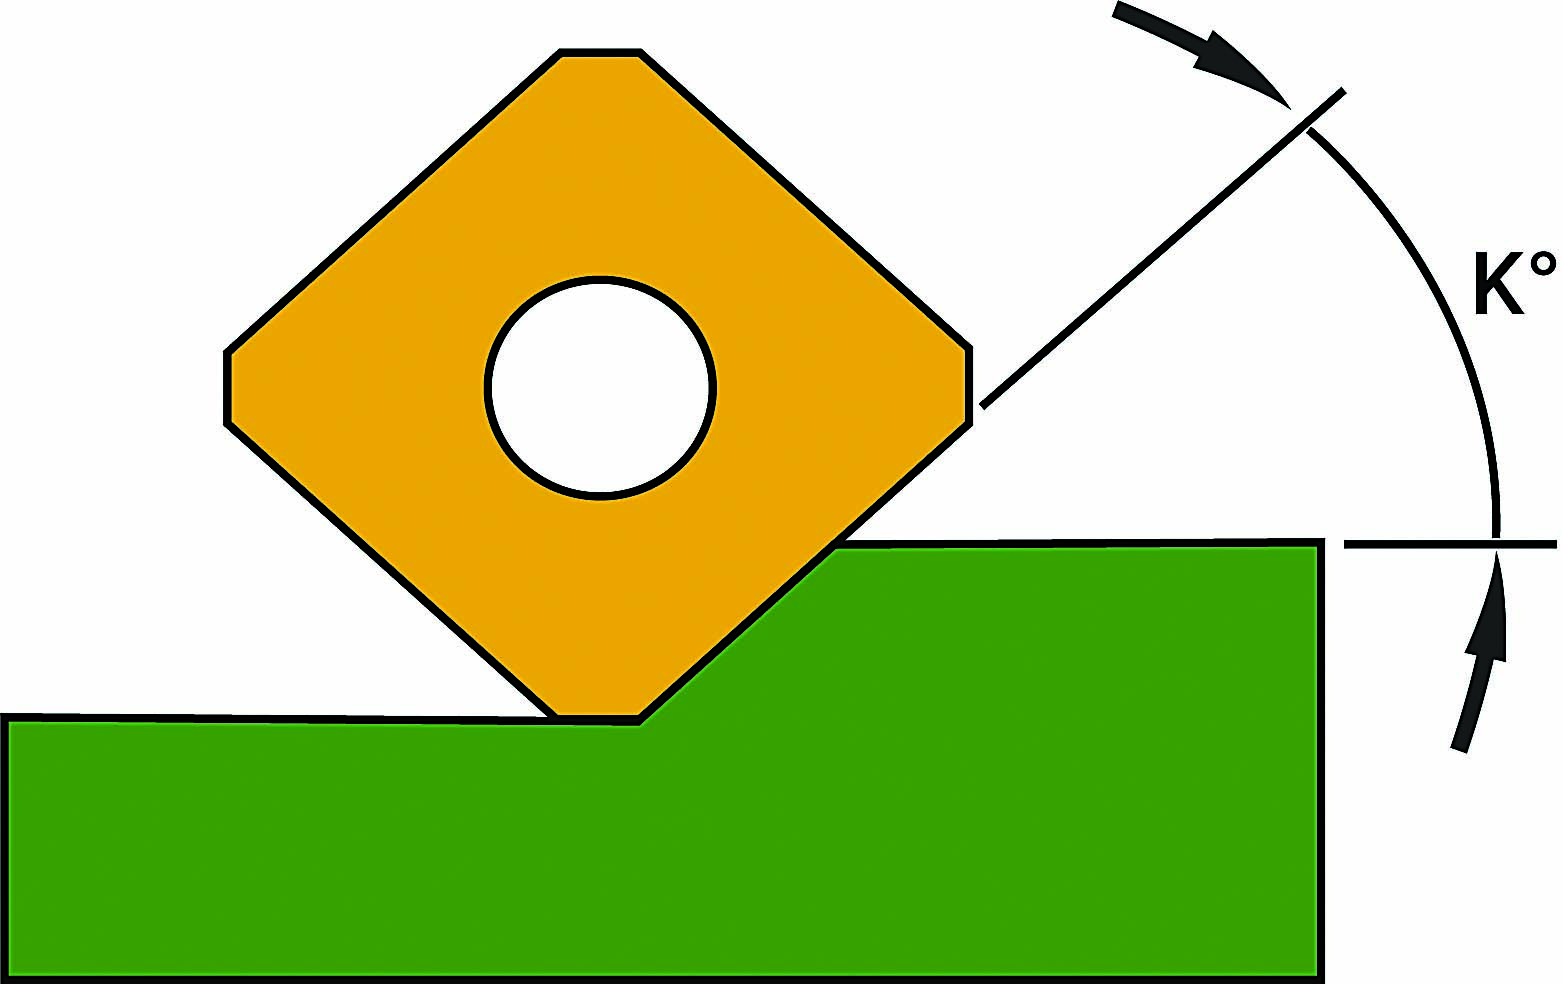
Figure 1: The lead angle of a facemill can have a big impact on the way it performs.
Calculations
It is worth trying to understand how a lead angle impacts the way that cutting forces are directed (Figure 2). The generated net cutting forces always react in the direction perpendicular to the cutting edge. Mathematically, to make it easier to comprehend these forces, they can be broken into two vectors: one in the horizontal direction and one in the vertical direction.
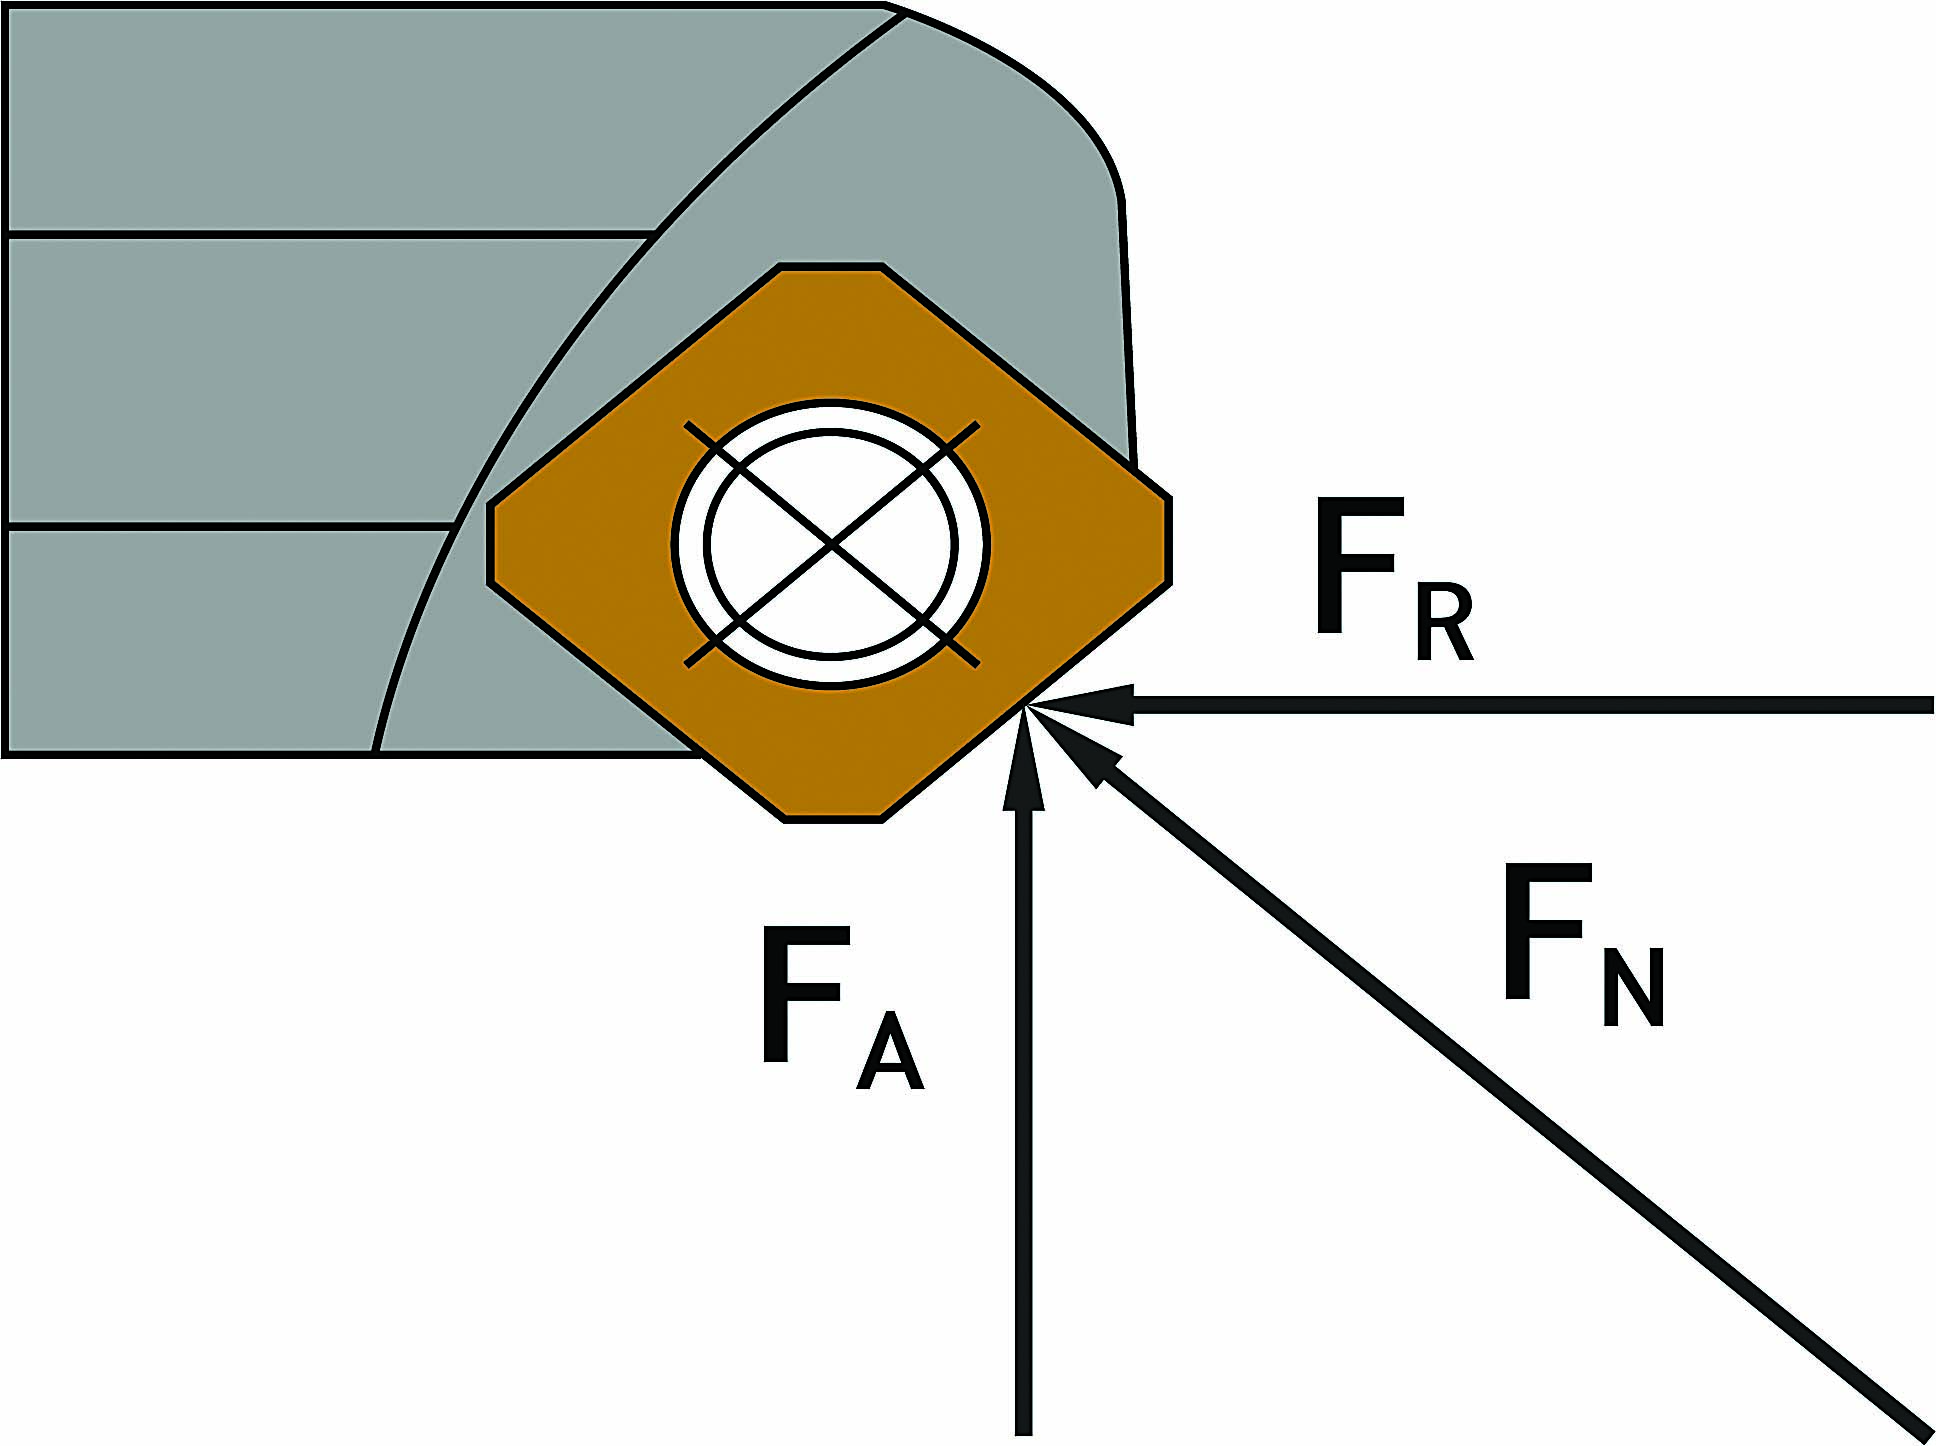
Figure 2: Net cutting force can be divided into axial and radial components.
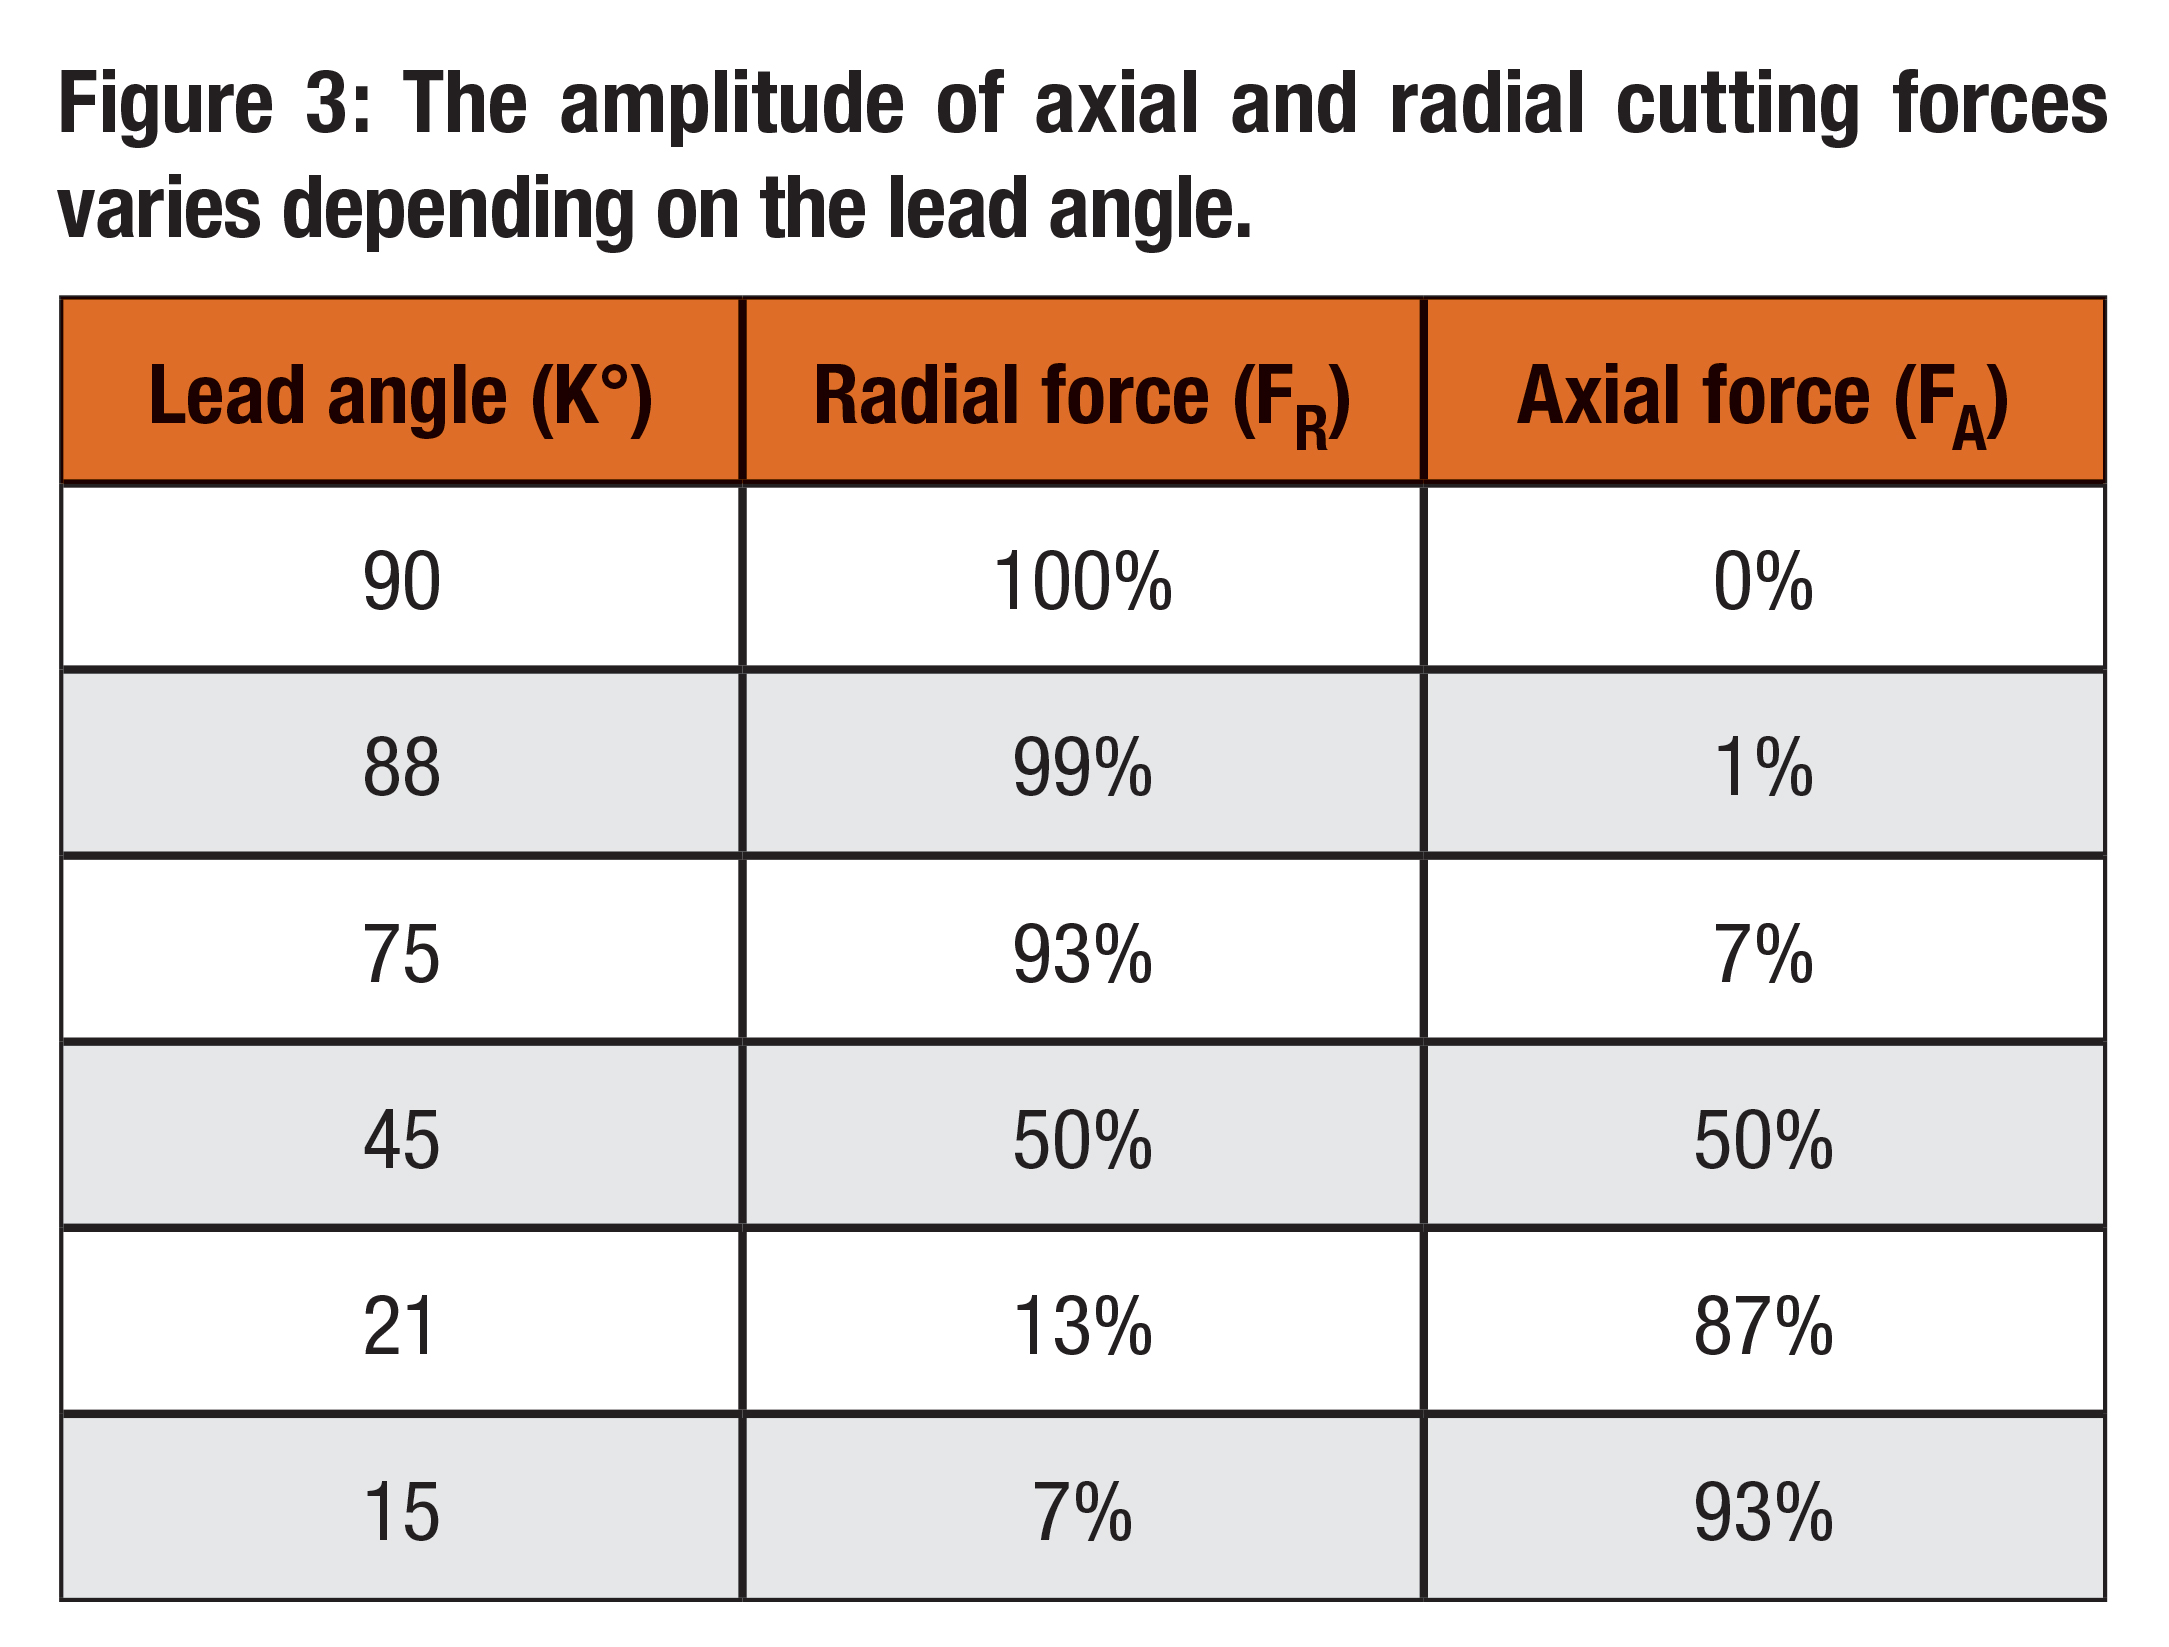
The amplitude of each vector shows where the larger of these two forces exists (Figure 3). Using a formula from basic trigonometry, how these forces should be divided can be calculated. Multiplying the net force (F) by either the sine or cosine of the lead angle tells what percentage of the forces is acting vertically and what percentage of them is acting horizontally.
Horizontal forces, which act perpendicular to the tool axis, are less desirable than vertical forces. Think of it as trying to push the facemill off-center. Forces moving in this direction can cause deflection, chatter and spindle tilt, all resulting in poor tool life and part quality. Vertical forces are much more desirable because they are parallel to the tool axis. This means they are directed straight up in line to the spindle axis, which has the entire rigidity of the machine opposing these forces. The machine is better equipped to handle forces in this direction, so the operation does not lose stability.
Axial Chip Thinning
The lead angle is also involved with a phenomenon called axial chip thinning, which is a result of the lead angle geometry and the feed rate. When the lead angle is equal to 90°, physical chip thickness is equal to the advance per tooth programmed into the machine. Because chip thickness is measured perpendicular to the lead angle, as the lead angle increases, chip thickness becomes thinner with the same advance per tooth (Figure 4).
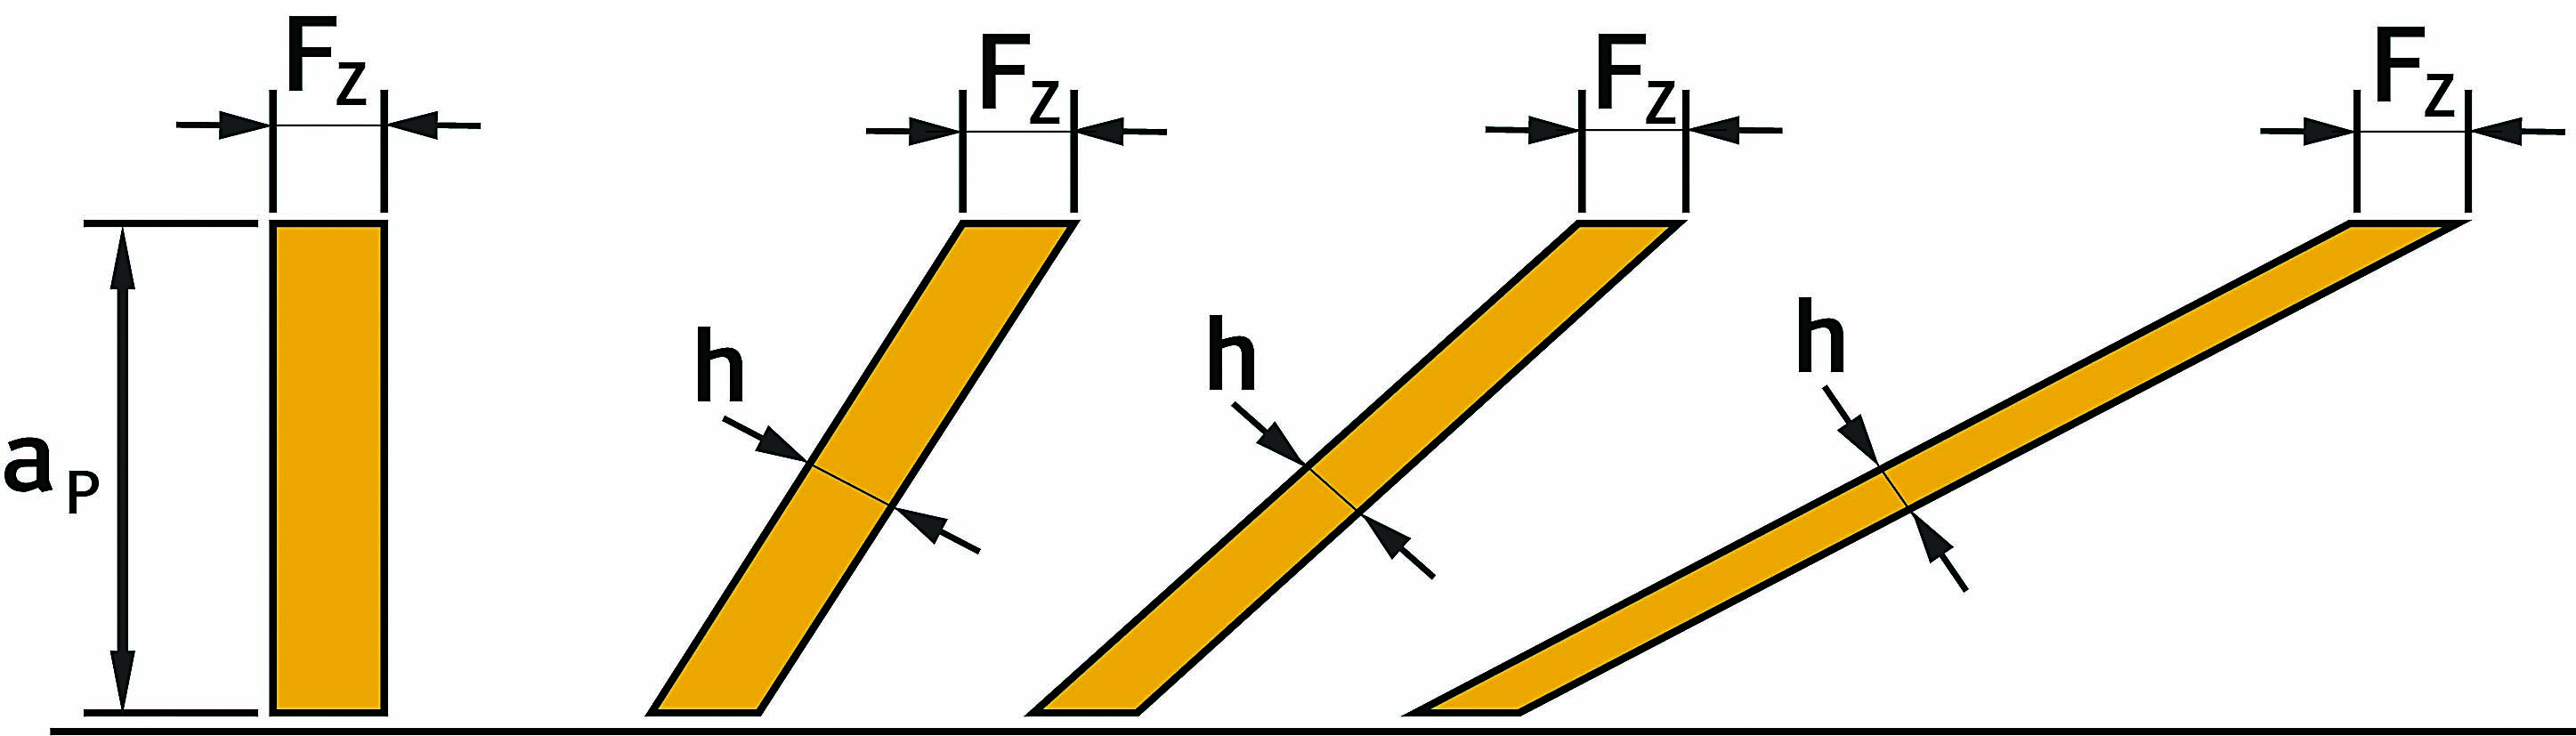
Figure 4: As the lead angle becomes smaller, the effects of axial chip thinning become greater.
Regardless of how much the chip thickness is influenced by chip thinning, chip thickness should adhere to the recommendation of the cutting tool manufacturer. This means increasing the advance per tooth (FZ) as the lead angle increases so the recommended chip thickness is maintained. If it becomes too small, the tool can rub and not actually cut the workpiece.
Review the print ads from this magazine to continue
This quick advertiser review unlocks the rest of the article and keeps the full-screen reader focused on the ads instead of the page chrome.

MFGAxis Discussion