Measuring & Inspection Systems

Mantis 3rd Gen

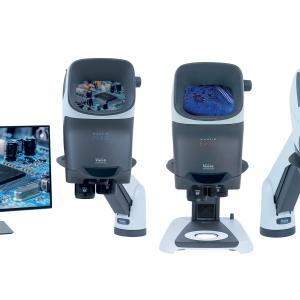
Mantis 3rd Gen features include; improved optics for both hand-to-eye coordination and excellent depth perception, a 3-position turret to house up to 3 objectives ranging from 3x to 15x, the introduction of an 8x super long working distance lens, five different illumination options providing flexibility to optimize the lighting to view the perfect image, and the Mantis PIXO offers an improved, higher resolution camera for image and video capture. The system also features an option to switch between white light and UV light using a toggle switch.

Hexagon Absolute Arm highlights


When you need to capture complete measurement data on a machined part, noncontact 3D laser scanning is available to provide "The Whole Picture," which is the title of our cover story in the June 2023 issue of Cutting Tool Engineering magazine. Presented here is a video supplement covering the highlights of the Absolute Arm AS1 portable CMM from Hexagon's Manufacturing Intelligence division.

Manufacturer uses Vicivision America M2018 Techno measuring machine


Trenton S.p.A., a manufacturer focused mainly on making parts for machines and tractors used for agriculture, offers a brief testimonial for Vicivision America's M2018 Techno measuring machine. The video, courtesy Vicivision, is presented here as a supplement to the Get With The Program column published in the June 2023 issue of Cutting Tool Engineering magazine.

L-Series Rigid Industrial Micro Fiberscopes

The durable construction of both L-Series models consists of a long, thin, and rigid stainless-steel tube body. The tube features a lens on one end and a light source (sold separately) on the other. The tube further contains an optical fiber bundle that transmits light from an external light source, thereby illuminating the area under inspection. The image is then transmitted by the fiberscope lens to an eyepiece or camera for remote viewing and diagnostics.

VOXLS 40 C 450

Nikon emphasizes that the VOXLS 40 C 450 is just the first of a next generation of X-ray CT systems of similar construction, featuring a single-piece cabinet, the same metrology-grade manipulator concept, Nikon’s unique microfocus X-ray sources, and extensive CT acquisition technologies. The upcoming models will broaden the range even further to provide users with more options that will not only meet their immediate business and technical requirements, but will also help them to identify new opportunities and raise operational efficiency.

450kV Microfocus Inspection Systems

Two variants are available. The VOXLS 30 C 450 is ideal for inspecting tall samples such as a large turbine blade. The VOXLS 30 M 450 is defined by its ability to be equipped with an internal autoloader for holding multiple samples. They may be scanned without operator intervention, freeing up personnel for other duties and facilitating unattended operation overnight and at the weekend, resulting in a big increase in productivity. In combination with external robotic handling and the Nikon Automation OPC UA Interface, both systems are compatible with fully automatic, closed-loop inspection at high speed in a Quality 4.0 production line environment.

225kV X-ray CT Systems

Powered by a Nikon 225kV microfocus source, the innovative systems feature the company’s Rotating.Target 2.0, which is unique in the industrial sector. It results in high resolution X-ray images to enable even the smallest defects inside an object to be identified quickly, easily, and non-destructively. Speed of operation is enhanced using Nikon’s extensive CT acquisition technologies and reconstruction algorithms, making the systems ideal for automated inspection applications on the shop floor.

Model ZMM-1

Featuring a 1:4 zoom ratio, the Titan Tool Supply Model ZMM-1 industrial inspection zoom microscope offers constant focal length, highly favorable depth of field, a large field of view at 15X magnification, and a higher magnification with smaller field of view at 60X as standard. When used with the optional extra 20X eyepiece, the Model ZMM-1 can additionally perform reliable and accurate remote visual inspections of a workpiece over an expanded magnification of up to 120X –all without the need for a change of lens.

Automated AM Validation Solutions

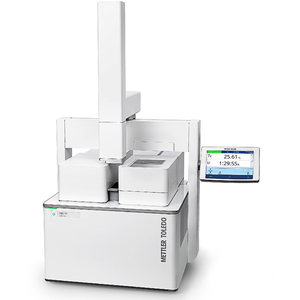
The density determination solution is a metrological system which has been developed for the rapid and highly accurate density determination of components, and has a particular significance when analysing AM-produced parts. Porosity in AM parts can be a problem because it can weaken the mechanical strength and stability of the parts, reduce their durability, and make them more susceptible to failure under stress. Porosity can also affect the thermal and electrical properties of the parts and make them less resistant to high temperatures, corrosives, and other environmental factors.