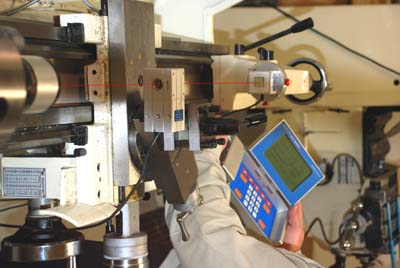
Pinpoint Laser Systems is introducing the "Transparent" Receiver to the Microgage 2D family. This receiver allows a laser beam to pass clearly through it while making a precise position measurement for aligning machinery and equipment. The receiver is compact and will fit into small places for bore alignment, checking extruder barrels, shaft bearings and much more. The receiver and the host Laser Microgage 2D are versatile and can be adapted to many industrial measuring and alignment tasks.
The method of operation is simple — a narrow laser beam provides a measuring reference line. This Transparent receiver is placed on a machine or moving assembly to determine its position relative to this laser reference beam. This new receiver will operate over distances of 100 feet or more and deliver a measuring precision of 0.0005 inch; ideal for demanding industrial alignment applications. The Laser Microgage system and this newest receiver are well suited for lathe and spindle alignment, checking machine tool runout, roll and web alignment, precision bore alignment, and more.
The Microgage 2D is easy to use with instructions that guide operator through their alignment project. Several simple accessories allow for alignment of straightness, runout, parallelism, squareness, roll and web alignment, shaft and bore alignment, flatness measuring, and more. The 2-Axis Laser Microgage operates on batteries for added convenience and all components are machined of solid aluminum with a hard anodized coating for wear resistance. A sealed push button keypad and large LCD display make the Microgage 2D easy and convenient to use in demanding industrial environments.
A serial and USB interface connect easily to a laptop or PC and link to popular spreadsheets for plotting and analyzing data for maintenance records, customer compliance and other uses. This Microgage system includes a compact carrying case to store the components and is easily carried right out onto the manufacturing floor.
Contact Details
Related Glossary Terms
- lathe
lathe
Turning machine capable of sawing, milling, grinding, gear-cutting, drilling, reaming, boring, threading, facing, chamfering, grooving, knurling, spinning, parting, necking, taper-cutting, and cam- and eccentric-cutting, as well as step- and straight-turning. Comes in a variety of forms, ranging from manual to semiautomatic to fully automatic, with major types being engine lathes, turning and contouring lathes, turret lathes and numerical-control lathes. The engine lathe consists of a headstock and spindle, tailstock, bed, carriage (complete with apron) and cross slides. Features include gear- (speed) and feed-selector levers, toolpost, compound rest, lead screw and reversing lead screw, threading dial and rapid-traverse lever. Special lathe types include through-the-spindle, camshaft and crankshaft, brake drum and rotor, spinning and gun-barrel machines. Toolroom and bench lathes are used for precision work; the former for tool-and-die work and similar tasks, the latter for small workpieces (instruments, watches), normally without a power feed. Models are typically designated according to their “swing,” or the largest-diameter workpiece that can be rotated; bed length, or the distance between centers; and horsepower generated. See turning machine.
- wear resistance
wear resistance
Ability of the tool to withstand stresses that cause it to wear during cutting; an attribute linked to alloy composition, base material, thermal conditions, type of tooling and operation and other variables.
- web
web
On a rotating tool, the portion of the tool body that joins the lands. Web is thicker at the shank end, relative to the point end, providing maximum torsional strength.


