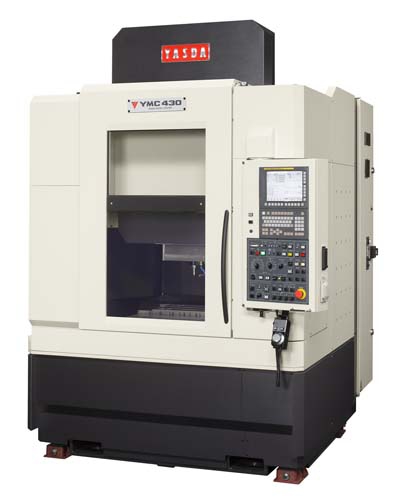
Yasda Precision America Corp.'s YMC430 Micro Center is capable of precisely processing molds for light emitting diodes (LED). LED is the latest trend in backlighting technology for liquid crystal displays (LCD). It is a semiconductor-based lighting solution that overcomes the limitations of commonly employed cold cathode fluorescent lamps (CCFL). While CCFL require a high voltage power supply and generally are the highest power-consuming component in large format display, LED backlight units deliver higher brightness than CCFL and better power efficiency. The YMC430 features rigid construction and spindle stiffness. These qualities enable the micro center to achieve higher levels of surface roughness and a longer tool life than most micro (Nano) centers with similar specifications, according to the company. Focusing on high-speed and high-accuracy motion control in micromachining, the YMC430's table (Y-axis) is assembled on the X-axis. The lighter table unit is controlled precisely by linear motors and newly developed linear guide ways with high-accuracy motion control. A solid H-shaped column unit firmly supports the Z-axis, and a unique cradle type design headstock holds the spindle unit without thermal distortion. The YMC430 performs positioning accuracy by ISO230-2 0.356µm for X-axis, 0.508µm for Y-axis and 0.316µm for Z-axis. YMC430 example — LED mold sample cavity core: Cavity bottom surface roughness of Ra 0.042 micrometers (42 nanometers); Core sidewall surface roughness of 0.026 micrometer Ra. Specifications of the YMC430 are X,Y and Z travel: 400 x 300 x 250mm; table size: 450 x 350mm; table loading capacity: 100kg; spindle speed: 40,000 rpm; spindle nose: HSK-E32; ATC: 32 tools. Mass of machine: 8 tons. One of the most critical and important issues of micromachining is the accurate measurement of small tools, especially those smaller than 0.1mm in diameter. This is because a laser measuring system has limitations when measuring small tools, and plunger type measuring system can break small tools. With Dyna Vision PRO, measuring accuracy and function are dramatically improved by capturing the image with a high magnification lens and high-speed shutter, as well as high precision image processing. The 600X magnification lens and high-pixel CCD camera visualizes the tool into a blown-up image. Utilizing this image, the tool is detected by 250,000 sensors at 0.7µm/pixel. Furthermore, the high-speed shutter can capture the rotating tool as a still image at up to 1,500m/min. surface speed.
Contact Details
Related Glossary Terms
- centers
centers
Cone-shaped pins that support a workpiece by one or two ends during machining. The centers fit into holes drilled in the workpiece ends. Centers that turn with the workpiece are called “live” centers; those that do not are called “dead” centers.
- micrometer
micrometer
A precision instrument with a spindle moved by a finely threaded screw that is used for measuring thickness and short lengths.
- stiffness
stiffness
1. Ability of a material or part to resist elastic deflection. 2. The rate of stress with respect to strain; the greater the stress required to produce a given strain, the stiffer the material is said to be. See dynamic stiffness; static stiffness.


