As the recent TV ad for AT&T says, “more is better.” That’s the case with measurement systems, too. With two or more sensors, multisensor measurement equipment enhances measuring capability, allows a part to be measured on one machine and increases inspection efficiency. This is especially beneficial when measuring complex 3-D parts, because a single sensor cannot perform all the required measurements.
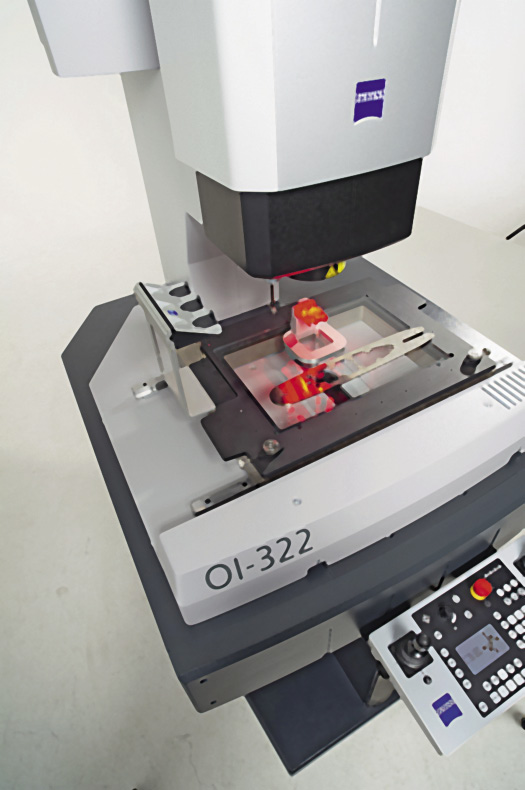
Courtesy of Carl Zeiss Industrial Metrology
The Zeiss O-INSPECT 322 multisensor measurement system (above). The O-INSPECT 422 (below) features a contact probe (left), Discovery zoom lens for video measurement (center) and a white light sensor (right).
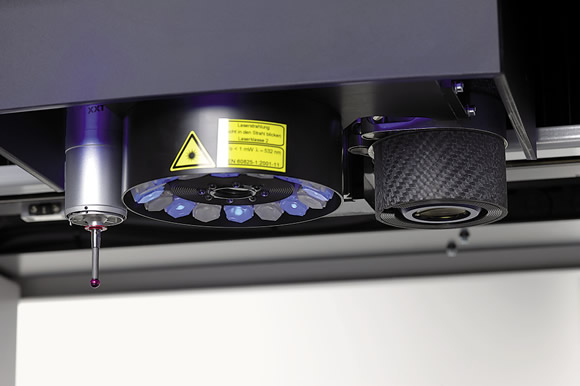
Machine shops are taking notice of the technology, according to Marty Morgan, product manager at Carl Zeiss Industrial Metrology LLC, Maple Grove, Minn., which makes the O-INSPECT multisensor measurement system. “It started slowly a few years ago, but has picked up momentum as more shops need the ability to make 3-D measurements of complex parts,” he said. “Also, as parts and features become smaller, shops have a need for a combination of optical and tactile measurement to handle them.”
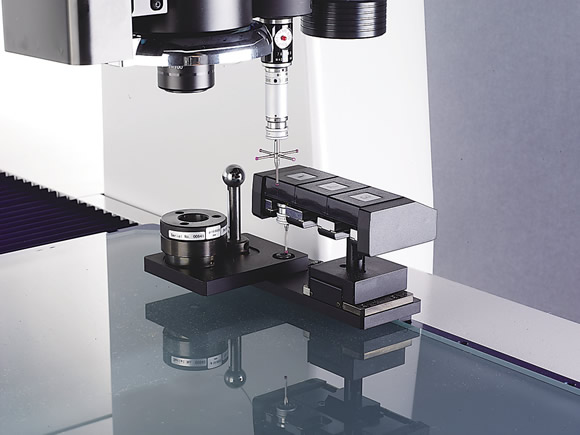
Courtesy of Mitutoyo
Touch probes, like this star probe from Mitutoyo, are best for hard-to-reach areas that are inaccessible to vision or laser techniques.
A standard multisensor measurement system starts around $50,000 and goes up to around $150,000 with options added. In comparison, a standard coordinate measurement machine costs from about $65,000 to several hundred thousand dollars.
Tim Sladden, director of marketing communications for Quality Vision International Inc. (QVI), Rochester, N.Y., noted that multisensor measurement systems are being used at all levels of machining, from small to large part manufacturers, and that the determining factor is not the size of the shop making the parts, but the complexity and value of the parts it is measuring. “Multisensor systems are particularly popular among aerospace and medical part makers that produce low volumes of complex part designs that require inspection audit trails,” he said.
Measurement equipment manufacturers have developed software that lets users collect data points that can be automatically compared to information in CAD models or part drawings. These automated functions make multisensor measurement machines easier for operators on the shop floor to use. While multisensor systems once were used exclusively by highly trained operators in laboratories, many systems are now as easy to use as a CMM.
Measurements performed on a multisensor system are more reliable than combining sets of measurements done on several measurement machines. “Multisensor measurement systems offer better data integrity because all of the sensors use a single calibration, and the same measurement software is used for all dimensions,” Sladden noted.
Also, multisensor measurement uses the same part data. “The part is measured in its defined space,” Morgan said. “If I remove that part and take it to another measurement machine, I have to align it and create that part data again. And because I have to realign it, I might introduce error. But with one multisensor machine, it is a known location and alignment setup so I just switch sensors and do the measurements.”
Set of Tools
Multisensor measurement machines combine contact and noncontact tools to acquire data points from part features and surfaces. The three most common types are touch, or tactile, probes, vision measurement tools and laser scanners.
Tactile probe typically refers to a touch-trigger probe commonly found on a CMM. These probes use a certain amount of contact force to trigger the data point and collect one data point at a time. Another tactile probe is the scanning probe. Scanning probes maintain continuous contact and collect multiple data points as they move across a part. Touch probes are best for hard-to-reach areas that are inaccessible to vision or laser techniques, such as the inside wall of a bore. Various links and extensions can be added to reach these places.
Vision measurement tools also continuously collect thousands or millions of data points. Vision systems excel at edge detection and for measuring features that are too small or malleable to measure with a tactile probe.
Laser scanners capture laser light reflected from a surface. They move a laser point across a part, continuously collecting data points. Lasers efficiently measure surface profiles and complex contours.
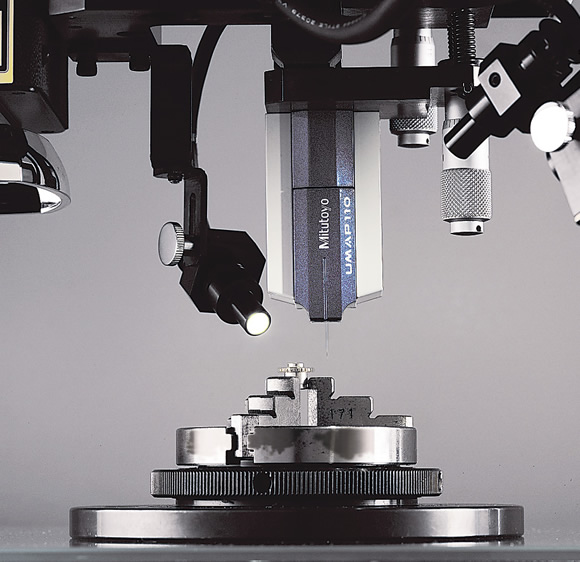
Courtesy of Mitutoyo
Mitutoyo’s UMAP microprobe, with a probe tip from 30μm to 100μm in diameter, is for measuring features too small for conventional touch-trigger probes.
Microprobe sensors come into play when measuring tiny or delicate features that are too small for conventional touchtrigger probes. “You have to use vision technology with the microprobe,” said Howard Whitlatch, product specialist, Mitutoyo America Corp., Aurora, Ill., which manufactures Quick Vision Hybrid multisensor measurement machines and CMM-based multisensor machines. The company’s UMAP microprobe is available for both. “Because the probe tip is so small [30μm to 100µm in diameter], you can’t see it for placement accuracy. You have to have a vision system to see inside the part. The vision side of it isn’t measuring anything—it is simply for viewing.”
QVI also offers a microprobe. The Feather Probe is an option for its SmartScope multisensor measurement systems. Using a probe 1mm in diameter or smaller, the technology measures very small or fragile parts with a trigger force of less than 1 mg.
White light sensors are also available for multisensor measurement equipment. “A white light sensor can be used in place of a laser for scanning surfaces,” said Zeiss’ Morgan. “The white light is good for scanning flat parts for surface measurement because white light can help determine depth. It is very fast and accurate. With the white light you can measure that surface three to four times faster than even scanning because it builds thousands of points quickly.”
Finding the Best Way
Machine shops that want to select the appropriate sensors in a multisensor measurement system should focus first on the characteristics of the feature to be measured. “The first question is going to be how do I get the right measurement, the required accuracy and the required precision,” QVI’s Sladden said. “And you need sufficient resolution to characterize that feature to the extent needed. After that, you ask what is the fastest and easiest sensor to use.”
One of the advantages of video measurement is the large quantity of data it collects. This provides a more accurate idea of what a feature looks like than taking a few data points and constructing a feature from that data.
“It is becoming more common to measure entire features rather than [collect] individual data points,” Sladden said. “If you take an image with a high-resolution camera, you have literally millions of data points available to you instantly. Rather than analyze each and every one, the software constructs primitives—arcs, circles and lines—and makes further constructions from there so you are measuring entire features instantly.”
Greg Chatfield, sales manager at multisensor measurement machine manufacturer Micro-Vu Corp., Windsor, Calif., provided the example of an airplane floor panel with 800 features that took 8 hours to measure on a CMM. “By switching to a measurement system with touch and vision, we brought inspection time down to 1 hour and 15 minutes because the vision could measure all those edges 10 times faster than a touch probe,” he said. “But we still needed the touch probe to do a lot of the 3-D features.”
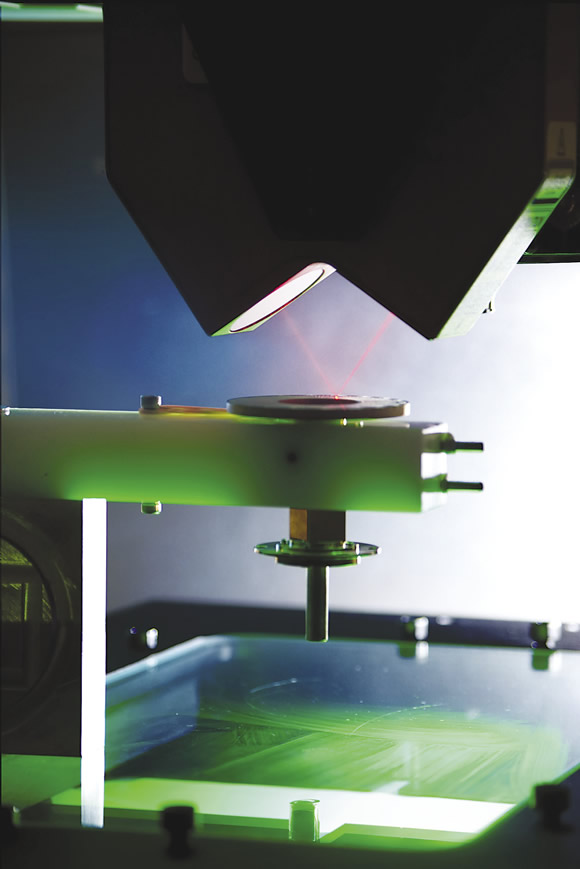
Courtesy of Quality Vision International
QVI’s DRS (Digital Range Sensor) laser can be called on for noncontact measurement of a part surface, and retracts out of the way once the measurement is made.
Shops also need to weigh the amount of data and ease of use vision measurement provides against the speed a laser scanner offers for measuring surfaces.
“The advantage of laser scanning is that it gets Z-axis data very quickly,” Chatfield said. “If I need to collect a bunch of Z-axis data, whether height or form, laser is a good choice. You can do it with vision, but it takes five to 10 times as long. So if I’m checking three or four parts, I’d use vision because it is easy, but for 20 or 30, I’d definitely use laser because of the speed.”
Sometimes, however, a user needs multiple sensors. Medical implants are a good example because they have many critical dimensions and hard-to-measure features, QVI’s Sladden noted. “They have complex curves—forms that aren’t easily described as arcs, lines, circles and intersections. They have profile tolerances and free-form surfaces that have to be characterized with lots of data to really understand how the part conforms to the design.”
Find a Platform
In general, multisensor measurement system manufacturers build the system from an existing platform, such as a vision system or touch probe-based CMM. The disadvantage of doing this is adding each tool can cause an inconvenience.
For instance, adding a touch probe to a vision system means having a rack on the stage, which means the measuring area just got smaller. Or, adding a side-mounted laser scanner might prevent the user from measuring as deep inside a part as before.
Not all multisensor systems are built on existing platforms. Some are designed as multisensor systems to minimize these inconveniences.
“For example, we offer through-the-lens laser scanners that don’t reduce measuring range or working clearance,” Sladden said. “We also offer deployment mechanisms for touch probes and side-mounted lasers that retract short-working distance sensors out of the way when they are not needed.”
Part of what makes vision systems work so well is the backlight illuminators, which CMMs do not have. “That is a part of the technology that can’t carry over to the CMM,” said Gene Hancz, product specialist, CMM at Mitutoyo. “Because most bridge-style CMMs use a granite table as the work table, backlighting is not available.”
To use vision systems on the CMM, therefore, Mitutoyo’s CMM Quick Vision Probe utilizes a white LED ring and coaxial illuminations with a high-resolution CCD camera to auto-focus on measurements.
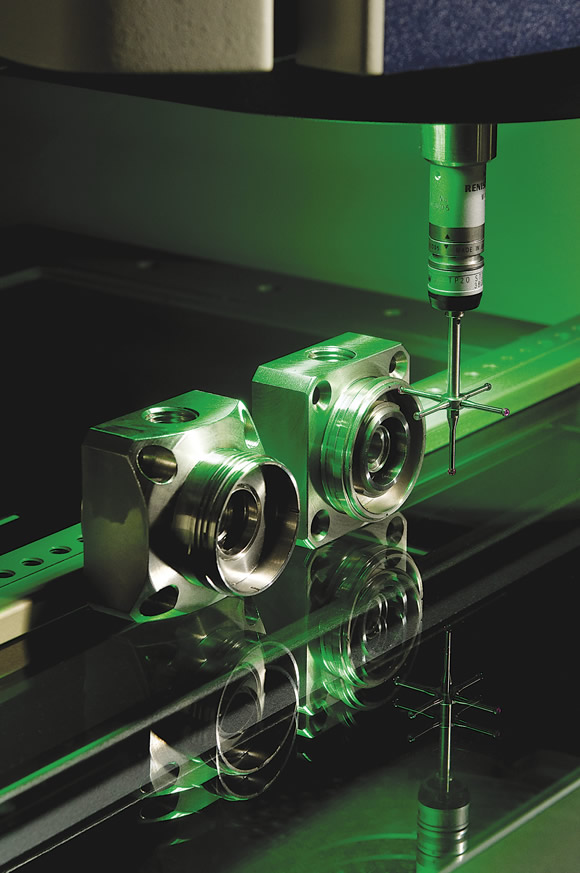
Courtesy of Quality Vision International
A touch-trigger probe like this star probe can be paired with a docking station for automatic deployment during a measurement routine.
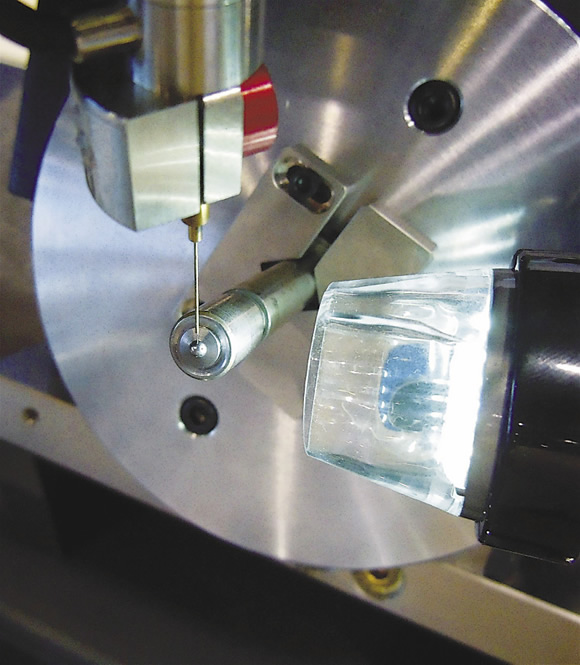
Courtesy of Quality Vision International
QVI’s Feather Probe microprobe measures a minute fuel-injector nozzle. The probe has a trigger force of less than 1 mg.
Typically, CMMs used by machines shops have large working clearances and measuring volumes, so it is not always easy to accommodate that same measuring range with the vision system. Hancz said: “With the vision, you have 150mm to 200mm of travel on the Z-axis, where with the CMM, you have three to four times that. So you lose volume on a vision system potentially. The size of the part may be a limitation.”
Both types of multisensor measurement machines have the flexibility to accept retrofits. It is generally cheaper to retrofit with new sensors and capabilities than buy a new measurement machine.
“Smaller operations, such as machine shops, like to add sensors as needed,” Micro-Vu’s Chatfield said. “Some part manufacturers grow into multisensor, usually starting with vision, then adding touch and, depending on the manufacturer, adding laser later.”
Whether buying new or retrofitting, there are definite benefits to having multiple measurement sensors in a single system. In addition to the higher levels of precision and capability, doing all the measurements in one setup on one machine cuts the costs for equipment, service and calibration, training and utilities. Having one machine also saves on floor space and fixturing.
But the software is key. “You can have a really good measurement platform that is stable and accurate,” QVI’s Sladden said, “but its ultimate capability depends on the ability of the machine to run automatically and collect data accurately and use that data to quickly confirm the design intent. Making the measurement is the first step. Comparing the measured data to the part CAD file or nominal feature sizes and tolerances provides good feedback on how well a part meets a design.” CTE
Contributors
Carl Zeiss Industrial Metrology LLC
(800) 327-9735
www.metrology.zeiss.com
Micro-Vu Corp.
(707) 838-6272
www.microvu.com
Mitutoyo America Corp.
(888) 648-8869
www.mitutoyo.com
Quality Vision International Inc.
(585) 544-0450
www.qvii.com
Related Glossary Terms
- 3-D
3-D
Way of displaying real-world objects in a natural way by showing depth, height and width. This system uses the X, Y and Z axes.
- calibration
calibration
Checking measuring instruments and devices against a master set to ensure that, over time, they have remained dimensionally stable and nominally accurate.
- clearance
clearance
Space provided behind a tool’s land or relief to prevent rubbing and subsequent premature deterioration of the tool. See land; relief.
- computer-aided design ( CAD)
computer-aided design ( CAD)
Product-design functions performed with the help of computers and special software.
- flat ( screw flat)
flat ( screw flat)
Flat surface machined into the shank of a cutting tool for enhanced holding of the tool.
- metrology
metrology
Science of measurement; the principles on which precision machining, quality control and inspection are based. See precision machining, measurement.
- vision system
vision system
System in which information is extracted from visual sensors to allow machines to react to changes in the manufacturing process.


