If you have worked at or done work for a large manufacturer, you are probably familiar with the terms CpK, PpK, Pp and Cp. These statistical calculations provide insight into the capability of the manufacturing process.
A capability study, as the name implies, gages the ability of a manufacturing process to reliably produce a product that meets customer requirements. Six Sigma continuous improvement tools and ideas work in conjunction with these statistical tools.

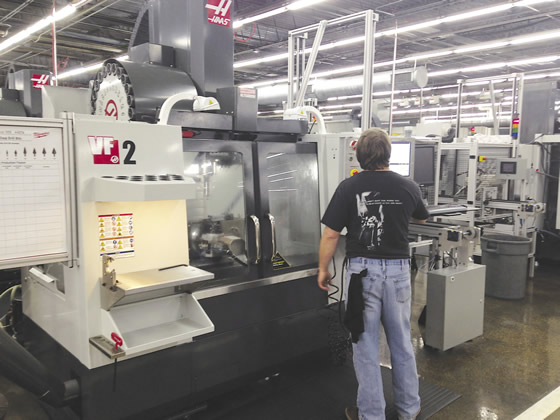
A machinist prepares a vertical machining center for a process capability study.
Before designing a manufacturing process, shops must understand the process requirements and have a solid definition of potential problems. It most cases, there are three responsibilities inherent in making a product: design, manufacturing and quality. These entities take on different names depending on the organization, but the functions are the same. Having them work together is critical for a capable process.
Design is responsible for providing a product definition that conforms to the customer’s requirements. Product definition is usually based on a drawing or written specification. It is the responsibility of all parties to ensure product definition, no matter the form, is clear and complete.
Manufacturing is responsible for reviewing, analyzing and understanding the customer’s requirements. It is common for manufacturing to blindly accept the product definition from the design team and find out later that some aspect of the requirement cannot be achieved. Having product requirements clearly defined, well understood and agreed upon is imperative because those requirements will drive the manufacturing process. A process that consistently and accurately conforms to design requirements is considered capable.
Manufacturing and quality should examine all of the requirements to ensure they are consistent with the organization’s capabilities, demonstrate best practices and fall within industry standards. Most importantly, the requirements must be achievable.
Once there is a clear understanding of the requirements, the team must determine how to verify or inspect the requirements. Large manufacturers often use process failure mode element analysis (PFMEA) to create a control plan. A control plan outlines the frequency and method of inspection for each of the requirements and eventually becomes the basis for statistical process control. The use of these tools requires a team composed of engineers and quality personnel, so they are typically used only by very large manufacturers.
When the PFMEA is created, each of the requirements is reviewed with the intent of developing the inspection methods and frequency, based on the criticality of the requirement.
For example, in one case the shaft of a power steering gear was inspected for surface cracks that could be caused by heat treatment. All of the parts were inspected because crack propagation could have caused a catastrophic failure, an obvious safety concern. Conversely, the wrench flats on the same shaft, used in the assembly process, were only inspected three times a shift because they posed little risk of failure.
The control plan also provides an inspection method. In the case of the steering shaft, magnetic particle inspection was employed to detect cracks, and a go/no-go gage used to verify the dimensional requirements of the wrench flats.

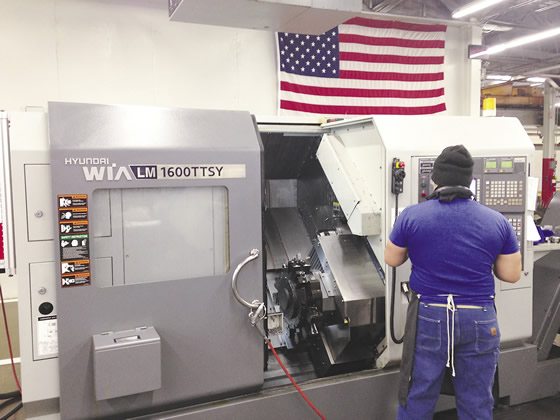
A machinist prepares a lathe for a process capability study.
Once there are clear definitions of the requirements and the inspection methods, a manufacturing process can be designed. The information generated during earlier evaluations should be a guide for the proper selection of machine tools, workholding and manufacturing processes. These initial evaluations should eliminate uncertainty and allow more efficient use of resources by preventing unnecessary operations and insuring the important specifications are highlighted.
In the case of the power steering shaft, it had two hydraulic seals that interfaced with the OD and functioned under high pressure. To maintain the proper seal in this high-pressure system, the OD of the shaft had to have a very fine surface finish and not vary more than 0.0008"; it also had a roundness tolerance of 0.0004". If the shaft geometry was incorrect, a hydraulic oil leak could develop. While an oil leak in the steering system is not considered a safety hazard, it can lead to very unhappy customers.
Having this information helped the manufacturing engineers fully understand the dimensional requirements and create centerless grinding and inspection operations capable of delivering a product that conformed to the customer’s expectation. Had there not been good communication between design, quality and manufacturing, the manufacturing process may have been approached differently. The grinding process would not have changed but the inspection frequency would likely have been less than 100 percent. It was the PFMEA that drove the decision to inspect every part.
I have described a perfect situation where there is ample time and enough people to accomplish the required tasks. In reality, most organizations—particularly small machine shops—do not have the time, personnel or expertise needed to perform this level of analysis. However, a small shop can still benefit from understanding the intent of this process, which is to foster good process planning. A good process plan minimizes costs and makes the manufacturing process capable of providing a product that meets the customer’s requirements.
Communication between different groups in a manufacturing operation will drive improved efficiency. For a small shop, improved efficiency could come in the form of fewer inspections or a controlled deviation from dimensional tolerances. It could be discovering that the customer uses a special, undocumented inspection process.
Stable and reliable manufacturing processes are important for all machine shops, regardless of size, and the flow of information between various groups is a key component in designing and establishing a capable process. CTE
About the Author: Christopher Tate is senior advanced manufacturing engineering for Milwaukee Electric Tool Corp., Brookfield, Wis. He is based at the company’s manufacturing plant in Jackson, Miss. He has 19 years of experience in the metalworking industry and holds a Master of Science and Bachelor of Science from Mississippi State University. E-mail: [email protected].Related Glossary Terms
- centerless grinding
centerless grinding
Grinding operation in which the workpiece rests on a knife-edge support, rotates through contact with a regulating or feed wheel and is ground by a grinding wheel. This method allows grinding long, thin parts without steady rests; also lessens taper problems. Opposite of cylindrical grinding. See cylindrical grinding; grinding.
- grinding
grinding
Machining operation in which material is removed from the workpiece by a powered abrasive wheel, stone, belt, paste, sheet, compound, slurry, etc. Takes various forms: surface grinding (creates flat and/or squared surfaces); cylindrical grinding (for external cylindrical and tapered shapes, fillets, undercuts, etc.); centerless grinding; chamfering; thread and form grinding; tool and cutter grinding; offhand grinding; lapping and polishing (grinding with extremely fine grits to create ultrasmooth surfaces); honing; and disc grinding.
- lathe
lathe
Turning machine capable of sawing, milling, grinding, gear-cutting, drilling, reaming, boring, threading, facing, chamfering, grooving, knurling, spinning, parting, necking, taper-cutting, and cam- and eccentric-cutting, as well as step- and straight-turning. Comes in a variety of forms, ranging from manual to semiautomatic to fully automatic, with major types being engine lathes, turning and contouring lathes, turret lathes and numerical-control lathes. The engine lathe consists of a headstock and spindle, tailstock, bed, carriage (complete with apron) and cross slides. Features include gear- (speed) and feed-selector levers, toolpost, compound rest, lead screw and reversing lead screw, threading dial and rapid-traverse lever. Special lathe types include through-the-spindle, camshaft and crankshaft, brake drum and rotor, spinning and gun-barrel machines. Toolroom and bench lathes are used for precision work; the former for tool-and-die work and similar tasks, the latter for small workpieces (instruments, watches), normally without a power feed. Models are typically designated according to their “swing,” or the largest-diameter workpiece that can be rotated; bed length, or the distance between centers; and horsepower generated. See turning machine.
- machining center
machining center
CNC machine tool capable of drilling, reaming, tapping, milling and boring. Normally comes with an automatic toolchanger. See automatic toolchanger.
- metalworking
metalworking
Any manufacturing process in which metal is processed or machined such that the workpiece is given a new shape. Broadly defined, the term includes processes such as design and layout, heat-treating, material handling and inspection.
- outer diameter ( OD)
outer diameter ( OD)
Dimension that defines the exterior diameter of a cylindrical or round part. See ID, inner diameter.
- process control
process control
Method of monitoring a process. Relates to electronic hardware and instrumentation used in automated process control. See in-process gaging, inspection; SPC, statistical process control.
- statistical process control ( SPC)
statistical process control ( SPC)
Statistical techniques to measure and analyze the extent to which a process deviates from a set standard.
- tolerance
tolerance
Minimum and maximum amount a workpiece dimension is allowed to vary from a set standard and still be acceptable.


