Back in my shop days, most workpieces were marked by using hardened steel stamps and a 2-lb. hammer. WHAM!
That heavy-handed approach didn’t cut it when the shop began supplying thin-walled aluminum brake sleeves to Boeing. We ordered a bunch of rubber stamps and gently rolled the part number in permanent ink around the sleeve’s circumference. Quite often the ink would smear and we’d have to clean it with alcohol before trying again.
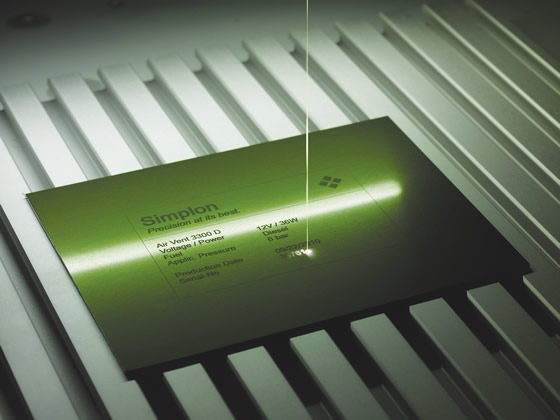
Courtesy of Gravotech
This compact Gravotech CO2 laser marks almost any material at up to 2.54 m/sec (8.33 sfm).
Later, we got an order from Sundstrand for tight-tolerance 4140 steel bearing housings. The print called for electrochemical etching of the contract and part number. We invested $500 in a benchtop machine, a supply of electrodes and some weird-smelling chemicals. Using a typewriter to generate the characters on a sheet of transfer paper, we’d then cut out the stencil with scissors, fit it to the electrode and apply DC current, one workpiece at a time. What a hassle.
Hands-Free Marking
Manual electrochemical etching and rubber and steel stamps are still in use. These tried and true part-marking methods are simple and affordable, and, except for steel stamps, gentle enough for even flimsy workpieces. The problem is those manual processes are slow. The good news is there are better ways to mark parts, especially ones with thin walls or other delicate features.
Perhaps the most flexible is laser marking, used to mark everything from saw blades to circuit boards, and pacemaker housings to bearing races. Best of all, laser marking, contrary to what some might think, is simple to perform: Set up the workpiece in the machine, load the program and press cycle start. A few seconds or minutes later, the part’s been marked with the required number, phrase, bar code or graphic design. Laser marking is noncontact, so clamps are typically unnecessary, although in some cases a multipart fixture might be used if production volumes warrant.
Andrew Wellons, laser marketing manager for marking provider Gravotech Inc., Duluth, Ga., said 4 hours of training is often enough to perform basic marking and machine setup on any of the company’s Technifor or Gravograph laser marking machines. “We offer user-friendly, Windows-based software with a WYSIWYG graphic preview, and clear tools and functions to set up the marking processes,” he said. “It’s very easy.”
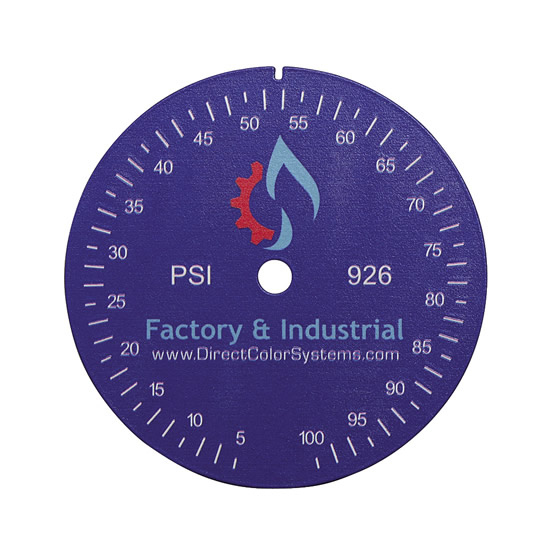
Courtesy of Direct Color Systems
A gage for a pressure dial is marked via UV LED inkjet printing.
Wellons explained that, when purchased as a turnkey solution, any of Gravotech’s machines meet Class 1 safety regulations from the Food and Drug Administration’s Center for Devices and Radiological Health (CDRH). This primarily means there’s guarding in place to prevent leakage of harmful light from CO2, YAG and fiber lasers. Most marking machines operate on 110v power and offer low power consumption. That doesn’t mean you should put one of these machines in your living room and mark parts while watching “Dancing with the Stars.” Lasers mark by ablating, or burning, a small amount of the metal, plastic, glass or wood workpiece material. If you’re going to mark parts on your coffee table, you’d better keep the windows open or opt for a fume extractor.
Wherever used, lasers are the way to go for just about any marking application, according to Brian Bittner, sales manager at Beamer Laser Marking Systems, Flushing, Mich., a division of Arch Global Precision, Livonia, Mich. He said: “In the case of delicate parts, the material, font size and desired penetration depth all come into play, but I’d typically start with a low power setting—maybe a couple of watts—and a fast repetition rate: many of today’s lasers are capable of very high frequencies, in some cases 200kHz (pulses per second) or beyond. This allows a light dusting of the workpiece surface with multiple passes and avoids any potential heating or warpage.”
Smoke and Mirrors
In the marking realm, laser beams are guided by ultrafast, ultraprecise galvo mirrors, which reflect and direct the beam into the desired part-marking path. Because these mirrors are fixed, there’s a limitation when the marking angle becomes too steep or when attempting to mark cylindrical or spherical surfaces. In these cases, it’s like trying to write your name on a beach ball. That’s where 3-axis lasers come in.
“In addition to X and Y galvos, 3-axis marking uses a Z-axis mirror,” Bittner explained. “Not only does this allow for a much larger marking field—up to 36" square, compared to 7 " square on one of Beamer’s standard machines—it also provides greater flexibility in beam movement. If you need to mark a cylinder, for example, there’s usually no need for a rotary table to turn the part. The beam is directed around the side of the workpiece, covering approximately 120° of the cylinder, depending on its size.”
There’s a caveat to laser markers, however: They’re not cheap. The ballpark price for a Beamer marking system is $40,000. Budget-conscious buyers can find a base model machine at half that price, but if you need a conveyor, custom enclosure and auto door, the price tag on one of Beamer’s machines could hit the low eighties.
If you can’t justify even a low-cost base model, don’t worry. Bittner said there are plenty of contract marking houses doing this kind of work. One is Wichita, Kan.-based marking service and supply company Automation-Plus Inc. Douglas Wohlford, vice president, said the company is happy to laser mark your parts with one of its in-house marking machines, but added that ink is a good alternative.
Power of the Printed Word
Suppose you want to put a company logo on machined parts. Laser marking will do a fine job of producing crisp lines, legible text and even gray-scale images, but in many cases only a printer will do. In addition to its laser marking services, Automation-Plus manufactures direct part marking systems (DPMS). Wohlford said the systems are based on continuous inkjet (CIJ) printers, the same technology that puts the expiration date on your canned peas and soda bottles.
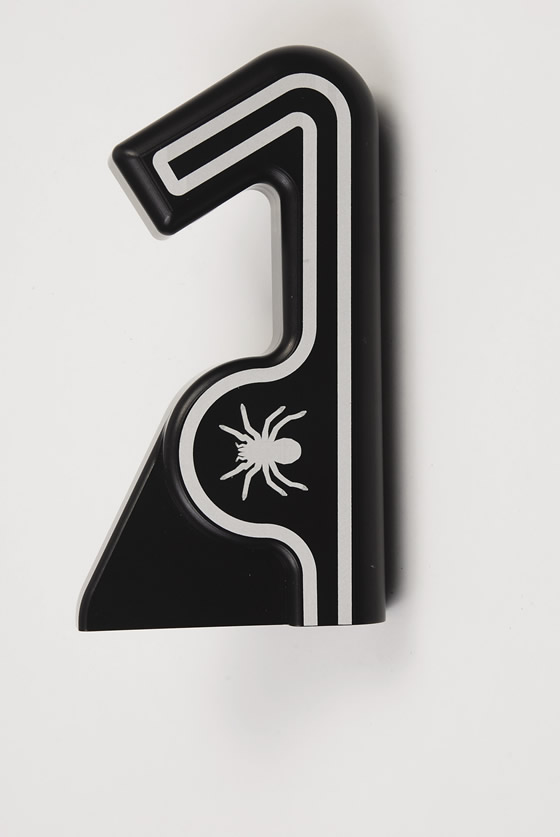
Courtesy of Schmidt Marking Systems
This high-resolution spider and racetrack design was engraved on this plastic part using a fiber laser from Schmidt Marking Systems.
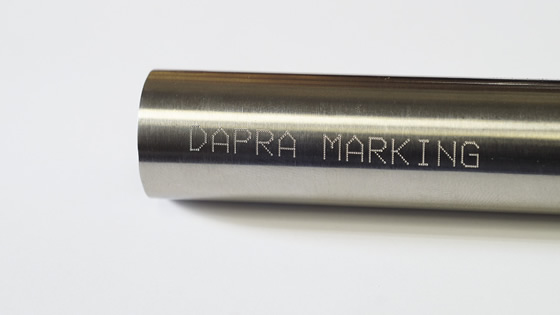
Courtesy of Dapra Marking Systems
Dot-peen marking, a low-pressure process, can permanently mark 0.035"-thick (0.889 mm) stainless steel tubing. A unit from Dapra Marking Systems, Bloomfield, Conn., was used to mark the part.
“The nice thing about CIJ is it’s noncontact,” Wohlford said. “It uses an electrical charge to spray the ink droplets to create characters on the product. About 15 years ago, we had an opportunity to create a system for an aerospace manufacturer with a CIJ printer, but in those days everything was tied in with conveyors. Basically, you’d put a part on the belt, it would run under the print head and mark several hundred parts per minute.” Conveyor marking works great for canned goods and soda bottles that are produced in mega volumes, but this is rarely the case with machined parts, especially those of a delicate nature. Rather than move the part, Automation-Plus developed a method of moving the print head. The result is a system that’s equally comfortable marking eggs, fuel injectors or replicas of Grandma’s fine china.
DPMS is like a supercharged version of the dot-matrix printers used on shipping docks back when the Artist Formerly Known As Prince was still just Prince. The difference is that this much newer technology prints up to 55' (10.8m) of text per minute. For example, a 3½"-wide (88.9mm) nameplate can be marked with four lines of text in less than a second. DPMS uses a dot-matrix form to create characters, using ink droplets just 60µm (0.0024") in diameter. These droplets are placed in vertical lines, with 32 drops per line and lines up to ½" (12.7mm) tall. Bring the part to within ¾" (19.0mm) of the marking gun, pull the trigger and DPMS does the rest.
Color Me Marked
Another printing option is ultraviolet LED inkjet. Direct Color Systems (DCS), Rocky Hill, Conn., manufactures a range of flatbed inkjet printers that operate much like the inkjet printer you have at home, but with a twist. “We use an advanced printhead that rides 0.040 " above the workpiece, depositing ink droplets as it goes,” explained Matthew Sands, software development analyst at DCS. “The instant the ink hits the workpiece surface, it’s cured with an ultraviolet LED light that rides just behind the head.”
If you need to mark workpieces in color, the printhead on the DCS machine boasts eight channels, or colors, with 180 nozzles per channel. That means 1,440 nozzles each spraying an ink droplet between 1.5 to 21 picoliters in volume (one trillionth of a Big Gulp) and a print resolution of up to 5,760 dpi.
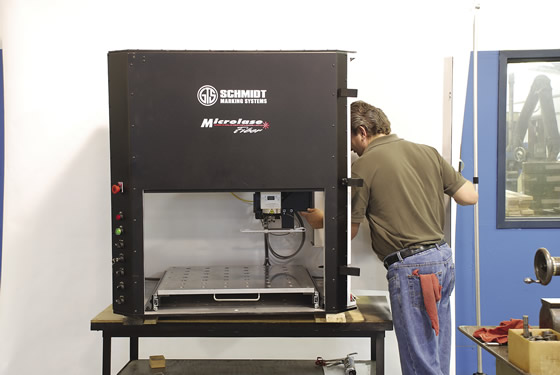
Courtesy of Schmidt Marking Systems
This laser marking system from Schmidt Marking Systems features a shuttle table.
Sands claims UV LED printers offer marking far more permanent than that those that use air-dried, solvent-based ink. “UV ink has proven to be extremely durable on multiple substrates and resists solvents. You can wipe it with acetone, for example, and the printing stays there. About the only way to remove it is with severe abrasion.”
Like other forms of inkjet printing, UV LED is noncontact, making it suitable for delicate parts. The bed size on DCS’s machines offers 10"×24" (254mm × 610mm) of print area and can print up to 4,600 sq. in./hour (116.8 sq. m/hour), or around 3 minutes for a full bed. X-Y mark location accuracy is ±0.0015" (±0.0381mm), and there’s a pair of bushed registration holes in the bed to quickly locate a part fixture or jig. If you’re worried about the ink jets clogging, don’t be. Sands said UV-cured inks don’t dry out like solvent-based ink does, so even after weeks of inactivity, all that’s needed is a quick cleaning pass and you’re ready to print.
The system’s biggest limitation may be workpiece height. Each object in any given print job must be within 0.080" (2.032mm) of its neighbors. That means cylindrical workpieces must be rotated during marking, using an optional rotary table, to prevent washout at the print edges. Like the DPMS system offered by Automation-Plus, a basic UV LED printer starts at around $20,000, and one with all the bells and whistles sells for two to three times that. Too spendy? Dave Noonan, product manager at Schmidt Marking Systems, Niles, Ill., said you might want to consider dot peen.
Sign on the Dotted Line
Like his competitors, Noonan will give you many reasons to choose a laser marking machine, including flexibility, speed, simplicity and mark quality. Also like his competitors, he’ll quote $20,000 on up for a system. For those shops that don’t need the precision of a laser but still need a permanent, semiautomatic method, dot-peen or percussion marking could be the answer.
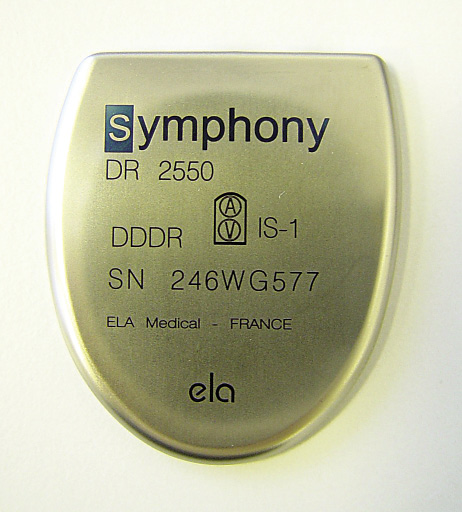
Courtesy of LNA Laser Technology
This titanium pacemaker body was marked using a solid-state fiber laser.
If you think a dot-peen marker hits the workpiece like a miniature jackhammer, making it unsuitable for delicate work, think again. “It depends on what you consider delicate,” Noonan said. “Even lasers can create problems with heat and warping on touchy workpieces, so it really comes down to how you apply the technology. We have a great deal of control with our pin markers and are successful with glass, ceramic and very thin-walled metals.”
The dot-peen markers use various tips, including ones for delicate marking applications. There’s also the possibility of integrating a rotary table for marking round parts. “Lasers are great, but you’ll pay three to four times as much for one compared to a pin-marking system, so for those customers on a tight budget, pin marking is a good option,” Noonan said.
Next door to Schmidt Marking Systems is its sister organization, Precise Machine Co. Ken Jensen, product manager, said most of the machine shop’s work is aerospace related and requires laser part marking. “The most delicate part we ever marked was a 416 stainless steel component measuring ¾" in diameter, with a 0.012"-thick wall. If we have a rush job, a dot peen is often the fastest and most economical way to mark it, but as a rule we use laser. Aerospace customers are very fussy about how things look. You can deliver a dimensionally perfect part, but if the marking doesn’t look just right, the customer will reject it.”
Lasers, inkjet printers, direct-part marking systems, electrochemical etching and rubber stamps all can mark delicate machined parts. Of these choices, laser is most accurate but also the most expensive. DPMS and UV LED offer color and speed, and marking nearly as permanent as laser. Chemical etching and rubber stamp? I wouldn’t wish that manual drudgery on anyone. Still, sometimes you do what must be done to get parts out the door. If you’re ready to move to the next level, ask around, research and get marking. CTE
Contributors
Automation-Plus Inc.
(316) 946-9988
www.automationplus.net
Beamer Laser Marking Systems
(810) 471-3044
www.beamerlasermarking.com
Direct Color Systems
(888) 204-8089
www.directcolorsystems.com
Gravotech Inc.
(800) 843-7637
www.gravotech.com
Precise Machine Co.
(847) 647-6125
www.precisemachinecompany.com
Schmidt Marking Systems
(800) 323-1332
www.gtschmidt.com
Related Glossary Terms
- burning
burning
Rotary tool that removes hard or soft materials similar to a rotary file. A bur’s teeth, or flutes, have a negative rake.
- fixture
fixture
Device, often made in-house, that holds a specific workpiece. See jig; modular fixturing.
- jig
jig
Tooling usually considered to be a stationary apparatus. A jig assists in the assembly or manufacture of a part or device. It holds the workpiece while guiding the cutting tool with a bushing. A jig used in subassembly or final assembly might provide assembly aids such as alignments and adjustments. See fixture.
- sawing machine ( saw)
sawing machine ( saw)
Machine designed to use a serrated-tooth blade to cut metal or other material. Comes in a wide variety of styles but takes one of four basic forms: hacksaw (a simple, rugged machine that uses a reciprocating motion to part metal or other material); cold or circular saw (powers a circular blade that cuts structural materials); bandsaw (runs an endless band; the two basic types are cutoff and contour band machines, which cut intricate contours and shapes); and abrasive cutoff saw (similar in appearance to the cold saw, but uses an abrasive disc that rotates at high speeds rather than a blade with serrated teeth).
Author

Kip Hanson is a contributing editor for Cutting Tool Engineering magazine. Contact him by phone at (520) 548-7328 or via e-mail at [email protected].