By Melanie Cook, Zoller Inc.
Hassay Savage, which manufactures and supplies micro cutting tools such as broaches, round tools, reamers and drills, was searching for a new method of qualifying its micro cutting tools when company owner Robert Savage watched a demonstration of the Zoller Inc. »pomBasicMicro« at an American Gear Manufacturers Association event. Soon after, Savage purchased the »pomBasicMicro« as the solution he was seeking.
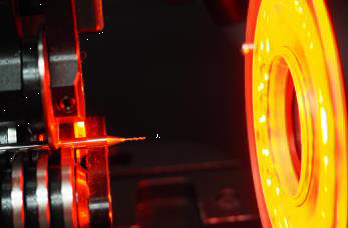
The »pomBasicMicro« is a compact and process-oriented inspection machine for inspecting and measuring microtools and is said to be suitable for use in the metrology room for incoming tool inspection or directly next to CNC grinding machines.
Hassay Savage, which is the exclusive agent to French tool manufacturers Magafor and GMauvais, uses the »pomBasicMicro« to inspect tool geometries, including tolerances during incoming, in-process and final tool inspection.
“We looked at six or seven different companies and many could do most of the things we needed, but not all,” Savage said.
While there are other ways to measure and inspect tools, noted Hassay Savage Production Manager Jim MacDougall, the alternative options left out important features for inspecting even the smallest tool geometries. A comparator, for example, "only allows you to check the external features" on the OD, he added.
The »pomBasicMicro« is equipped with a video microscope system, a monochrome camera and a 12x macro zoom lens with a magnification of 400x on a 24" monitor.
"We have a wide variety of tool sizes," MacDougall said, "so it comes in handy to have all levels of magnification for any drill or reamer we’re checking. Auto edge detection works really well. You move the cursor over the edge [of the tool being measured] and the software finds the angle or feature and automatically recognizes it. It’s faster, repeatable, and operator independent. But with microtools, sometimes you may manually adjust—it’s just part of the process."
Due to the size and fragility of microtools as small as 0.01mm in diameter, there are several challenges—breakage being one of the biggest. The contactless measurements of the »pomBasicMicro« is important.
The automatic light adjustment on the »pomBasicMicro« is another important feature, MacDougall noted. "There are eight different LED segments around the lens on the »pomBasicMicro«, and I can turn each off separately to see different details on the sections," he explained.
The “pom” measures in incident light with a magnification of 400x (in correlation with a 24” monitor) and, therefore, delivers a high resolution and a crystal clear picture of the end of the tool.
MacDougall also noted that Hassay Savage now is able to produce a comparative image of the quality of the finish grind on a tool. The company can send pictures and data reports to customers and to Magafor.
Hassay Savage labels tools and packages them with tool reports they run from the »pomBasicMicro« so they can send all relevant information to customers regarding size, angles and distances. The company can also inspect competitor tools and provide information to customers regarding those dimensions as well. Inspecting their own tools, and those of their competitors, allows Hassay Savage to provide comparative information to Magafor and GMauvais for quality purposes.
"Using the »pomBasicMicro« has made us a better company," MacDougall concluded, "because we can qualify to tighter tolerances. In general, we can make and supply better tools to our customers."
The »pomBasicMicro« interface layout of »pomSoft« software can be configured and saved based on specific needs of the operator or special application requirements. When the »pomBasicMicro« was initially set up for Hassay Savage, three training sessions took place and the software configuration was adjusted for its requirements. During a software upgrade, a ZOLLER inspection product specialist revised the user menu options and shortcuts to ensure that all frequently used functions are quickly accessible for Hassay Savage. The specialist also stressed the importance of addressing special measurement requirements at both a software and hardware level.
Contact Details
Contact Details
Related Glossary Terms
- computer numerical control ( CNC)
computer numerical control ( CNC)
Microprocessor-based controller dedicated to a machine tool that permits the creation or modification of parts. Programmed numerical control activates the machine’s servos and spindle drives and controls the various machining operations. See DNC, direct numerical control; NC, numerical control.
- grinding
grinding
Machining operation in which material is removed from the workpiece by a powered abrasive wheel, stone, belt, paste, sheet, compound, slurry, etc. Takes various forms: surface grinding (creates flat and/or squared surfaces); cylindrical grinding (for external cylindrical and tapered shapes, fillets, undercuts, etc.); centerless grinding; chamfering; thread and form grinding; tool and cutter grinding; offhand grinding; lapping and polishing (grinding with extremely fine grits to create ultrasmooth surfaces); honing; and disc grinding.
- metrology
metrology
Science of measurement; the principles on which precision machining, quality control and inspection are based. See precision machining, measurement.
- outer diameter ( OD)
outer diameter ( OD)
Dimension that defines the exterior diameter of a cylindrical or round part. See ID, inner diameter.
- reamer
reamer
Rotating cutting tool used to enlarge a drilled hole to size. Normally removes only a small amount of stock. The workpiece supports the multiple-edge cutting tool. Also for contouring an existing hole.


