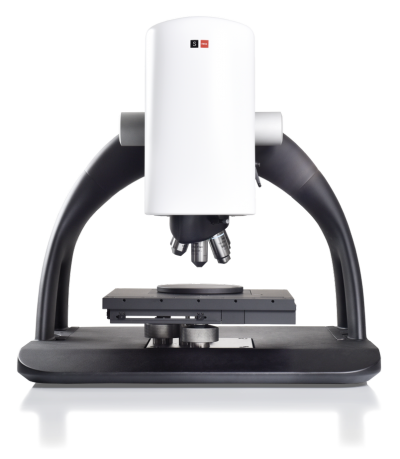
Sensofar Metrology announces the release of the 5th generation of its flagship optical profiler. The S neox is a high-performance non-contact 3D optical profiler microscope system purposely-designed for subnano, nano and microscale measurement, with advanced inspection and analysis capabilities.
The new S neox outperforms existing optical 3D profiling microscopes in terms of design, functionality, efficiency and performance. Above all, the most impressive feature to highlight is the speed. Everything is faster with new smart and unique algorithms. Data acquisition is taken at 180 fps. Standard measurement acquisition is fives times faster than before, making the S neox the fastest areal measurement system in the market.
The S neox design has been improved in terms of flexibility, stability and durability required for both R&D and QC laboratories. The Sensofar’s 3-in-1 technologies approach found in the S neox sensor head – Confocal, Interferometry, Ai Focus Variation (new) – contributes critically to the versatility of the system and help to minimize undesirable compromises in the data acquisition. The S neox is ideal for all lab environments, without limitations.
The most significant features are:
• New Active illumination Focus Variation is an optical technology that has been developed for measuring the shape of large rough surfaces. It has been improved with the use of active illumination to get more reliable focus location even on optically smooth surfaces.
• New thin film measurement technique which allows the user to measure the thickness of optically transparent layers quickly, accurately, non-destructively and with no sample preparation. Transparent films from 50 nm to 1.5 μm can be measured in less than 1 second.
• Differential Interference Contrast (DIC) has been added to emphasize very small height features, which have no contrast in regular observation.
• High Dynamic Range (HDR) mitigates reflection and drop-out points on highly reflective surfaces (local slopes and/or different materials).
The S neox comes equipped with a four long-lifetime LED light source and a 6-position motorized nosepiece. There are no moving parts in the sensor head, thus providing for long-term stability, accurate measurement repeatability and a very long lifetime. As in the former S neox, a rotational stage with a 5-axis high-precision motorized rotating module can be attached to the system.
The S neox comes with SensoSCAN 7 which drives the system with a clear, intuitive and user-friendly interface and is coupled with new software SensoVIEW for a broad range of analysis tasks. The most popular surface texture parameters are calculated according to ISO 25178 and ISO 4278.
Automated analysis modules have been created to make all QC procedures easier with SensoPRO. For more powerful and flexible data analysis, SensoMAP, a state-of-the-art surface analysis software based on Mountains technology is available.
Contact Details
Related Glossary Terms
- metrology
metrology
Science of measurement; the principles on which precision machining, quality control and inspection are based. See precision machining, measurement.
- profiling
profiling
Machining vertical edges of workpieces having irregular contours; normally performed with an endmill in a vertical spindle on a milling machine or with a profiler, following a pattern. See mill, milling machine.
- surface texture
surface texture
Repetitive or random deviations from the nominal surface, which form 3-D topography of the surface. See flows; lay; roughness; waviness.


