The Stalybridge, UK-based engineering company Park Engineering has increased the size of parts it can machine and subsequently measure on a coordinate measuring machine (CMM).

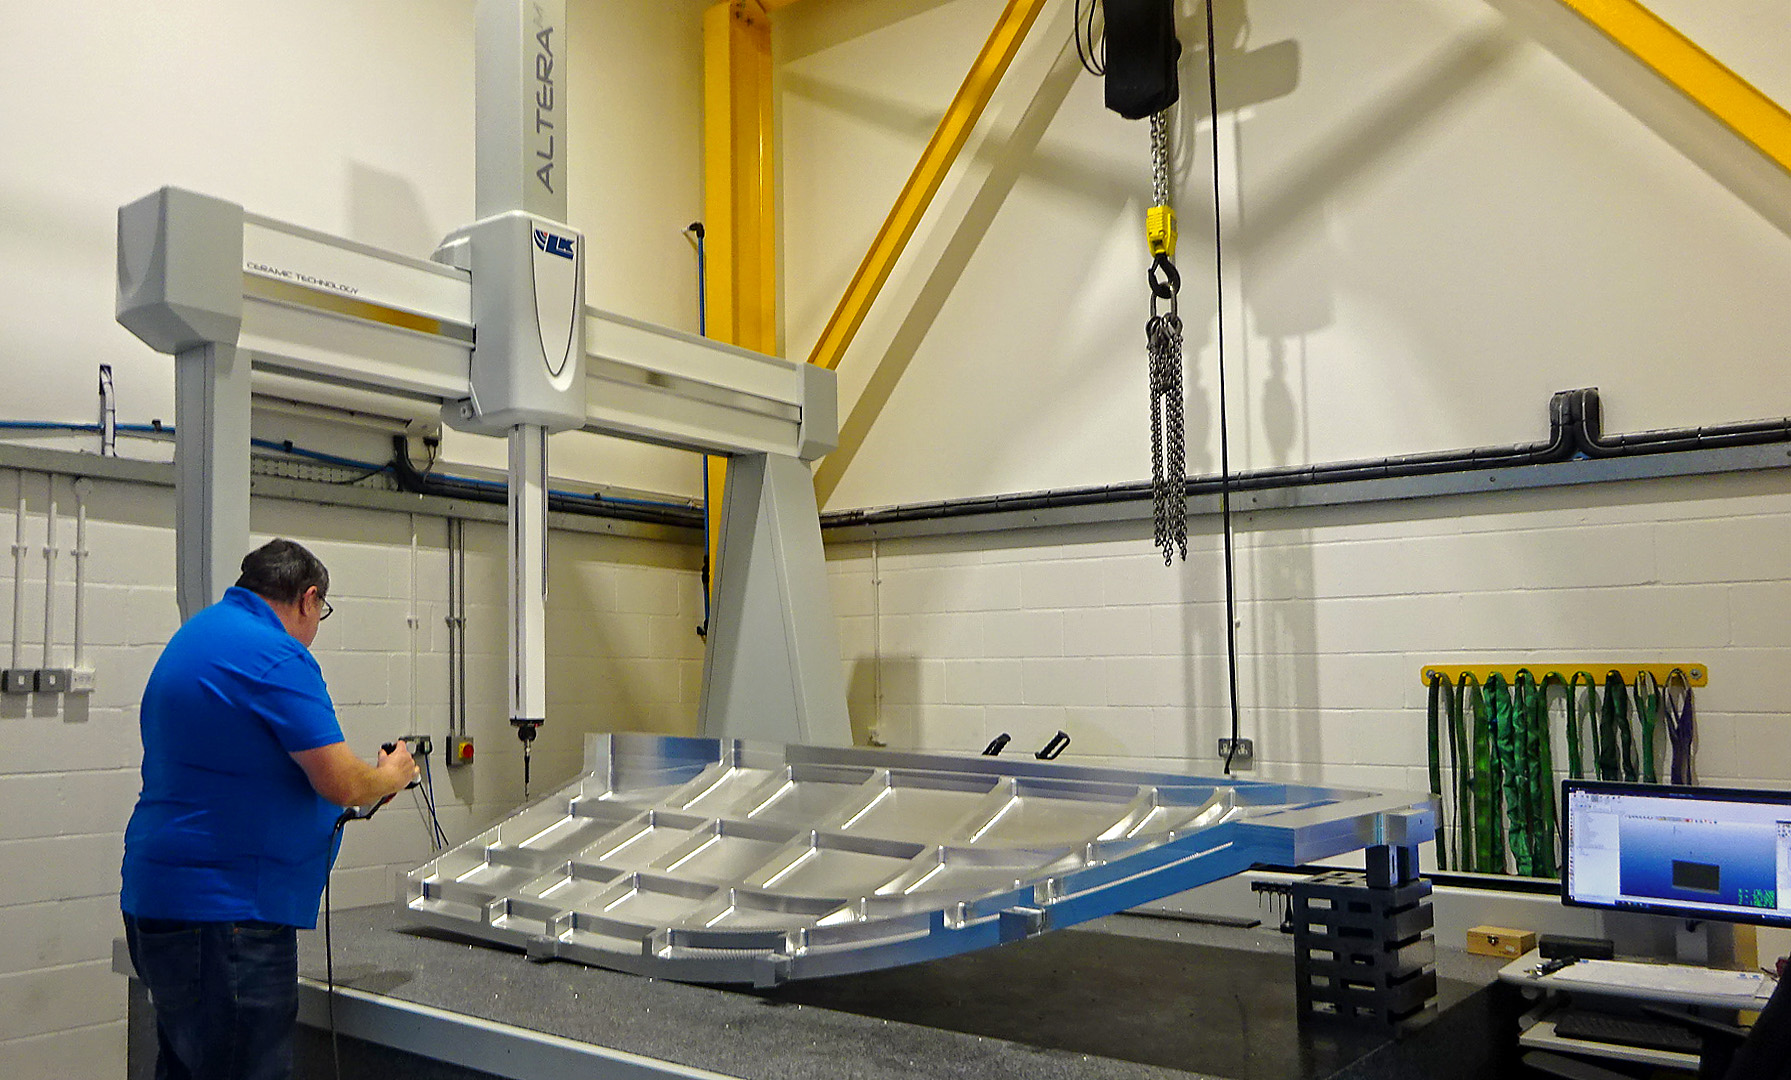
In 2022, the company installed two new machines, a Spanish-built Correa Fox 50 5-axis machining center having a 5.0 x 3.25 x 1.6 m working envelope, nearly 16% larger than the previous largest machine, and an Altera M 30.20.15 CMM with 3.0 x 2.0 x 1.5 m axis travels built by LK Metrology in Castle Donnington, UK. Compared with the largest of three LK machines previously operated by Park Engineering, it offers twice the measuring volume, the company said.
A member of the tooling division within the Hyde Group in the North of England, Park Engineering specializes in the design, manufacture, assembly, and certification of tooling jigs and fixtures for the aerospace, nuclear, defense, and automotive sectors, so the company is accustomed to dealing with the large components. It also provides a subcontract machining service. When looking to invest in new technology to offer an even larger capacity, there was a desire to inspect the bigger parts on a 'gold standard' CMM platform rather than rely on portable measuring systems, which may have a larger measuring volume but are usually lower in accuracy.

Park Engineering first encountered LK in the mid-1990s when buying a pre-owned, 10-year-old, 2.5 x 1.5 x 1.2m capacity G80K. The performance of the machine coupled with the good back-up provided by LK in maintaining the equipment's mechanics and its ability to provide control and software upgrades prompted the purchase a few years later of another pre-owned LK CMM – a 2.0 x 1.0 x 0.8m G80C. Both were the mainstay of the jig, fixture, and tooling inspection not only for the company’s products but also for a growing subcontract customer measurement service.
The metrology department continued in this vein, adding a new LK Integra 10.10.8 with a measuring volume of 1.0 x 1.0 x 0.8m in 2007 for quality control of smaller, tight-tolerance aerospace parts and tooling. The machine was purchased through Metris, which owned LK at the time, although the company has been independent again since 2018.

All of Park Engineering's activities were at the time conducted at a factory in Reddish, Stockport, but the company relocated in the second half of 2021 to larger premises owned by the Hyde Group in Stalybridge, Cheshire. In the process, the company decided to upgrade its machining and measuring technologies and capacities, which included the retirement of the two older CMMs and replacing them with a new, larger machine. Quality manager Will Reeves looked at other potential CMM suppliers, which is the normal practice within the group, but saw no reason to change due to his long-term experience with the reliability of LK machines and the excellent service provided by the LK team.
He said, "In fact, the process only served to underscore LK's reputation and reaffirm the trust we have in them as a preferred supplier. The fact that it is a UK manufacturer is an added benefit, as it means that the in-depth engineering expertise in the factory is local to us should it be required."
Discussions with LK soon identified the ideal size of the new CMM to be installed, the Altera M 30.20.15. Reeves said, "The increase in speed and accuracy of the Altera M, which is around six times faster and 216% more accurate than the oldest of our previous CMMs, was a great selling point but we were also delighted to have a larger capacity CMM with a smaller overall footprint. It is down to the top-class LK machine design, incorporating the best of modern materials and technology. "
In day-to-day operation, the Altera M CMM supports the inspection of large parts with drawing tolerances of typically ± 50µm but is sufficiently accurate to measure smaller parts down in the 10 µm region. Irrespective of tolerances, LK’s software application CAMIO with its user-friendly operator interface allows CNC programs to be generated either online or offline for the inspection of batch quantities, further reducing inspection time and cost, especially when CAD models are available.
Reeves said, "Across the broad spectrum of work packages, we have access to CAD models approximately 50-60% of the time, with the remainder being worked to print. However, the provision of CAD models is something we are always encouraging our customers to provide, as it minimizes the risk of incorrect data being entered due to human error during the programming process."
"LK’s Camio software also saves time by automatically generating comprehensive reports that we can send to our customers with inspected components. The professional appearance of the documentation adds to the perceived professionalism of the service we provide.
“The new metrology platform is significantly more productive than our old G80K and the G80C put together, as well as being more accurate. Along with the Integra, it puts Park Engineering in a good position to provide metrology support not only to our products but also to external customers that want subcontract measurement support now and into the long-term future.”
Contact Details
Related Glossary Terms
- computer numerical control ( CNC)
computer numerical control ( CNC)
Microprocessor-based controller dedicated to a machine tool that permits the creation or modification of parts. Programmed numerical control activates the machine’s servos and spindle drives and controls the various machining operations. See DNC, direct numerical control; NC, numerical control.
- computer-aided design ( CAD)
computer-aided design ( CAD)
Product-design functions performed with the help of computers and special software.
- fixture
fixture
Device, often made in-house, that holds a specific workpiece. See jig; modular fixturing.
- jig
jig
Tooling usually considered to be a stationary apparatus. A jig assists in the assembly or manufacture of a part or device. It holds the workpiece while guiding the cutting tool with a bushing. A jig used in subassembly or final assembly might provide assembly aids such as alignments and adjustments. See fixture.
- machining center
machining center
CNC machine tool capable of drilling, reaming, tapping, milling and boring. Normally comes with an automatic toolchanger. See automatic toolchanger.
- metrology
metrology
Science of measurement; the principles on which precision machining, quality control and inspection are based. See precision machining, measurement.
- quality assurance ( quality control)
quality assurance ( quality control)
Terms denoting a formal program for monitoring product quality. The denotations are the same, but QC typically connotes a more traditional postmachining inspection system, while QA implies a more comprehensive approach, with emphasis on “total quality,” broad quality principles, statistical process control and other statistical methods.
- sawing machine ( saw)
sawing machine ( saw)
Machine designed to use a serrated-tooth blade to cut metal or other material. Comes in a wide variety of styles but takes one of four basic forms: hacksaw (a simple, rugged machine that uses a reciprocating motion to part metal or other material); cold or circular saw (powers a circular blade that cuts structural materials); bandsaw (runs an endless band; the two basic types are cutoff and contour band machines, which cut intricate contours and shapes); and abrasive cutoff saw (similar in appearance to the cold saw, but uses an abrasive disc that rotates at high speeds rather than a blade with serrated teeth).


