N3 Measurement Technology
N3 Measurement Technology
Nanovea introduced in 2013 the N3 line dedicated to providing high-end measurement technology to the broader market.

Nanovea introduced in 2013 the N3 line dedicated to providing high-end measurement technology to the broader market. Nanovea has fully automated their measurement techniques while designing to price in the $20K market.
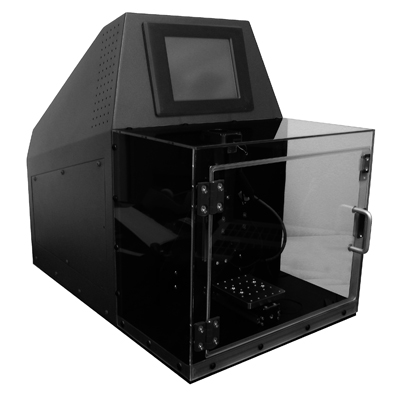
The headline of the N3 line is the M3, a breakthrough in technology that aims at two distinct aspects missing in the hardness testing market. First, the combination of three factors never before available: nanometer range, controlled load & depth and a competitive price to compete in the $20K market. This provides universities and smaller R&D units to affordable nanoindentation capability. The M3 introduces an entirely new user capability with this price range, providing affordable access too quick and easy nanoindentation results under ASTM standard. Second, is to offer next generation technology to replace the traditional Visual Micro Vickers Hardness Testers that have not changed in more than 15 years. To achieve this, the indentation method has been made fully automated with no need to visually observe the indent which eliminates user error or problems with image recognition software that may have issues with material color and texture. Also, this new technology can achieve lower load and will work on thin coatings and all ranges of materials including ceramics, polymers, metals and others. The fully automated system has a touch screen start that gives automatic average of multiple measurements in minutes. The unit is compact and fully contained with only one standard electrical cable to connect. Because of these advancements in technology and the very competitive price, the M3 line will be the replacement of choice for older Micro Vickers Tester currently used in industrial high throughput quality control environments.
The M3 ushers in a new era of hardness testing by providing measurement capability that until this point targeted very specifically high end research. Essentially, like most technological advancements, price has kept nanoindentation capability out of the reach of the broader market still using standard hardness testing equipment. The M3 will be a significant replacement at an affordable cost and the result will be revolutionary. But Nanovea didn't stop there. The M3 is only one of three new products from Nanovea's new N3 line. Along with the M3 Nanovea also introduces the P3 and the T3.
The P3 is a significant advancement with 3D non contact metrology, providing automatic nanometer ISO roughness and step data on nearly any material; a capability unavailable in the 20k market. The P3 will provide to a broader market in need of automatic nano through macro roughness data without the high cost associated with a complete Profilometer system. And last but not least, the T3, like the P3 was developed to provide quick, easy and affordable access to high end measurement capability. The T3 is an automatic nano wear tester using linear reciprocating, ASTM g133, for wear rate study.
"The N3 line is a revolution of high end material measurement instruments, each in their own way and in their own markets. Each has been strategically designed to follow Nanovea's goal to provide crucial nanotechnology to the broader market. As with many technologies being developed today to advance our society, price will ultimately control broad acceptance and use. It is no different with measuremen technology and is just as crucial if not more," said Pierre Leroux, Nanovea's CEO.


