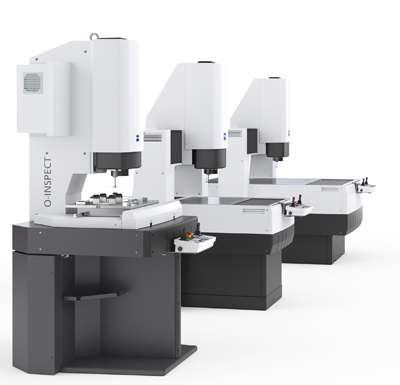
O-Inspect Multisensor Measuring Machine
O-Inspect Multisensor Measuring Machine
The ZEISS O-INSPECT multisensor measuring machine is reportedly becoming more customizable and now provides even more flexibility for a wide range of applications.

The ZEISS O-INSPECT multisensor measuring machine is reportedly becoming more customizable and now provides even more flexibility for a wide range of applications. Thanks to the new additions to the ZEISS O-INSPECT line, users now have a greater selection of machine sizes, configurations and options.
Anyone on the search for a contact-optical measuring machine will now be able to choose from several sizes, load capacities and contact probes. "All this with increased dynamics and the option of adding a chromatic focus sensor at any time. We are providing our customers with considerably more flexibility when they select the right system for their specific requirements," says Christoph Stark, product manager at ZEISS.
ZEISS O-INSPECT can be used for a wide range of activities, including the measurement of dental implants, tiny vehicle parts and sensitive smartphone components. For workpieces that are either too small or delicate, or when large quantities have to be measured, users can simply switch on the ZEISS O-INSPECT camera sensor. For 3D characteristics, the benefits of the contact sensor come into play. The chromatic focus sensor closes the gap between the contact and camera sensors.
Users of ZEISS O-INSPECT are no longer limited to two system sizes: the smallest model measures just 300x200x200mm, giving it a measuring range of 12 cubic decimeters. The next size up measures 500x400x300mm or 60 cubic decimeters. ZEISS also offers an 863 model for large or heavy workpieces, or large pallets which hold many parts. It features a measuring range of 800x600x300mm, or 144 cubic decimeters.
There is also greater flexibility with the contact sensor. The ZEISS VAST XXT TL1 and ZEISS VAST XXT TL3 scanning probes are now available. The TL1 features minimal measuring forces and is therefore ideal for scanning sensitive workpieces such as components for camera lenses and thin-walled, injection-molded plastic parts for smartphones. The TL3 can be used flexibly for larger workpieces.


