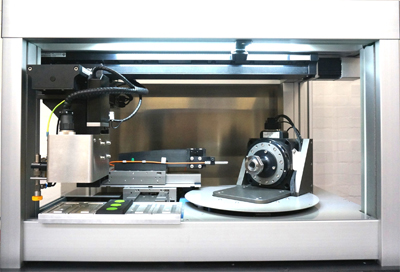
OmniLux Optical Coordinate Measuring Machine
OmniLux Optical Coordinate Measuring Machine
The new OmniLux Optical CMM from Redlux Ltd. for cutting tools combines the advantages of an optical coordinate measuring machine with those of a roundness machine and adds the focus variation technique to obtain detailed measurements on the cutting edge.

The speed of quality control is often the bottleneck in the manufacturing of cutting tools. The requirements for the inspection in the cutting tool industry is twofold:
1) The overall form of the cutting tool has to be controlled.
2) The all-important geometry of the cutting edge has to be measured.
In many cases, this requires several inspection systems, with the associated changeover times. The new OmniLux Optical CMM from Redlux Ltd. for cutting tools combines the advantages of an optical coordinate measuring machine with those of a roundness machine and adds the focus variation technique to obtain detailed measurements on the cutting edge. This combination provides reliable, fast and highly accurate measurements on cutting tools and allows in-line quality control of cutting tools.
The geometry of the cutting tool includes features such as the shank diameter, the length, the cutting diameter, the runout and various angles of the actual cutting surface. All of these features can be measured and the results may be output graphically or in a table, giving a pass/fail for each parameter.
The quality of the cutting edge, particularly the cutting edge radius, determines the performance of the cutting tool. The OmniLux Optical CMM measures the cutting edge using the well-known focus variation technique in the same measuring cycle as the other parameters.


