Contact Details
Total indicator runout (TIR) is a term often used in manufacturing, especially when dealing with rotating parts such as cutting tools, particularly endmills and drills. TIR is defined as the difference between the maximum and minimum values measured across an entire rotating surface about a reference axis.
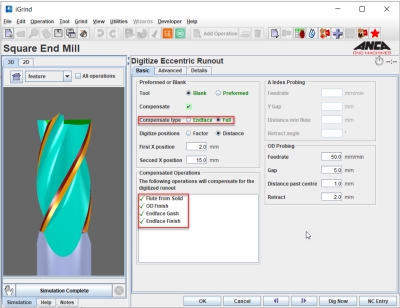
Manufacturing high quality, high performance tools requires the Total Indicator Runout to be perfect or minimal for overall tool life and surface finish. Runout on blanks before grinding can be achieved by either spending a certain amount of time for work holding setup or alternatively, compensating the runout in software. The latest software update of ToolRoom has an option to apply complete tool runout compensation when needed.
Runout creates uneven chip loads due to uneven contact on the workpiece. The result, as pictured above, is that some flutes get way too much load and wear fast while others get too little. This is not an optimal situation for endmills during machining. Not only do tools with runout have shorter tool life, they tend to be unbalanced and more prone to breaking. Additionally, they vibrate and cause chatter, increase spindle load and result in a bad surface finish on the workpiece.
On the contrary, even cutting flutes result in longer tool life, better surface finish and accurate finished parts.
Circular runout controls only a particular circular cross section of an endmill, while total runout controls the entire surface of the endmill which includes the outer diameter and endface. There are two kinds of runout: Radial and Axial. Radial runout is when the axis of rotation is off-center from the main axis, but still parallel. Axial runout is when the axis of rotation is tilted to some degree from the main axis, meaning the axis of rotation is no longer parallel to the main axis.
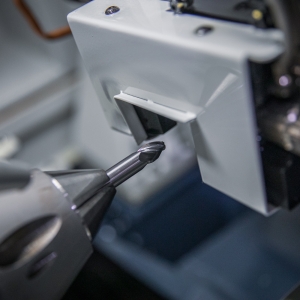
On an ANCA tool and cutter grinder, runout is measured by rotating the blank around the A-axis (headstock) and using the Renishaw touch probe. The latest update in ToolRoom RN34.1 release contains the total tool runout measurement and compensation operation in iGrind as an option. This is an addition to the existing axial runout compensation.
The runout measurement and compensation can be performed on a blank or a pre-formed blank. A pre-formed blank is a tool that has flutes ground, for example tools requiring re-sharpening. Endface compensation is used for axial runout by digitizing a single point close to the end of the tool. Only the endface operations are supported for this type of compensation.
Total runout or full compensation will measure and compensate radial and axial runout. This is mainly used while manufacturing and two points are digitized. One is near the end of the tool and the other at shank end. With the digitizing results, users are able to convert the grinding to the centerline of the blank rather than the centerline of the A-axis.
When an endmill is in rotation it is important that each tooth cuts at the exact same spot along the workpiece for longer tool life and efficient cutting. Every tool in the batch can be measured and compensated for runout to ensure the entire batch is within tolerances.
Runout in drills and reamers will result in oversized holes. This can be avoided by using the runout compensation. The chart below shows the compensation test results.
It is important to note that accuracy starts with the quality of blank. Contrary to popular belief, carbide blanks can be out of round bent or tapered. Ensure that the blanks are checked for size and accuracy, cleaned, and chamfered at insertion end. Blanks should be within 0.001mm (0.00004”) in straightness and 0.0005mm (0.00002”) in roundness to achieve the above accuracy.
Manufacturing challenges due to runout is a persistent pain point for many precision tool manufacturers. This new feature addresses this problem and will give users the assurance they need to manufacture high quality tools - ensuring that the hundredth endmill produced will be equally as good as the first.
The new complete tool runout measurement and compensation operation is now available as an option in the latest ToolRoom update for RN34.1 release. Customers will benefit from increase in productivity due to the reduced collet and collet adaptor setup time, and reduced scrap from zero rejections due to runout.
Related Glossary Terms
- chatter
chatter
Condition of vibration involving the machine, workpiece and cutting tool. Once this condition arises, it is often self-sustaining until the problem is corrected. Chatter can be identified when lines or grooves appear at regular intervals in the workpiece. These lines or grooves are caused by the teeth of the cutter as they vibrate in and out of the workpiece and their spacing depends on the frequency of vibration.
- collet
collet
Flexible-sided device that secures a tool or workpiece. Similar in function to a chuck, but can accommodate only a narrow size range. Typically provides greater gripping force and precision than a chuck. See chuck.
- endmill
endmill
Milling cutter held by its shank that cuts on its periphery and, if so configured, on its free end. Takes a variety of shapes (single- and double-end, roughing, ballnose and cup-end) and sizes (stub, medium, long and extra-long). Also comes with differing numbers of flutes.
- flutes
flutes
Grooves and spaces in the body of a tool that permit chip removal from, and cutting-fluid application to, the point of cut.
- grinding
grinding
Machining operation in which material is removed from the workpiece by a powered abrasive wheel, stone, belt, paste, sheet, compound, slurry, etc. Takes various forms: surface grinding (creates flat and/or squared surfaces); cylindrical grinding (for external cylindrical and tapered shapes, fillets, undercuts, etc.); centerless grinding; chamfering; thread and form grinding; tool and cutter grinding; offhand grinding; lapping and polishing (grinding with extremely fine grits to create ultrasmooth surfaces); honing; and disc grinding.
- outer diameter ( OD)
outer diameter ( OD)
Dimension that defines the exterior diameter of a cylindrical or round part. See ID, inner diameter.
- parallel
parallel
Strip or block of precision-ground stock used to elevate a workpiece, while keeping it parallel to the worktable, to prevent cutter/table contact.
- shank
shank
Main body of a tool; the portion of a drill or similar end-held tool that fits into a collet, chuck or similar mounting device.
- total indicator runout ( TIR)
total indicator runout ( TIR)
Combined variations of all dimensions of a workpiece, measured with an indicator, determined by rotating the part 360°.
- total indicator runout ( TIR)2
total indicator runout ( TIR)
Combined variations of all dimensions of a workpiece, measured with an indicator, determined by rotating the part 360°.



 PRODUCTS

