Updated 3D machining functions top the bill for engineering companies in the latest release of Alphacam. Users of Alphacam 2019 R1 will find two major enhancements for 3D Machining – firstly, what Brand Manager Hector Henry says is a much-improved Automatic Collision Detection algorithm, which avoids gouging non-machined faces and surfaces in the Select Solid Faces function.
“It also allows for full control over which faces should stay untouched. This intelligent algorithm can even automatically create 2D boundaries for the end user. Overall, this enhancement improves machining functionality and gives greater productivity through intelligent boundary creation,” he says.
Secondly, Cylindrical-Parallel Machining has been improved to the extent that optimized toolpaths can now be created for parts under conditions which were previously impossible. “This update greatly enhances functionality in previous releases, by including complex geometries, opening new possibilities for 4-axis machining,” Henry says.
Also, important to manufacturers; the ability to provide universal control over the stock in an Auto-Z operation means the user can set the reference level on a geometry to the top or bottom, truly allowing for complex environment and application, which Henry says delivers industry-leading automation capabilities.
The user interface includes two powerful enhancements: the first allows a selection window to be created, selecting anything it touches or includes; and users can now resize the preview window in their NC code, to fully show the posted code, regardless of how long or complex it is.
A completely redesigned and compact nesting interface provides a streamlined way to quickly create and deploy nest projects, giving greater flexibility and productivity.
Drag-and-drop support for manually nested parts means it is easier for programmers to begin the process of manual nesting. “This is just one of many features throughout the latest release which provides greater control with fewer clicks,” Henry says. “Again, it enhances productivity.”
Another process which reduces the number of steps is the ability to automatically align a part to a neighbouring angled part on the nest. Parts are matched in this way by simply selecting which elements must be aligned.
An update to the Automation Manager does away with the need to create a CSV file when producing assemblies, which he says is a major plus for any manufacturer. “Given a part thickness, the Auto Associate Material function automatically assigns a material from the database. It compares the thickness, solid or otherwise, and selects an appropriate material within a set tolerance,” Henry says.
When importing CSV files for subcomponents, the main parametric job can now pass detailed information to subcomponents in an assembly. This means complex and parametric objects can now be fully controlled with complete selection of parameters, static and dynamic hardware, fittings and other data.
Automation jobs now benefit from the new Tool Ordering utility. This allows the user to completely reassign the tool sequence in a job, giving freedom of execution, optimization and better control.
When importing a part to a job in Automation Manager, the system interrogates the geometries – including solid – to find the part sizes (X, Y, Z), which can then be used throughout the interface, leading to greater clarity, better reporting, and enhanced automation.
Reporting is enhanced with the ability to query and display additional part information. This is managed by interrogating the incoming CAD file to determine parameters such as the X, Y and Z dimensions.”
Enhancing the interface in the Sawing module now allows users to efficiently select solid faces for sawing, from a solid model. “Applying a sawing strategy directly to a solid face considerably improves productivity, with greater reliability,” Henry says.
Parametric Rules now have a new "Else" condition, which provides a complete "If…Then…Els"’ structure. “It means complex rules can be synthesized into significantly shorter statements, providing four major benefits: ease of use, ease of maintenance, reliability and productivity,” Henry says.
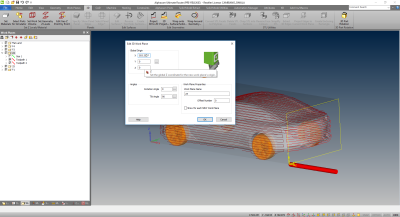
A new, dedicated option when editing 3D workplanes considerably reduces the risk of mistakes. Users simply change all the properties of a plane with a single click, which improves productivity, and, as no toolpaths have been modified, there is no need for associativity to change.
Finally, changes to the Custom Line Width in Line Properties provides greater functionality for the presentation of drawings and prints. “With Custom Line Widths now possible through the main interface and API, it allows the user to set true custom line widths both by layer and at the individual geometry level,” Henry says.
Related Glossary Terms
- computer-aided design ( CAD)
computer-aided design ( CAD)
Product-design functions performed with the help of computers and special software.
- numerical control ( NC)
numerical control ( NC)
Any controlled equipment that allows an operator to program its movement by entering a series of coded numbers and symbols. See CNC, computer numerical control; DNC, direct numerical control.
- sawing
sawing
Machining operation in which a powered machine, usually equipped with a blade having milled or ground teeth, is used to part material (cutoff) or give it a new shape (contour bandsawing, band machining). Four basic types of sawing operations are: hacksawing (power or manual operation in which the blade moves back and forth through the work, cutting on one of the strokes); cold or circular sawing (a rotating, circular, toothed blade parts the material much as a workshop table saw or radial-arm saw cuts wood); bandsawing (a flexible, toothed blade rides on wheels under tension and is guided through the work); and abrasive sawing (abrasive points attached to a fiber or metal backing part stock, could be considered a grinding operation).
- solid model
solid model
3-D model created using “building blocks.” This is the most accurate way of representing real-world objects in CAD.
- tolerance
tolerance
Minimum and maximum amount a workpiece dimension is allowed to vary from a set standard and still be acceptable.


