Operation / Process

Metrology & Measurement

Optional: narrow results to one content type.
Select one or more.
Select one or more.
Select one or more.
Reset
Articles March 1, 2016 Christopher Tate
Controlling the process
Careful consideration when implementing inspection processes yields efficiencies. Manufacturers continually search for ways to increase profits and reduce costs. Trying to find cost savings where chips are made makes sense and is usually where the most-significant improvements are found. However, efficiency gains can also be made in nonvalue-adding areas, like inspection.
Articles March 1, 2016 Michael Deren
Gaging nonconforming parts
Do you know why your last part run had a high defect rate, why parts from an outside supplier were nonconforming, and what you are going to do with those parts? If your company has a material review board, it can probably answer those questions.
Videos January 29, 2016
M4 Inline part marking system demonstration
The new M4 Inline part marking system from Dapra Marking Systems, Bloomfield, Conn., is a turnkey solution that features an integrated 16 bus card and is said to eliminate the need for vision identification/control equipment, making the system ideal for efficient, cost-effective inline part marking for everything from automated production lines to manual loading stations and custom-engineered systems, according to a Dapra news release issued Jan. 25.
Videos January 21, 2016
Haimer: Easier to find edge with new 3D sensor
The 3D-Sensor New Generation from Haimer USA LLC builds on the success of its predecessor, the Haimer Universal 3D-Sensor, according to a Haimer USA blog post dated Jan. 12. The 3D-Sensor New Generation reportedly features enhanced mechanics, a compact and easy-to-grip casing, and a large 1/100mm dial gauge with two easy-to-read hands.
Articles January 1, 2016
From hard gaging to noncontact
CHALLENGE: Upgrade QC to reduce the amount of time required for dimension measurements. SOLUTION: Utilize an image-dimension-measuring system that enables hundreds of features to be measured in seconds. END USER: Autocam Corp. Inc., (800) 747-6978, www.autocam.com. SOLUTION PROVIDER: Keyence Corp. of America, (888) 539-3623, www.keyence.com.
Articles January 1, 2016 Matthew Jaster
Closer inspection
Metrology is evolving to allow inspection to be moved closer to the production area. Is it time to remove your inspection lab and retire your old, reliable coordinate measuring machine? Has portable metrology equipment reached a point where all your parts can be measured directly on the shop floor? The answer to both remains a resounding, "Not quite yet."
News November 12, 2015
Hexagon Metrology now Hexagon Manufacturing Intelligence
Hexagon Metrology announced last November that the company was changing its name to Hexagon Manufacturing Intelligence and rebranding to reflect increasing capabilities in data-driven industrial manufacturing solutions. The change aligns the business more closely with Hexagon's overall strategy to offer software-centric information technology solutions that improve quality and productivity across entire industry workflows, according to a Nov. 12, 2015, company news release.
Videos October 14, 2015
Virtual measuring machine offers ‘substantial’ time savings
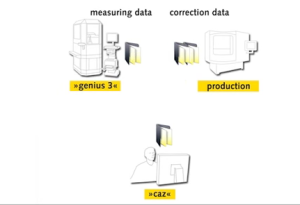
Another recent Zoller innovation is »caz« software – Computer-Aided Zoller, the virtual measuring machine. "It's going to be a huge time-saver," Matt asserted. "Previously we would have to create the inspection program in front of the inspection machine. Since our Star Cutter tool grinding machines come with Numroto operating software, we can export the tool model from the Numroto machine programming software as an STL file, including a 3D image, and write the inspection program from that before the tool is even ground."
Articles October 1, 2015 Evan Jones Thorne
Stabilizing, monitoring air helps ensure part measurement accuracy
As children, we likely all learned the hard way that drastic temperature changes cause objects to change size—whether it was leaving a soda in the freezer too long to get it cold or breaking your turtle's terrarium by cleaning it with hot water after it had been resting on the cold ground (sorry, Mom and Dad!). However, in the realm of precision measurement, even minute differences in atmospheric conditions can have huge impacts—to the point that parts manufactured within spec can fail inspection and be needlessly reworked or even scrapped.
Articles September 1, 2015 David McPhail
US among lowest-cost locations for manufacturing
While the U.S. greenback has markedly appreciated in the last year, the Boston Consulting Group's Global Manufacturing Cost-Competitiveness Index shows that the U.S. remains one of the lowest-cost locations for manufacturing in the developed world. Productivity increases are largely responsible, and a key factor in this success is a relentless push to data-driven manufacturing.
News August 28, 2015
Mettler Toledo offer high-precision weighing platforms
Mettler Toledo's new PBK9 and PFK9 weighing platforms provide superior accuracy and reliability in harsh industrial conditions, with sufficient flexibility to be used for many applications, according to the company. The platforms notify the operator when recalibration or adjustments are necessary due to environmental changes, and automated calibration with a built-in calibration weight and plug-in cables allows for easy maintenance.
1 8 9 10 11 12 15