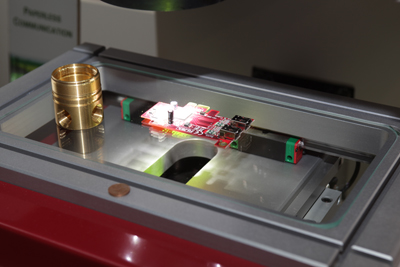
SAPHIR QD Measurement and Analysis Software
SAPHIR QD Measurement and Analysis Software
Dr. Heinrich Schneider Messtechnik presents its new measurement and analysis software SAPHIR QD and a new series of projectors.

Quality standards in industrial production are constantly rising, and only manufacturers of high-quality products will be able to ensure their long-term success in global markets. In light of this development, corporate metrology has come to play an ever more important role in the industrial arena. In order to cater to the needs of an increasing number of users, easy-to-learn procedures and intuitive user interfaces are a key priority in the creation of new measurement methods and devices. Dr. Heinrich Schneider Messtechnik presents its new measurement and analysis software SAPHIR QD and a new series of projectors.
"SAPHIR QD clearly belongs to the age of Metrology 4.0., as inspired by Industry 4.0," explains Dr. Wolfram Kleuver, Managing Director of Dr. Heinrich Schneider Messtechnik, "this is because the workpiece automatically integrates itself into the measurement process as an information carrier, without an RFID chip being required."
The new series of projectors is a completely new development designed as a modular system. Clients can enlarge and upgrade the entry-level model (which, by the way, is ready for use without any further accessories) into a high-precision measuring projector, depending on their requirements and budget. Measurement with the SAPHIR QD software is easy to complete: After the device has been switched on, it will only take a couple of clicks until the software is ready to measure and analyse the workpiece placed on the measuring table — no previous manual alignment is required. As soon as user's hand has disappeared from the field of view, the workpiece recognition process will be triggered and measurement will be performed. In the next step, the measurement report including a graphical log of the measured elements will be displayed in the live image of the workpiece in the form of an overlay with colour coding (green=good; red=bad). The workpieces to be measured can even be placed on the measurement table in a mirror-inverted way, the part will nevertheless be recognised so that measurement can be performed without a problem.
In the development of SAPHIR QD, the design engineers at Schneider Messtechnik have not only provided for the measurement of individual parts, but have also succeeded in impressively integrating functionalities for the measurement of several identical parts (MMi=Multiple Measurement identical) and several different parts (MMd=Multiple Measurement different). The user is not even required to inform the control unit about the number of parts to be measured; this number can now freely vary from one measurement to the next. The software will reliably capture all parts positioned within the measurement coverage area.
Apart from the crucial aspect of fast measurement, the Schneider Messtechnik experts have also attended to the programming feature: whenever a workpiece without a dedicated measurement programme is placed on the measurement table, the contour of the part will nonetheless be recognised immediately. The software will automatically identify the centroid of the workpiece and then perform an alignment operation. By placing arrow heads in the locations to be measured on the workpiece, the user can trigger an automatic transfer of measurement locations to the measurement programme. Alternatively, this task can also be entirely delegated to the software itself because the software is capable of capturing all measurable elements and integrating them into the measurement programme as required.
The list of options available for the new series of vertical projectors is as extensive as it is varied. For example, users can choose among:
• 2 screen diameters (300 or 360mm)
• 4 telecentric objective lenses (10x/20x/50x/100x)
• Manual acquisition of measurement points, automatic edge detector or camera
• Analysis units: 2-axis digital display, measurement software M2 (edge detector) or measurement software M3 (camera)
• High-performance LED incident light for each lens
• Measurement table with fastening threads or T-slots
• Measurement table with or without quick adjustment mechanism
• Rotation mechanism for the ground-glass screen – with or without digitisation
• Measurement table with a measurement path ranging from 200 x 100mm to 500 x 200mm.
"One of the key aspects in the development of the new series of projectors was the changeover to a modern and efficient workpiece illumination system. Thanks to the use of high-performance LEDs in both incident and transmitted lighting, we have been able to achieve an unprecedented illumination quality and a significant reduction in energy consumption," emphasises Dr Kleuver. "The wishes and expectations of our clients were the most relevant criteria in the development of our new products. We are, therefore, confident that the new series of projectors and the SAPHIR QD software will spark strong interest in the metrological community."


