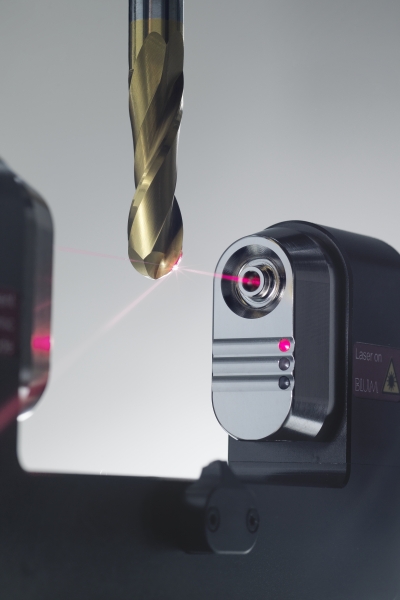
Blum-Novotest offers its new laser measuring system LC50-DIGILOG, which has been completely redeveloped to future-proof the speed, precision and in-process reliability of tool measurement in machine tools thanks to the latest possible applications. The hardware also features lots of technical innovations.
Alexander Blum, president of Blum-Novotest GmbH, says: “In-machine measurement has become established as an
integral element of high-end CNC machining. Automated machines and virtually all 5-axis machining centers are
nowadays equipped with BLUM laser measuring systems. The prerequisite for this was the outstanding performance
of systems under the harshest conditions, as well as the associated possibilities in terms of automated tool
measurement and monitoring. Based on that, it was by no means easy to upgrade the tried and proven laser measuring technology with NT technology. We achieved this innovative advancement by implementing the DIGILOG technology familiar from touch probes in the laser measuring system.”
BLUM laser measuring systems have always been renowned for their high precision and in-process reliability. Thanks
to the newly implemented DIGILOG technology, those attributes have been enhanced. Whereas the proven digital/switching laser measuring systems using NT technology only generate a small number of signals for recording measurements by shadowing the tool, the new DIGILOG laser measuring systems generate many thousands of measurement values per second while dynamically adjusting the measuring speed according to the nominal speed of the tool. The new laser measuring system LC50-DIGILOG also measures each cutting edge individually, rather than just determining the value for the longest cutting edge, meaning it is possible to make a comparison from the shortest to the longest cutting edge. As a result, runout errors, caused by contamination on thetaper of the toolholder, for example, are also automatically detected.
Furthermore, the new LC50-DIGILOG detects any contaminants and cooling lubricants adhering to the tool – due to the large number of measurements per cutting edge – and deducts them from the result to make measurement results even more reliable. The many new ideas implemented by the BLUM developers in the LC50-DIGILOG have resulted in impressive advantages for users: Firstly, measurement and testing times have been shortened by up to 60 percent. In addition, the optics in the system were further improved so that the new generation achieves an absolute accuracy thanks to an optimised beam shape and a 30 percent smaller focus diameter.
BLUM's developers have also further improved the homogeneity of the laser beam, making further analogue
measurements possible. The influence of coolant mist has been further reduced enabling improvements in accuracy
and in-process reliability. And despite its reduced external dimensions, the optimized design enables the measurement of tools that are up to 30 percent bigger, depending on the version used.
The compact BLUM smartDock represents another innovation. This standard interface serves as the basis for all new support systems and contains all the necessary pneumatic valves in addition to the electrical, mechanical and pneumatic connections between the machine and laser measuring system. If the compressed air quality is in
accordance with ISO 8573-1 class 1.3.1, the separate pneumatic unit required for the LaserControl NT can even be
omitted completely.
“With the LC50-DIGILOG laser measuring system, we have succeeded in raising a tried and proven technology to a new level. In addition to realising the shortest measurement times, optimized precision and in-process reliability, users will also profit in the future from new, ground-breaking applications. These include the 3D ToolControl software, which enables continuous digilog-based contour measurement of tools – including the visualisation on the control screen. Or the new ‘SpindleControl’ technology cycle, which can be used to record and evaluate the state of a spindle bearing,“ sums up Blum.
Related Glossary Terms
- centers
centers
Cone-shaped pins that support a workpiece by one or two ends during machining. The centers fit into holes drilled in the workpiece ends. Centers that turn with the workpiece are called “live” centers; those that do not are called “dead” centers.
- computer numerical control ( CNC)
computer numerical control ( CNC)
Microprocessor-based controller dedicated to a machine tool that permits the creation or modification of parts. Programmed numerical control activates the machine’s servos and spindle drives and controls the various machining operations. See DNC, direct numerical control; NC, numerical control.
- coolant
coolant
Fluid that reduces temperature buildup at the tool/workpiece interface during machining. Normally takes the form of a liquid such as soluble or chemical mixtures (semisynthetic, synthetic) but can be pressurized air or other gas. Because of water’s ability to absorb great quantities of heat, it is widely used as a coolant and vehicle for various cutting compounds, with the water-to-compound ratio varying with the machining task. See cutting fluid; semisynthetic cutting fluid; soluble-oil cutting fluid; synthetic cutting fluid.
- toolholder
toolholder
Secures a cutting tool during a machining operation. Basic types include block, cartridge, chuck, collet, fixed, modular, quick-change and rotating.


