Calypso 5.0
Calypso 5.0
With the latest version of its standard measuring software Calypso, Carl Zeiss IMT offers additional functions for users of measuring technology.

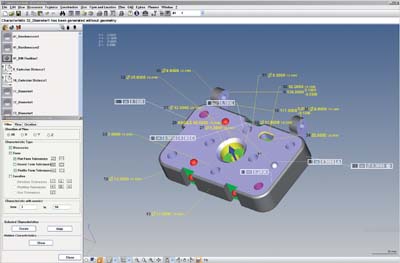
With the latest version of its standard measuring software Calypso, Carl Zeiss IMT Corp. offers additional functions for users of measuring technology. Calypso 5.0 further improves measuring efficiency be it the generation of measuring plans for contact or optical measurements, or the documentation and preparation of the measuring results. With the software, the function for importing metadata as a feature directly from 3-D CAD systems has been improved. It is now possible to generate measurement plans from the 3-D models up to 60 percent faster, according to the company. CAD metadata (PMI) in the form of dimensions and tolerances, comments in text form and data on surface quality and material specifications can be accepted with high accuracy by Calypso 5.0. The Siemens NX (UG), CATIA V5 and ProE CAD systems, as well as the new open CAD format JT Open are supported. A 3-D computer mouse increases the efficiency of offline programming. An important feature has been added to the function of integrating a live camera image into the CAD model for optical measurements: Calypso 5.0 uses an interactive selection in the live image of the camera sensor to automatically navigate the coordinate measuring machine to the desired location. Extensive searching for a feature and the time-consuming positioning with the joysticks on the control panel are no longer necessary. Optimized probing cycles make single-point measurements considerably faster. With the VAST XT and VAST XXT probes, the time needed for a measurement is reduced by up to 6 percent. There is now a special option for the measurement of tubes. Entire tubes and segments can be inspected and specific values for tube production can be ascertained. The results are then available as correctional values for tube bending machines. New features are also available for the METROTOM computer tomographs from Carl Zeiss: they allow the definition of customized tolerance classes and visualization of the results in informative colored displays. The new BasicReporter features a number of predefined templates that display the measuring results in informative logs. Furthermore, user-specific templates can be generated more quickly and easily. The measured points can be saved following a CNC run. The clear allocation of the saved measuring points to a measurement (standard via the part number) makes it possible to access different workpiece measurements of the same measurement plan. Further analyses can be performed later, even if the workpiece is no longer available. Calypso 5.0 supports all 64-bit windows operating systems, even Windows 7, thus enabling faster processing and access to measurement data. Customers with a software maintenance agreement receive Calypso updates automatically, enabling them to always measure efficiently.


