Contact Details
Carbide-roll burnishing tools by Elliott Tool Technology produce a mirror-like surface finish while eliminating secondary operations, machining setups, and operator labor and cost. These cost-effective, easy-to-use carbide rolls from Monaghan Tooling Group improve surface irregularities and tool marks, producing optimum surface finishes of 4-20 microinch (0.1 to 0.5 µm).
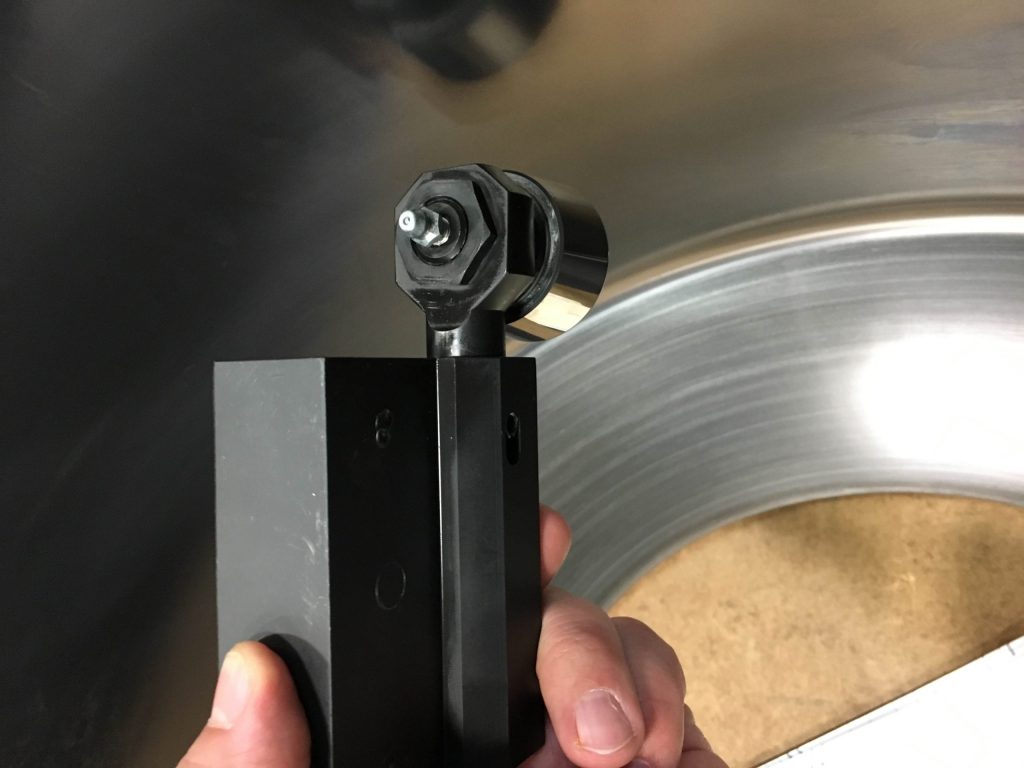
They are ideal for both CNC turning centers and manual lathes, for OD and ID/OD burnishing applications. This technique can eliminate secondary processes, such as grinding, honing and polishing, by automating those processes in the primary CNC machine. Doing so saves setup and processing time and labor costs and also enhances machinery utilization and shop floor productivity.
Carbide rolls can be reconditioned several times, yielding economical tool life. Shank sizes are available from 1.5” to 2.0” in diameter, or 40 mm to 50 mm, to process overall length of 9.5 “ (241.3 mm) to 18” (457.2 mm). Roll radius from 0.032” (0.787 mm) to 0.093” (2.36 mm) are available.
Spherical surface burnish tools, available in either 1” or 25 mm square shank size, with a .125” radius, are for burnishing spherical and contoured surfaces to finishes as low as 2 to 8 Ra microinch. Other sizes and spherical designs available on request.
Carbide roll burnishing is ideal for a wide variety of parts and ductile metals under Rc40, including steel, stainless steel, aluminum and cast iron. A Concord, NH job shop recently experienced the benefits of this tooling in a heavy machining horizontal table lathe application. An exceptional finish was needed on the ID of a roughly 6’ diameter ring made of a stainless grade with an average hardness of Rc33. The ID had both parallel and tapered walls. Starting with a pre-burnished surface finish of 120 Ra microinch, they were able to obtain a single digit surface finish in a single pass at 450 sfm and 0.035 ipr. This eliminated many hours of fine boring and hand polishing. “I would estimate we are machining these parts in 1/10th the time we were previous: from 40 hours to 4 hours,” said the company President, “We’re very happy with it!”
Elliott carbide roll tools increase the surface hardness through the cold working process and compressive forces, and increase metal’s resistance to fatigue and failure at stress points while producing a dense and uniform surface.
Related Glossary Terms
- boring
boring
Enlarging a hole that already has been drilled or cored. Generally, it is an operation of truing the previously drilled hole with a single-point, lathe-type tool. Boring is essentially internal turning, in that usually a single-point cutting tool forms the internal shape. Some tools are available with two cutting edges to balance cutting forces.
- burnishing
burnishing
Finishing method by means of compressing or cold-working the workpiece surface with carbide rollers called burnishing rolls or burnishers.
- centers
centers
Cone-shaped pins that support a workpiece by one or two ends during machining. The centers fit into holes drilled in the workpiece ends. Centers that turn with the workpiece are called “live” centers; those that do not are called “dead” centers.
- cold working
cold working
Deforming metal plastically under conditions of temperature and strain rate that induce strain hardening. Working below the recrystallization temperature, which is usually, but not necessarily, above room temperature.
- computer numerical control ( CNC)
computer numerical control ( CNC)
Microprocessor-based controller dedicated to a machine tool that permits the creation or modification of parts. Programmed numerical control activates the machine’s servos and spindle drives and controls the various machining operations. See DNC, direct numerical control; NC, numerical control.
- fatigue
fatigue
Phenomenon leading to fracture under repeated or fluctuating stresses having a maximum value less than the tensile strength of the material. Fatigue fractures are progressive, beginning as minute cracks that grow under the action of the fluctuating stress.
- grinding
grinding
Machining operation in which material is removed from the workpiece by a powered abrasive wheel, stone, belt, paste, sheet, compound, slurry, etc. Takes various forms: surface grinding (creates flat and/or squared surfaces); cylindrical grinding (for external cylindrical and tapered shapes, fillets, undercuts, etc.); centerless grinding; chamfering; thread and form grinding; tool and cutter grinding; offhand grinding; lapping and polishing (grinding with extremely fine grits to create ultrasmooth surfaces); honing; and disc grinding.
- hardness
hardness
Hardness is a measure of the resistance of a material to surface indentation or abrasion. There is no absolute scale for hardness. In order to express hardness quantitatively, each type of test has its own scale, which defines hardness. Indentation hardness obtained through static methods is measured by Brinell, Rockwell, Vickers and Knoop tests. Hardness without indentation is measured by a dynamic method, known as the Scleroscope test.
- inner diameter ( ID)
inner diameter ( ID)
Dimension that defines the inside diameter of a cavity or hole. See OD, outer diameter.
- lathe
lathe
Turning machine capable of sawing, milling, grinding, gear-cutting, drilling, reaming, boring, threading, facing, chamfering, grooving, knurling, spinning, parting, necking, taper-cutting, and cam- and eccentric-cutting, as well as step- and straight-turning. Comes in a variety of forms, ranging from manual to semiautomatic to fully automatic, with major types being engine lathes, turning and contouring lathes, turret lathes and numerical-control lathes. The engine lathe consists of a headstock and spindle, tailstock, bed, carriage (complete with apron) and cross slides. Features include gear- (speed) and feed-selector levers, toolpost, compound rest, lead screw and reversing lead screw, threading dial and rapid-traverse lever. Special lathe types include through-the-spindle, camshaft and crankshaft, brake drum and rotor, spinning and gun-barrel machines. Toolroom and bench lathes are used for precision work; the former for tool-and-die work and similar tasks, the latter for small workpieces (instruments, watches), normally without a power feed. Models are typically designated according to their “swing,” or the largest-diameter workpiece that can be rotated; bed length, or the distance between centers; and horsepower generated. See turning machine.
- outer diameter ( OD)
outer diameter ( OD)
Dimension that defines the exterior diameter of a cylindrical or round part. See ID, inner diameter.
- parallel
parallel
Strip or block of precision-ground stock used to elevate a workpiece, while keeping it parallel to the worktable, to prevent cutter/table contact.
- polishing
polishing
Abrasive process that improves surface finish and blends contours. Abrasive particles attached to a flexible backing abrade the workpiece.
- shank
shank
Main body of a tool; the portion of a drill or similar end-held tool that fits into a collet, chuck or similar mounting device.
- turning
turning
Workpiece is held in a chuck, mounted on a face plate or secured between centers and rotated while a cutting tool, normally a single-point tool, is fed into it along its periphery or across its end or face. Takes the form of straight turning (cutting along the periphery of the workpiece); taper turning (creating a taper); step turning (turning different-size diameters on the same work); chamfering (beveling an edge or shoulder); facing (cutting on an end); turning threads (usually external but can be internal); roughing (high-volume metal removal); and finishing (final light cuts). Performed on lathes, turning centers, chucking machines, automatic screw machines and similar machines.