Microgage
Microgage
Pinpoint Laser Systems is introducing a revolutionary new 2-dimensional Microgage for precision measuring, machine alignment, calibration, and other demanding industrial applications.

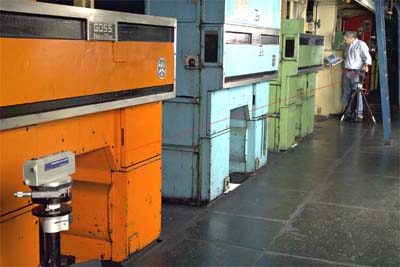
Pinpoint Laser Systems is introducing a revolutionary new 2-dimensional Microgage for precision measuring, machine alignment, calibration, and other demanding industrial applications. Roll and web lines, CNC cutting and milling equipment, lathes, stamping presses, injection molding machines, extrusion systems and other production equipment are easily checked and aligned for improved operating efficiency and reduced downtime with this new Microgage. The new Microgage 2D is compact, easy to set-up and use right on the factory floor. The attached photograph shows the new Microgage 2D checking roller parallelism on a long multi-color printing press. The Microgage 2D is easy to use with instructions that show up on the display guiding the operator through their alignment project. This product combines a compact laser transmitter with a receiver and digital display. As the laser moves across the receiver in a vertical or horizontal direction the display provides a reading of the motion, accurate to 0.0001 inch. This new Microgage will operate over a distance of 100 feet with a bright red beam that is quickly adaptable to many industrial applications. Several simple accessories allow for alignment of straightness, runout, parallelism, squareness, roll and web alignment, shaft and bore alignment, flatness measuring and much more. The 2 Axis Laser Microgage operates on batteries for added convenience and all components are machined of solid aluminum with a hard anodized coating for wear resistance. A sealed push button keypad and large LCD display make the Microgage 2D easy and convenient to use in demanding industrial environments. A serial and USB interface connect to a laptop or PC and link to popular spreadsheets for plotting and analyzing data for maintenance records, customer compliance and other uses. This Microgage system includes a compact carrying case to store the components and is easily carried onto the manufacturing floor.


