Effectively cleaning parts improves bottom line
Effectively cleaning parts improves bottom line
Many nonmanufacturing people would be surprised by the amount of resources expended on parts cleaning, but it is a critical aspect of part quality. Failure to maintain a rigorous cleaning program can cause significant issues in complex assemblies.
What are the final steps to a machining job at your shop? Removing the burrs? Measuring and recording dimensions? Marking with serial numbers? Cleaning?
At my family's shop, deburring, measuring and marking were considered important activities. Cleaning, however, was something of an afterthought.
As the shop grew and brought in new customers, we occasionally had to conform to cleaning specifications, such as those from a food equipment manufacturer. But most of the time, our lackadaisical attitude toward cleaning did not cause any serious problems. Therefore, we never developed a comprehensive cleaning program.
Cleaning Automotive Parts
After I left the family machine shop to work for a Tier 1 automotive supplier, though, I began to fully understand the importance of cleaning parts.
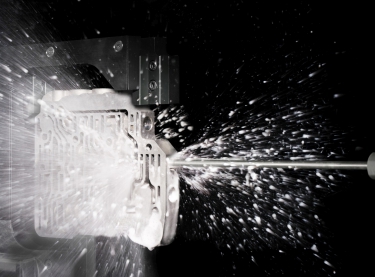
I worked for a company that manufactured hydraulic power steering gears. Our QC plan included measuring cleanliness of machined parts. They were collected three times each shift, then taken to a lab where the parts were put through an extensive test that evaluated cleanliness. Each part was cleaned for a specific amount of time in a custom washer with a virgin mixture of water and cleanser.

Image courtesy of Ecoclean Inc.
After the cleaning cycle, the water was filtered through pre-weighed filter discs to remove any solids. Filters were then dried in an oven and weighed again. Parts were considered unclean when the filter weight exceeded the specification. If part cleanliness was found to be out of spec, every part that had been manufactured since the previous acceptable evaluation would be returned to the line to be cleaned again. There was little margin for error: only 300mg.
We ran about 8,000 parts per day, and all had to conform. By purchasing custom parts washers, we were able to conform to the rigorous requirements. These washers, each costing about $75,000, were configurable to the various parts that were run on a line. Much like other machines, they had part-specific fixtures, along with special nozzles pointed at critical areas. Washers were programmable—temperature, motion and duration had to be controlled or monitored.
Maintaining cleanliness also required extravagant filtration units capable of removing particles as small as 1µm (0.00004"). Finally, just like machining centers, each new machine went through a runoff; the cleaning process was needed to meet Six Sigma capability.
To some, this degree of precision may seem ludicrous. It did to me at first. However, as I learned more about the internal workings of the steering gears, I began to realize why the parts needed to be cleaned so meticulously. Power steering gears have special valves integrated into the pinion assembly. These valves act as metering devices, directing pressurized oil through the system. Metering holes are very small and can easily become fouled with foreign objects, causing a malfunction in the system. Such a malfunction is not only inconvenient for the vehicle owner but a serious safety issue if the vehicle becomes uncontrollable.
Valve failure is not the only worry. Small particles can become lodged between close-fitting parts or be passed through sealing areas, creating leak paths. While oil leaks can cause safety issues, they are more likely to cause expensive warranty issues when an owner returns the leaky car to the dealer for repairs. A systemic cleanliness problem could turn into a profoundly expensive vehicle recall.
Cleaning Gas Turbine Parts
As with automotive parts, requirements for cleaning parts at a gas turbine manufacturer, such as Mitsubishi Hitachi Power Systems, are demanding. The cleaning methods, though, can be quite different.
Gas turbine combustion hardware operates at temperatures that exceed the melting point of the materials from which it is manufactured. Special thermal barrier coatings and internal cooling passages prevent the hardware from melting during operation. Protecting the internal cooling passages from becoming blocked with foreign objects and debris (FOD) is, therefore, extremely important. One blocked channel could create a hot spot, resulting in failure of the part, which, in turn, could cause catastrophic damage inside a gas turbine.
While all machining and welding operations could introduce FOD, the surface preparation of the parts before coating presents the greatest risk. To improve coating adhesion, we robotically blast the surface of the part with aluminum oxide. Al2O3 (the sand in sandblasting) is fine enough to access small areas and open cooling channels.
We have found that sealing openings and protecting the cooling channels from contamination is the best way to eliminate FOD. Our masking and sealing methods are very effective. However, we always double-check and clean any area that cannot be verified by visual inspection, such as internal cooling passages.
Applying soap and water does not effectively clean small cooling channels. Furthermore, part geometry makes evacuating water from inside the channels and small areas almost impossible. Small air nozzles, vibratory tables and dental tools are used to clean areas that become exposed. The work can be very tedious but is necessary; we hope to eventually transition to robots.
Many nonmanufacturing people would be surprised by the amount of resources expended on parts cleaning, but it is a critical aspect of part quality. Failure to maintain a rigorous cleaning program can cause significant issues in complex assemblies.


