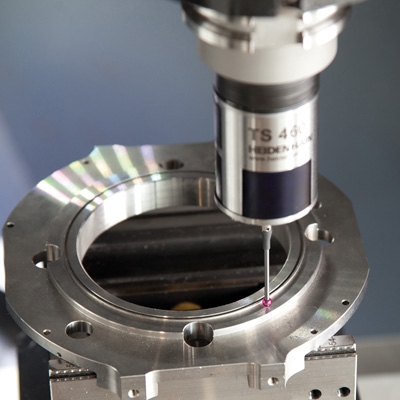
HEIDENHAIN has introduced a touch probe cycle package for all common FANUC milling controls. The cycles can be run on the main FANUC controls (0, 01, 16, 18, 21, 30, 31 and 32) and its derivatives (such as the 300i s-A, 310i-A etc.), and are available in the following current HEIDENHAIN touch probes: TS 260, 440, 444, 460, 640 and 740.
Touch probe cycles are used to enhance the performance of the frequently used measuring routines on machine tools. The probing cycles can be created in the same way as other NC programs that run on the control and tailored to the specific manufacturing process.
All who are familiar with FANUC controls can create their own NC measuring programs, consisting of NC blocks and probing commands. Users frequently create their own measuring program for simple measuring tasks, such as measuring the cylinder holes in an engine block. For more complex routines, ready-to-use probe cycles from HEIDENHAIN are available. The cycles enable the user to perform touch probe tasks like datum setting, automatic work-piece measurement and alignment, tolerance testing, and to define protected movements, to name a few. HEIDENHAIN also offers cycles for touch probe calibration.
Tool measurement cycles are also available with HEIDENHAIN's TT touch probes. The user can measure tool length and radius as well as determining the position of the touch probe. The cycles for tool measurement make it possible to detect tool breakage and wear during the process time. This will help prevent rework and or scrap.
Contact Details
Related Glossary Terms
- calibration
calibration
Checking measuring instruments and devices against a master set to ensure that, over time, they have remained dimensionally stable and nominally accurate.
- gang cutting ( milling)
gang cutting ( milling)
Machining with several cutters mounted on a single arbor, generally for simultaneous cutting.
- milling
milling
Machining operation in which metal or other material is removed by applying power to a rotating cutter. In vertical milling, the cutting tool is mounted vertically on the spindle. In horizontal milling, the cutting tool is mounted horizontally, either directly on the spindle or on an arbor. Horizontal milling is further broken down into conventional milling, where the cutter rotates opposite the direction of feed, or “up” into the workpiece; and climb milling, where the cutter rotates in the direction of feed, or “down” into the workpiece. Milling operations include plane or surface milling, endmilling, facemilling, angle milling, form milling and profiling.
- numerical control ( NC)
numerical control ( NC)
Any controlled equipment that allows an operator to program its movement by entering a series of coded numbers and symbols. See CNC, computer numerical control; DNC, direct numerical control.
- tolerance
tolerance
Minimum and maximum amount a workpiece dimension is allowed to vary from a set standard and still be acceptable.


