Additional tips for part finishing
Additional tips for part finishing
Tom Lipton offers more tips for part finishing in the December 2014 Cutting Tool Engineering Shop Operations column.
Wrapping up the theme of my previous three columns, presented here are more tips and tricks for effectively performing finish work.
■ A ceramic blade scraper is effective for deburring gummy, grabby plastics like ultrahigh-molecular-weight polyethylene and ABS (acrylonitrile-butadiene-styrene) plastics. The ceramic has just the right amount of edge sharpness to peel off burrs without gouging softer materials. Another trick is to put soft plastics in the freezer. This makes the burrs more frangible and easier to snap off crisply and cleanly.
Media wedging is a deadly booby trap when deburring parts in a vibratory tumbler.
Mask features you want to protect or remain sharp while the rest of the part goes the vibratory tumbler deburring cycle.
■ Vibratory tumblers are a double-edged sword, with the potential to decrease hand deburring time by a huge amount, or to destroy an otherwise simple job in a matter of minutes. The secret is in the media and part geometry. The deadly booby traps are material cross contamination and media wedging into and plugging part cavities—not to mention just plain losing small parts. It's a real pain to remove ceramic media from a tapped blind-hole without messing something up, and you can waste significant time trying to find small parts if you're not set up properly. Run sample parts first before you commit a large batch of critical parts. Also, beware of overloading large parts, which can clank together and cause serious part damage.
■ Always note the part count when you drop a batch in a tumbler. There's nothing like finding a missing part months later when you change media.
■ For really small parts, you can use a subcontainer inside the main bowl. This prevents tiny, gray parts from becoming hopelessly lost in a sea of tiny, gray media. It's also a neat trick to allow you to switch media sizes and shapes without having to dump 300 lbs. of abrasive to find one little part.
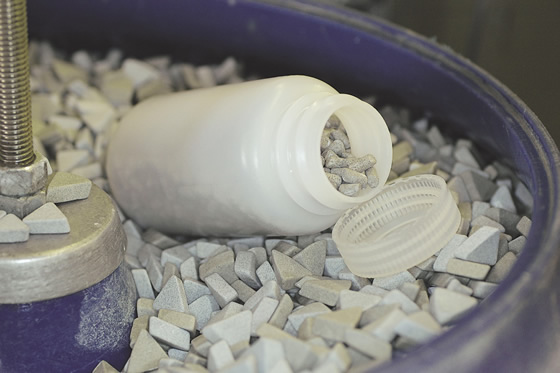
For really small parts, you can use a subcontainer inside the main bowl. This prevents tiny, gray parts from becoming hopelessly lost in a sea of tiny, gray media.
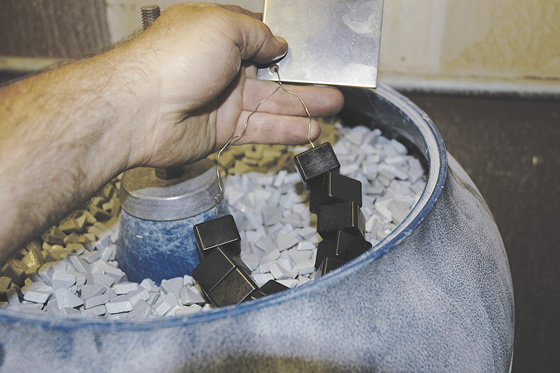
Securing small parts to a leash makes it easier to retrieve them from a vibratory tumbler.
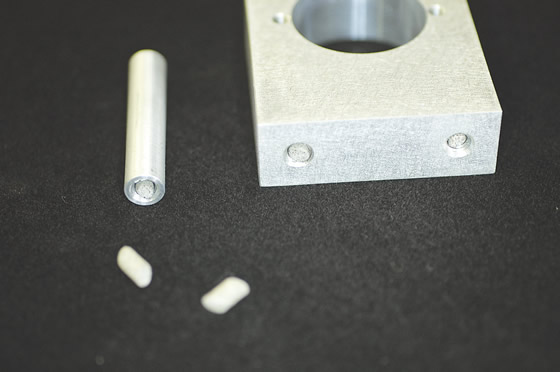
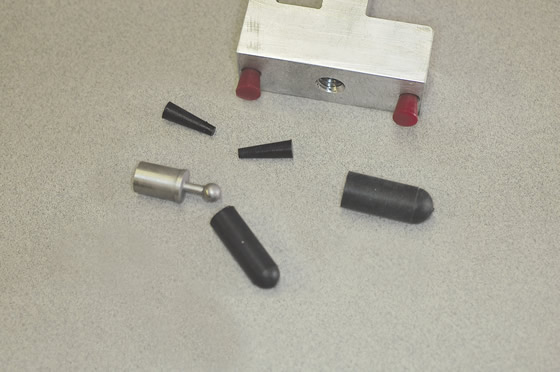
■ Mask features you want to protect or keep sharp while the rest of the part goes through the vibratory tumbler deburring cycle. Plastic or rubber caps and mesh sleeves used to protect shafts work great for masking. You can also use small silicone plugs for masking holes you don't want media to enter.
■ To make small parts easier to retrieve from the tumbler, secure them to a leash of sorts. I use stainless steel tie wire and a large "flag" that I can easily spot when I open the lid. This cuts down on the inevitable search-and-count associated with tumblers without part discharge devices.
■ Little grinders are for little work. If you have a significant amount of material to remove, do yourself a favor and get a large sander or grinder. The optimal size seems to be 7 ", whereas 9 "-dia. wheels have an annoying gyroscopic effect that tends to fatigue the operator more quickly without adding much of a metal-removal advantage.
■ I am a firm believer that you get what you pay for in abrasives. The longer an abrasive disc lasts before it glazes and just produces heat is the true measure of performance.
■ For sheer metal removal and fine control, I would put a coarse sanding disc up against any hard-type disc any day. The only exception would be in an application where the amount of abrasive used per hour outweighs the labor costs for changing discs. In other words, sanding discs cut faster, but don't last as long as hard discs. However, hard discs can do some jobs sanding discs cannot, like cutting a bolt off flush with the floor or removing metal with the front edge of the wheel. The main advantage of hard discs is for slot or recess grinding. Hard discs are also superior to sanding discs when removing hot-rolled mill scale. A hard disc fractures this tough-to-grind material, whereas a sanding disc just polishes itself into oblivion.
■ Most people wait too long to change a disc. The telltale signs are excessive heat and a polished surface. The sanded surface should have a matte or satin finish and appear flat and nonreflective when the abrasive is cutting properly. You can see the polished surface of the glazed abrasive surface grains when examining a worn-out disc. Sometimes you can dress these out with a dressing stick to extend disc life. I also tear the disc before throwing it in the trash so the cheapskate dumpster divers don't take them and waste time using worn discs. CTE
About the Author: Tom Lipton is a career metalworker who has worked at various job shops that produce parts for the consumer product development, laboratory equipment, medical services and custom machinery design industries. He has received six U.S. patents and lives in Alamo, Calif. For more information, visit his blog at oxtool.blogspot.com and video channel at www.youtube.com/user/oxtoolco. Lipton's column is adapted from information in his book "Metalworking Sink or Swim: Tips and Tricks for Machinists, Welders, and Fabricators," published by Industrial Press Inc., South Norwalk, Conn. The publisher can be reached by calling (888) 528-7852 or visiting www.industrialpress.com. By indicating the code CTE-2014 when ordering, CTE readers will receive a 20 percent discount off the book's list price of $44.95.