END USER: Fralsen-Timex, +33-3-81-63-42-09, www.timex.com.
CHALLENGE: Speed up and simplify inspection of watch movements.
SOLUTION: An image dimension measurement system.
SOLUTION PROVIDER: Keyence Corp. of America, (888) 539-3623, www.keyence.com.
By inspecting more parts in less time, manufacturers can increase the time spent adding value to those parts. That was the objective of Fralsen-Timex, the French manufacturing entity for watchmaker Timex. “We wanted more modern and more efficient optical inspection equipment,” said Sylvain Scotto, the company’s QC manager. “We also wanted a machine that could be operated by nonspecialists and be able to log measurements.”
The Fralsen, France, company makes watch movements via three technologies: plastic injection molding of small parts with fine details, cutting and coiling of complex springs, and turning, hobbing and otherwise machining parts, such as wheels, pinions, arbors and rivets. Tolerances are as tight as 15µm for concentricity and 10µm for center-to-center spacings and distances.

Courtesy of Fralsen-Timex
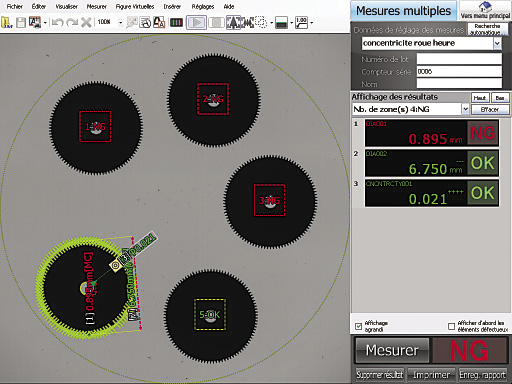
The Keyence IM-6500 series image dimension measurement system displays green for good parts and red for bad parts, such as these metal wheels (below).

According to Scotto, measurements take too long and require a high level of operating skill when using the company’s conventional inspection equipment, which includes shop microscopes, micrometric comparators and vertical and horizontal projectors. “As a result, we couldn’t measure many parts and there was a risk of overlooking significant variation within batches,” he said.
For example, although quite accurate, taking measurements on the profile projectors can be difficult and time-consuming if the operator must affix parts on a gage to check concentricity, he noted. In addition, operators must interpret—and possibly misinterpret—a measurement value. “In the case of the regular AIS (automatic inspection system) machine, only trained people are able to use it, not production operators,” he said.
Seeking a solution, Fralsen-Timex examined a number of other AIS machines and was impressed with the IM-6500 series image dimension measurement system from Osaka, Japan-headquartered Keyence Corp. after reading about the system in a Keyence newsletter and seeing it at a trade show. (Keyence Corp. of America is based in Itasca, Ill.) The Keyence system is “quite singular” because of its user-friendly interface, Scotto pointed out, adding that QC personnel and production operators can use it. “The IM series eliminates variations in interpretation of measurements.”

Courtesy of Keyence
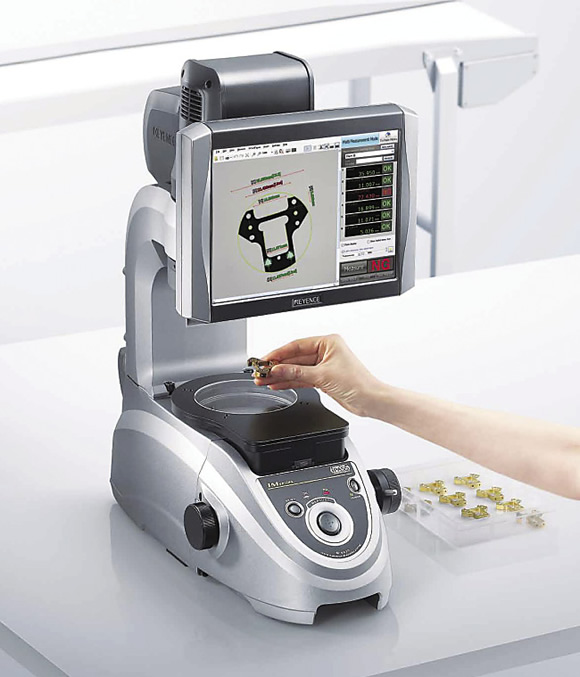
The IM series image dimension measurement system enables part manufacturers to quickly and simply perform part inspection, according to Keyence.
The system displays measurement results in green for “OK” and red for “no good” and allows users to simultaneously measure multiple identical parts. The size of the parts and the number of elements making up the program are the only limits, according to Keyence. Up to 99 points can be measured with a repeatability of ±1µm.
In addition, users can save the results, track statistics and compare part profiles against master profiles imported from CAD files. “As a result, we no longer need to position templates on parts and measure differences in shape by eye,” Scotto said. “The machine does it automatically and extracts an image of the contour, showing the difference with the tolerance.”
With the Keyence system, Fralsen- Timex saves a significant amount of time when measuring parts. Compared to measuring the concentricity of 25 hour-second wheels in 15 minutes using conventional inspection equipment, for instance, the parts manufacturer measures them in 3 minutes with the Keyence system. In other applications, it took 3 minutes to conventionally measure the general dimensions of three stators vs. 2 minutes to measure six stators on the new system, 2 minutes to conventionally measure the concentricity of two wheel correctors vs. 3 minutes to measure 10, and 15 minutes to inspect the center-to-center spacing on one plate vs. 3 minutes to inspect two plates on the Keyence.
“The faster inspection times enable us to track dimensions better and thus improve the quality of a large number of the parts we deliver,” Scotto said. “What’s more, we haven’t received a single complaint from clients about any of the parts measured on the machine.”
Related Glossary Terms
- computer-aided design ( CAD)
computer-aided design ( CAD)
Product-design functions performed with the help of computers and special software.
- tolerance
tolerance
Minimum and maximum amount a workpiece dimension is allowed to vary from a set standard and still be acceptable.
- turning
turning
Workpiece is held in a chuck, mounted on a face plate or secured between centers and rotated while a cutting tool, normally a single-point tool, is fed into it along its periphery or across its end or face. Takes the form of straight turning (cutting along the periphery of the workpiece); taper turning (creating a taper); step turning (turning different-size diameters on the same work); chamfering (beveling an edge or shoulder); facing (cutting on an end); turning threads (usually external but can be internal); roughing (high-volume metal removal); and finishing (final light cuts). Performed on lathes, turning centers, chucking machines, automatic screw machines and similar machines.


