According to Dan Schmidt, owner of Zero Hour Parts, Ann Arbor, Mich., his shop is “an island in a sea of automotive shops.” An automotive supplier typically focuses on producing huge volumes of parts and continually squeezing per-part cost, but Schmidt said speed and accuracy are Zero Hour’s priorities. “We do ‘onesies and twosies’ of everything, and a part has to be right the first time,” he said.
Lead times are usually less than a week, sometimes much less. “We’ve got some jobs where they call us in the morning and we ship it out that day,” he said, noting that the shop doesn’t bid on production jobs or those with lead times more than a couple of weeks.
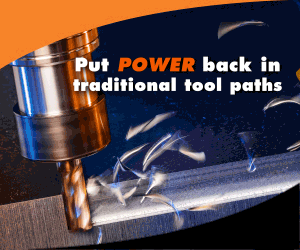
Courtesy of Zero Hour Parts
In 2 days, Zero Hour Parts programmed and machined a single example of this 41 "-long aluminum handle for a prototype refrigerator.
A recent job was a 41 "×3½ "×2½ " aluminum door handle for a prototype refrigerator. A single example was due in just 2 days.
Zero Hour quoted the part using the customer’s solid model. “One of our core skills is to be able to look at a part and know how long it’s going to run before we ever cut a chip,” Schmidt said. “We have software that I wrote for quoting and scheduling. It is pretty good at predicting, based on size, geometry and data from previous jobs, how long a job will take.”
The handle’s 41 " length was a critical factor in compiling the quote. At the time, the shop’s largest machine was a Haas VM3 with X-axis and Y-axis travels of 40 " and 24 ", respectively. Those dimensions yield a diagonal of 46 ", Schmidt said, “so we laid the part out corner to corner.”
Schmidt said because the shop usually machines only one or two parts at a time, “typically it will take just as long to program a part as to run it.” Therefore, “the most critical thing in our success is our four employees,” each of whom is an expert machinist and programmer. Every employee runs several machines and is responsible for a part from beginning to end.
Zero Hour machined the door handle in two operations. The first, for the back side of the handle, began with a 42 "×4 "×3 " piece of 6061 aluminum. “The first operation was pretty easy because we had a big block of material,” Schmidt said. “We just clamped it in Kurt vises and went at it with a 2 "-dia. Iscar Shredmill.” The cutter, he said, is “our go-to when we need to remove a lot of material.” The shop employed the Rough Pocket utility in its Mastercam CAM software that “blows away any material that is not part of the model. If you were in production, you’d want to optimize every tool and operation, but for our game, the fewest operations and fewest tools possible is the safest way to run, even though it’s not always the most efficient,” Schmidt said.
The roughing cutter ran at 100 ipm, 5,000 rpm and a 0.125 " DOC. “We were pretty aggressive; we only leave about 0.010 " on the surface,” Schmidt said. “Then, with a 1 "-dia., 2-flute insertable cutter with a 0.032 " nose radius, we went around the outside of the part at the finish dimension. That entire contour wasn’t necessarily going to be in the final part; it was a reference point when we flipped it for the second operation.” That cutter ran at 100 ipm, 5,000 rpm and a 0.100 " DOC.
To impart the required 16 µin. Ra surface finish, “We used a ⅜ "-dia. ball mill, run at 60 ipm and 5,500 rpm with a 0.005 " step-over,” Schmidt said. Machining the handle’s back side took about 9 hours. To meet tight deadlines, Zero Hour performs long operations untended overnight.
Holding the part to machine its front side posed a challenge. “The fixturing for the first operation was stable and we could just rip through it. It’s the second operation that got a little dicier,” Schmidt said. He explained that in a similar situation he would ask the customer for permission to drill and tap holes in the part so it could be held with screws, later filling the holes with welds and flattening them. However, the handle was to be chrome plated, and the mismatch of weld and base material could degrade the plating. Zero Hour resolved the dilemma by creating a cradle to hold the part. In three vises, 6 "-wide aluminum blocks were machined with a negative form of the part’s backside. “The part nestled in there, and we used epoxy to glue it,” Schmidt said.
With the handle held securely, Zero Hour removed the material clamped by the vises in the first operation. “We knocked that square flange off the top with the Shredmill, exposing the contour machined around the outside of the part in the first operation,” Schmidt said.
Then the shop used its Renishaw probe system to verify the part’s position. Schmidt said: “We knew where it was because we cut the cradles to match the model, but we wanted to verify it. You can probe it anywhere on the outside contour and put that point in the Mastercam model to make sure it corresponds with the original. You want to make the first one right, so it is better to take an extra half hour to probe it and make sure that everything is jiving and makes sense.”
Regarding machining parameters, “Because this part becomes flimsy as it nears completion and it was just epoxied in,” Schmidt said, “we had to be a little less aggressive. That means smaller tools, lighter DOCs.”
Zero Hour roughed the contour with solid-carbide, ½ "-dia., 3-flute flat-bottom and ⅜ "-dia. ballnose endmills, both run at 80 ipm and 8,000 rpm with a 0.040 " step-down. A ¼ "-dia. ballnose endmill run at 120 ipm and 7,500 rpm with a 0.005 " step-over imparted the final finish. Total machining time for the handle’s front side was about 8 hours. To remove the part from the cradle, Zero Hour burned the epoxy with a propane torch.
Despite his shop’s “island” status, Schmidt said he welcomes partnerships with other high-quality shops, in which Zero Hour Parts would handle other shops’ rush jobs, or where Zero Hour would hand off requests from its customers for high-volume and long-lead-time parts. CTE
For more information about Zero Hour Parts, call (800) 476-1808 or visit www.zerohourparts.com.
Related Glossary Terms
- arbor
arbor
Shaft used for rotary support in machining applications. In grinding, the spindle for mounting the wheel; in milling and other cutting operations, the shaft for mounting the cutter.
- computer-aided manufacturing ( CAM)
computer-aided manufacturing ( CAM)
Use of computers to control machining and manufacturing processes.
- endmill
endmill
Milling cutter held by its shank that cuts on its periphery and, if so configured, on its free end. Takes a variety of shapes (single- and double-end, roughing, ballnose and cup-end) and sizes (stub, medium, long and extra-long). Also comes with differing numbers of flutes.
- inches per minute ( ipm)
inches per minute ( ipm)
Value that refers to how far the workpiece or cutter advances linearly in 1 minute, defined as: ipm = ipt 5 number of effective teeth 5 rpm. Also known as the table feed or machine feed.
- milling machine ( mill)
milling machine ( mill)
Runs endmills and arbor-mounted milling cutters. Features include a head with a spindle that drives the cutters; a column, knee and table that provide motion in the three Cartesian axes; and a base that supports the components and houses the cutting-fluid pump and reservoir. The work is mounted on the table and fed into the rotating cutter or endmill to accomplish the milling steps; vertical milling machines also feed endmills into the work by means of a spindle-mounted quill. Models range from small manual machines to big bed-type and duplex mills. All take one of three basic forms: vertical, horizontal or convertible horizontal/vertical. Vertical machines may be knee-type (the table is mounted on a knee that can be elevated) or bed-type (the table is securely supported and only moves horizontally). In general, horizontal machines are bigger and more powerful, while vertical machines are lighter but more versatile and easier to set up and operate.
- roughing cutter
roughing cutter
Tool for high-volume metal removal; normally followed by finishing passes. See finishing tool.
- solid model
solid model
3-D model created using “building blocks.” This is the most accurate way of representing real-world objects in CAD.
- step-over
step-over
Distance between the passes of the toolpath; the path spacing. The distance the tool will move horizontally when making the next pass. Too great of a step-over will cause difficulty machining because there will be too much pressure on the tool as it is trying to cut with too much of its surface area.
- tap
tap
Cylindrical tool that cuts internal threads and has flutes to remove chips and carry tapping fluid to the point of cut. Normally used on a drill press or tapping machine but also may be operated manually. See tapping.